Wednesday, January 31, 2007

Ginger Thali


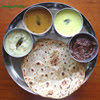
When I saw ginger being chosen for this month's JFI by Rosie, I thought of presenting a GINGER THALI. Thali is an Indian meal served on a big platter with several dishes arranged in small cups beautifully, increasing any body's appetite. Depending upon the region, the main dish would be rice or rotis / pooris. I am calling my meal as Ginger Thali because this is a simple meal (mainly South Indian minus dessert) prepared using ginger.
Every dish (except rice) served on thali is prepared using atleast a small quantity of ginger. Don't assume that all dishes are gingery. Even if you have slight inclination towards ginger and Indian food, then these dishes are right for you. The gingery taste is subtle in most of the dishes with a few exceptions like ginger-tamarind chutney and ginger gojju.

What is the menu then? Come and explore. Please click on the image to view the recipe.

PongalGinger ParathasGinger GojjuMoongDal Ginger Vada
Ginger Tamarind Chutney
Dalia ChutneyGinger RasamYogurt Rice

Hope you enjoy!!

Post a comment

Tuesday, January 30, 2007

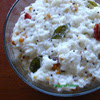
Daddhojanam / Yogurt Rice


Some how, the word daddhojanam always reminds me a serene temple and the prasadam disributed to devotees there. At temples, usually this is associated with a savory dish like Pulihora (Tamarind rice), Pongal or Lemon rice. The cooked rice is mixed with sweet yogurt and a dash of salt and lightly seasoned with spices so that the subtle flavors of spices are infused into the dish.
This dish is welcome any day at my home. Serve this simple meal alone or with a savory dish. It is particularly soothing on a hot summer day.

Ingredients:
Cooked rice - 1 cup
Yogurt - 2 cups
Salt
For tadka:
Oil - 1 tbsp
Chandal - 1 tsp
Urad dal - 1 tsp
Mustard seeds - 1 tsp
Ginger chopped into fine pieces - 1 tsp
Curry leaves - A few
Red chillies - Few broken pieces

Preparation:
This is a simple dish to make if you have cooked rice and fresh yogurt (which is sweet and has not gone sour) ready. Mix the rice, yogurt and salt. Adjust the amount of yogurt and salt accordingly.
Heat a small pan and add ginger, chanadal, urad dal, mustard seeds, red chillies and curry leaves in that order. When chana and urad dals turn red, remove the pan and add it to the rice - yogurt mixture and mix well.

Post a comment

Monday, January 29, 2007

Ginger Parathas


A couple of years ago, I saw a post about ginger parathas. I thought it was worth a try and noted it down. I am rather interested in collecting new recipes than trying them. So, actually I never attempted to prepare these parathas. The recipe was playing hide and seek whenever I opened my recipe book. Since, JFI - Ginger event is going on, I thought this is the right time to try them. I did and posting the recipe now. The original recipe can be found here. I followed basically the same recipe but omitted a few things to suit our taste.

Ingredients:
Whole wheat flour - 2 cups
Ginger powder - 1/2 tsp
Sesame seeds - 1 Tbsp
Carom (ajwain) seeds - 1/4 tsp
Fresh ginger grated - 2 tsp.
Cilantro finely chopped - 1 Tbsp
Yogurt - 2 Tbsp
Oil - 2 Tbsp
Salt - 1/4 tsp
Oil to fry the parathas

Making Parathas:
Mix everything (except the last item in the ingredients list) and make a soft, pliable dough adding water as needed. Knead it and leave the dough to rest for half an hour. Then make lemon sized balls out of the dough and roll them out into thin circles. Heat a skillet and then shallow fry these parathas (thin circles rolled out of the dough) using oil, till both sides turn golden brown .
Serve hot with a curry.

Moongdal - Ginger Vada

I used to have an elderly Gujarathi lady as a neighbor few years ago. Once when I visited her house, she made these dal vadas and served them with mint chutney. She had soaked moongdal earlier and so, she prepared them in a jiffy. Until then, I knew nothing about moongdal vadas. They tasted so delicious. Ofcourse, I tried them later and have been making them eversince. From yesterday, we are experiencing snowfalls on and off and we have snow predictions for a couple of days more. I prepared moongdal vadas today to beat the gloomy weather outside.

Ingredients:
Moong dal (Yellow) - 1 cup
Ginger - Thumb size
Salt
Green chillies - 2 - 3
Oil to fry

Preparation:
Soak moongdal in water for a couple of hours. Then grind smoothly with ginger, salt and chillies adding as little water as possible. (Otherwise your vadas would be shaped like those in the picture. If it is watery, add a little besan or riceflour to make it thicker)
Heat oil in a wok. When the oil is hot enough, drop small balls of batter into it. Fry them on a low heat till they turn golden brown. Remove them and repeat the process with the remaining batter.
Serve them hot with chutney.


Post a comment

Sunday, January 28, 2007

Pongal and Roasted Chickpeas- Ginger Chutney

January is the month when harvest festival Sankranthi is celebrated in Southern India. Their main staple food is rice and on the festive occasion, the food prepared reflects the new crops grown and harvested. One of the foods that always figure on that day is pongal. This is also one of the regular breakfast items in a South Indian wedding. I would call it divine food since this is one of the foods that is offered as "Naivedyam" (an offering to diety) and served as "Prasadam" to the devotees in Hindu temples worldwide including the world famous abode of Lord Balaji at Tirumala. This recipe is from my MIL who prepares one of the best pongals that I have ever tasted. I have followed her method and ingredients. My MIL never cooked in small quantities and hence the quantities used here are to suit my taste. She used to serve this with her ginger gojju and chutney. You can use a pressure cooker to keep this preparation simple and fast. If you don't own a pressure cooker, take a big sturdy pot with a thick bottom to cook pongal. You may need more water (than mentioned in the ingredients list), to cook in the pot. In my opinion, both methods will yield the same result. The quantity of the ghee used in the preparation of pongal makes all the difference. The more the ghee, the better the taste.  

Ingredients: 
1 cup rice
1/2 cup moongdal 
4 & 1/2 to 5 cups water
1 tbsp. peeled and grated ginger
1/2 tsp. pepper corns
1/2 tsp ground pepper corns  
1 tsp cumin seeds
1/4 cup ghee
1 /4 cup cashew nuts
1.5 tsp salt
A sprig of curry leaves 
1/4 tsp turmeric powder (Optional)
  
Method:
* Dry roast moong dal on a medium flame till it starts to turn very light brown and you start to feel the aroma. 
* Wash the rice thoroughly with water and drain. Add rice, moong dal, salt, turmeric powder, pepper corns and water to a pressure cooker and cook for 2 whistles. 
* For the tadka part, heat ghee in a small pan. Add ginger, cumin seeds, pepper powder, cashews, curry leaves in that order. When ginger pieces turn brown, turn off the stove. Add this to the cooked rice - dal mixture and stir. Again turn on the stove and let this mixture / pongal simmer on low flame for 5 minutes so that it can absorb the flavors of the spices added. 
Alternatively, the tadka mixture can be added to rice and moongdal before cooking. There is no need to simmer it at the end, if you cooked rice & dal with the tadka. Serve hot pongal with ginger gojju or chutney. Though it is optional, Pongal is usually served with a generous serving of ghee to make it more delicious. 
 Roasted chickpeas - Ginger Chutney:  
Roasted chickpeas (Pappulu) chutney is the most common chutney prepared in South India. Indian stores sell these roasted chickpeas under the gujarati name dalia. It serves as a side dish for most of the breakfast foods like dosas, idlis, vadas, upmas, pongals etc. It is very easy to prepare and best served fresh. Usually the coconut chutney version has more coconut and a few tbsp. of roasted chickpeas. The other adult at home hates coconut and so I settled at this coconut-less version for our everyday needs. 

Ingredients:  
1 cup roasted chick peas (pappulu) 
One inch piece of peeled ginger  
3 to 4 green chillies
Salt to taste
A handful of cilantro leaves  
For tadka: 
2 tsp oil
1 tsp. mustard seeds 
1 tsp Chanadal (Bengal gram)
A sprig of curry leaves    

Method:
Grind chickpeas, ginger, chillies,salt and cilantro using water into a smooth, thick paste in a blender and transfer it into a bowl.  
Heat the oil in a small pan. Add chanadal, mustard seeds and curry leaves. When chandal turns red and mustard seeds start to splutter, remove from the stove and add to the chutney bowl. Stir and serve with breakfast.  

Comment

Saturday, January 27, 2007

Ginger - Tamarind Chutney / Allam - Chintapandu Pachchadi

My mom uses ginger rarely in her kitchen and preparation of Ginger - Tamarind chutney is one of those occassions. My parents are from Coastal Andhra and tamarind chutney is quite popular in that region. There, you sure are going to find a jar of ginger - tamarind chutney in most of the kitchens , any day, any time. This comes under 'Must haves' in my mom's kitchen. She never runs out of this chutney.
As usual, this can be eaten with rice as all other Indian chutneys. If this would have been my sister's blog, she would have recommended this chutney with dosas and upmas. She would eat dosas only, with this chutney, even if you tempt her with hundred other side dishes. This comes in real handy when you have no time to prepare chutneys or during those power cuts which have become so frequent in India.

Ingredients:
Tamarind - 100 g / 3.5 oz
One inch square ginger - 2 pieces
Powdered jaggery - 1/4 cup
Red chillies - 20
Salt - 3/4 tsp
Urad dal (Black gram) - 2 tbsp
Mustard seeds - 1 tsp
Methi (Fenugreek) seeds - A few ( half of 1/4 tsp)
Asafoetida (Hing) - Little (half of 1/4 tsp)
Oil - 1 tbsp


In USA, tamarind (Indian brands) is usually sold in a 200 grams / 7 oz size bar. I have used half of it to make this chutney. Soak this in enough water for an hour or until it softens. Alternatively, you can place this in microwave for 2 minutes to quicken the process. When it is soaked, tamarind would become soft enough to squeeze. Extract a cup of thick tamarind pulp from it and keep aside.
Peel the ginger. I used the same quantity of ginger shown in the picture.
Meanwhile, heat oil in a small pan and add uraddal and mustard seeds. When urad dal starts to turn a little brown, add methi seeds, hing and redchillies. When urad dal and methiseeds turn red, switch off the stove. Let it cool. Grind this cooled mixture with ginger, tamarind pulp, jaggery and salt in a blender to a coarser mixture. Remove the chutney from the blender and store it in a glass / ceramic bowl.
It usually stays fresh even for a month, refrigerated.

This recipe is going to be a part of my contribution to the JFI - Ginger event.

Post a Comment

Friday, January 26, 2007

Allam Gojju / Ginger Gojju

For Rosie's JFI - Ginger event, I am planning to go overboard a little (assuming not overwhelming Rosie) and presenting a GINGER THALI. All Indians know what a thali is. It is an Indian meal, served on a big plate. Different dishes are served in small cups arranged in it. My Ginger Thali is a simple meal with food items (mainly South Indian) prepared with ginger. Don't assume that all dishes are gingery. You would not even notice that all the items have ginger unless someone tells you. Even if you have slight inclination towards ginger and Indian food, then these dishes are right for you. In South India, appetizers and desserts are not served unless it is a festive occasion. So, I am skipping those. I am sure my friends would come up with them in plenty. I already see Asha's mouth watering Rissoles.

I am going to post ginger recipes from Ginger Thali for a couple of days. Today, I am coming up with the recipe for 'Allam Gojju' which you can eat with rice, pongal, rotis etc. (Ginger is called allam in Telugu, my native language).

The spicy, sweet and the sour gojjus are a speciality of Karnataka, a southern state of India where I grew up. Gojju is usually prepared with a vegetable in a gravy. To a gojju, jaggery imparts the sweetness, the tamarind gives the sourness and spices of course give that kick associated with Indian food. A powder is usually used to thicken the gravy. Here I have used roasted chick pea (Dalia) - coconut powder. Every family sure will have their own favorite when it comes to the powders added to thicken the gravy. (If you don’t have any ingredients used to make this gravy thickening powder, you simply can add a tablespoon of rice flour. Before adding to the gravy, just take care to mix rice flour well with a little quantity of cold water without forming any lumps and then add it to the other ingredients in the wok).

Here in this recipe, ginger has been used in place of the vegetable. I learnt this recipe from my MIL who in turn got this recipe from a cook at her nephew’s wedding. She cooks this primarily to go with pongali / pongal. It is good to go with rice, rotis and other Indian breakfast stuff. It takes hardly 10 minutes to prepare if you have all the ingredients ready. I have no words to describe this dish which has all the flavors infused in it. It is simply delicious. Try it once and this would be on your regular menu.


Ingredients:
Ginger grated and chopped into fine pieces – 2 Tbsp
Tamarind – A small lemon size
Jaggery, Powdered – 2 Tbsp
Chillie powder – 1 & ¼ tsp
Salt – 1 & ½ tsp
Water – 1 & ½ cups
Oil – 1 or 2 Tbsp
Cumin Seeds (Jeera) – 1 tsp
Mustard seeds – 1 tsp
Chana dal – 1 tsp
Asafoetida(Hing) – ¼ tsp
Turmeric Powder - ¼ tsp
Curry leaves – A few
For gravy thickening powder:
Roasted chickpeas /Dalia (Pappulu , Kadale pappu) - 2 Tbsp
Dry coconut grated – 1
Tbsp


Preparation:
Soak tamarind in water for half an hour. Alternatively, you can put the tamarind & water bowl in a microwave for 2 minutes to fasten the process of soaking. Squeeze two tablespoons of thick tamarind pulp from it.
Grind dalia and coconut into a fine powder.
Heat oil in a wok or a pan. When the oil is hot, add ginger and fry for 30 seconds. Then add chanadal and when both ginger and chanadal start getting brown, add cumin seeds, mustard seeds, hing, curry leaves and turmeric. When mustard seeds start to splutter, add tamarind pulp, jaggery, chillie powder, salt, dalia-coconut powder and water. When it starts to boil, lower the heat and leave it for a couple of minutes. Then, switch off the stove and allam gojju is ready to serve.

Post a Comment

Wednesday, January 24, 2007

Idlis and Tricolor Idlis

When Pooja announced tricolor theme, it got me into thinking. Rice and coconut were the only white things which were popping before my eyes. Today, I was preparing idlis for breakfast. Suddenly, the rava idlis with carrot toppings I used to eat at Kamath Hotel in Bangalore flashed before my eyes. They used to be my favorite and I thought why not serve the regular white idlis with green peas and orange carrot which represent the colors of our National flag. So, here they are for the entry to Pooja's theme of the week, orange, white & green.
The usual soft, fluffy, melt in your mouth idlis just got a makeover and the recipe follows here. Note that idli rava is different from rava idli mixes. Rava idli mix is used to prepare rava idlis.


Ingredients required to make idlis:
Urad dal - 1 cup
Idli rava - 2 cups
Salt - Accordingly
Ingredients required to make tricolored idlis:
Idli batter
A small carrot grated
A small cup of green peas

Preparation of idlis:
Wash urad dal and idli rava seperately with water to remove any impurities. Soak urad dal and idli rava in water seperately for atleast 3 hours. Throw away all the water used to soak.
Grind urad dal very smoothly with as little water as possible in a blender.
Then squeeze out any water present in the rava using your hands and add it to the ground urad dal and mix well. Alternatively, (after squeezing out the water from the rava) you can add the rava to uraddal in the blender and grind for a couple minutes more so that the rava and uraddal are mixed well.
Collect the batter in a big vessel and add salt. Allow it to ferment in a warm place for 8 - 10 hours. I usually soak the dal and rava around 9-10am, grind them at 3 pm and leave the batter container in a warm oven till next morning.

If idli batter is fermented properly, you see a raise in the level of the batter. So, always add the batter to a container which can hold more than the ground batter.
(Next day morning,) Add 2-3 cups of water to idli cooker / pressure cooker.   Grease the idli moulds with ghee or oil. Fill them with fermented idli batter and put the idli stand in the idli cooker / pressure cooker. If using a pressure cooker, don't use the weight.
Steam cook on low - medium heat till they are done. It would usually take around 15 - 20 minutes.

 
Preparation of tricolor idlis:


Add grated carrots and peas to the greased idli moulds before adding the idli batter. Steam them as said above.


Serve idlis with chutney / sambhar.

Here are some helpful tips:
1. For batters to ferment well especially during winters, put the batter in the oven, with the light on. If that doesn't work, preheat the conventional oven and turn it off. Then place the batter container, with the light on. I always had well fermented batters even during winters.
2. Rice rava can be substituted for Idli rava. Dal & rava ratio can even be 1:3 instead of 1:2.
3. Here is a way to check whether the idlies are done. Carefully remove the lid. Wet your fingertips and touch the idlis. If they don't stick, the idlies are done. Do this with out getting into the way of the hot steam. :)
4. Use a container with enough room for the batter to rise. Put a large plate or aluminium foil sheet under the container to catch any drips after the fermentation. Yeah, it happens sometimes. The batter rises more than you expected and you may end up with a messy oven.
5. Idlies can be refrigerated or frozen. If frozen, you may need to thaw them. If you refrigerate them, you can put the idlies in a container and place it in a pressure cooker with out the weight on and steam for 5-10 minutes. They will be piping hot as the freshly made ones. Or sprinkle a few drops of water and place it in a microwave safe bowl covered, for 1 - 2 minutes depending upon the quantity.

Post a Comment

Tuesday, January 23, 2007

Banana Raisin Squares

I was searching web and sorting through the cook books that I borrowed from the library, to bake with bananas. I found a muffin recipe which seemed perfect in spite of the fact that I told myself earlier, no more making/baking banana muffins. I also found a banana loaf recipe which seemed equally good. I sat thinking for half an hour like Hamlet. Finally, the loaf got my vote. I prepared the batter. When it was time to pour in the loaf pan, I changed my mind and instead baked in a cake pan, so that I can have nice little squares (like a slice of cake) to eat instead of loaves. The following recipe (instructions) is from other source, for a banana loaf prepared in a 2 lb loaf tin. It was a nice, home made treat, tasting like a fruit cake.
This is my entry to Maheswari's
AFAM - Banana event.


Ingredients:
Self-raising flour - 2 cups
Baking powder - 1/2 teaspoon
Salt - 3/4 teaspoon
Sugar - 1/2 cup
Butter - 1/2 cup
Milk --2 Tbsp

Sour cream -- 4 Tbsp
Medium sized bananas - 3
Raisins and dried cranberries - 1 cup

Grated orange peel - 1 tsp

Preheat the oven to 350 degree F.
Use a 900g/2 lb loaf tin, If you are planning to bake a loaf.
Sift together the flour, baking powder and salt.

Cream the butter and sugar until light and fluffy.
Add the sour cream and orange peel, beating well.
Mash the bananas, combine with the milk and add to the creamed mixture alternately with the flour mixture.
Beat until smooth after each addition. Stir in the raisins & dry cranberries.
Turn into the greased loaf tin. Bake for 45 to 50 minutes. Leave to cool in the tin for 10 minutes, and turn out onto a wire rack.

Note:
This is the recipe which served me as a guideline. I made some changes based on the ingredients I had and also to suit my taste.
I added 2 cups of all purpose flour and a tsp of baking powder to substitute the 2 cups of self raising flour.
I added 4 tbsp of yogurt instead of the 4 tbsp of sour cream.
Dried fruits were my addition.
I baked the batter in a cake tin, cut it into small squares after cooling.

A little info about bananas:
When Maheswari asked to share the benefits of the fruit we knew about , it got me into thinking. The two things that came into my mind were these,
1. Bananas help to prevent constipation.
2. Banana is a healthy snack, which requires no packing , particularly when you are on the go.
Many of the Indians grow banana plants in their homes and from long time, not only bananas but also the flower, shoot and the leaves have been used in cooking and other purposes.

After googling, I got this information about the bananas and the plant.
India tops the chart in banana production. Globally, bananas rank fourth after rice, wheat and maize in human consumption.
Bananas are a valuable source of Vitamin A, Vitamin B6, Vitamin C, and potassium. It is reported that in Orissa, India, juice is extracted from the corm and used as a home remedy for the treatment of jaundice. In other places honey is mixed with mashed banana fruit and used for the same purpose.
The banana plant has long been a source of fibre for high quality textiles in Japan and Nepal. Banana fibre is also used in the production of banana paper.

Post a Comment

Monday, January 22, 2007

Rice Flour Dosas

Once upon a time, a decade ago to be exact, I would sleep any time of the day happily, amazing my mom. But now a days, I cannot sleep restfully even during nights. I would consider sleeping late on a weekend without disturbances, a luxury. My blissful sleep depends upon my kids. Don't assume that they are infants or toddlers. My SpongeBob squarepants loving smartypants son, who also happens to be the technical manager of my blog is eight. My girl is a kindergartener who thinks that the whole world revolves around her.
Every morning she has an agenda of her own, which suits her needs. The list goes like this. a) Brushing teeth b) Drinking milk c) Watching T.V.
She has come up with this plan after a myraid number of failed attempts to watch TV as soon as she got up from the bed. She has come to this conclusion that this is an amicable plan for all of us. You may ask how is it bothering my sleep? Let me explain. She needs help for all these things. She exercises her right by saying "Mommy, you are my mommy. Help me". This demanding starts a wee bit early on week ends when she thinks mommy is making her to miss those wonderful shows, even though she cannot understand an iota of it.
Now coming to my son, he gets up barely an hour before the arrival of his school bus on weekdays. Where as on weekends, he cannot sleep beyond 6 a.m though he slept the previous night beyond his usual bedtime. After some time, he comes to me and whispers in my ear "Mom". I am suddenly alarmed. I ask him cautiously ‘Are you nose bleeding’?. He says 'No, mom. I am soooo hungry. Can I get something to eat'? Not willing to get up from my bed, I come up with a bright idea and ask him to brush his teeth. He goes on updating me about his schedule till then. He had already brushed his teeth, read a book, played a video game, watched some TV and got hungry. I will try to remind him that it is barely 7 in the morning. He in turn tries to remind his forgetful mom that it is the usual time of the day when he eats his breakfast. He then goes 'What do you have'? I don't run a break fast joint... Any how, I tell him that I would toast some bread. My son then would share a secret with me that he hates bread. That was his most favorite thing till Friday evening. How would I know that likes/dislikes keep changing every few hours? OK.... Then, how about some cereal ? My son now says in a booming voice that he is tired of cereals. Why did he pick his favorite ones at sam's club last week? It is beyond my comprehension. Then he makes a choice and asks me to make some dosas. Then I have to promise him that dosas would be served next day, since I need to prepare the batter. I give him some milk and cookies and buy some time to get freshen up.
In the mean while, I think of breakfasts which could be done in a jiffy. Rice flour dosas top the list. I thank my grand mother and my mom secretly and dive into the kitchen. My son is happy to eat the thin, crisp dosas where as I am happy to prepare a breakfast without slaving much in the kitchen.

I am sure every Indian household will have an emergency dosa recipe. Dosas made from the basic flours which always come handy when we are short of time and ideas. Here is one such recipe from my kitchen. My grand mother with 7 kids used to make this as a breakfast, when she has to come up with something in a short notice of time. My mom used to make this as an evening snack for us, when we were kids. I make them on a chaotic, weekend. Here follows the recipe. The following ingredients would give 10 dosas.

Ingredients:
Rice Flour - 1 cup
Chillie powder - 1 tsp
Salt - 1 tsp
Water - 3 cups

Oil - For making dosas

Mix all the ingredients except oil, so that there are no lumps in the batter. Don't be alarmed to see the thin batter. The batter for this dosas should be watery and the above measurements are perfect for the thin, crispy rice flour dosas. Also note that you are not going to spread the dosa batter on the griddle as you do the traditional dosas.

Heat a griddle. Just take a ladleful of batter and pour in the center of the grill, from a little height. The batter spreads by itself through out the griddle as rava dosas do. Fill out the gaps, if any with little batter. Spread a tsp of oil around the dosa, lower the heat and cover it with a lid. Let it cook for a couple of minutes. Remove the lid. By this time, you must be able to remove the dosa without any effort. Flip the dosa and spread the oil once more around the edges of the dosa. Let it cook for a minute and remove the dosa. Repeat the process with the remaining batter.
Make sure to serve them hot. No need to prepare any chutney. They would just taste fine with any pickle.

Post a Comment

Saturday, January 20, 2007

Gojjavalakki / Pullatukulu

Pullatukulu / Gojjavalakki is one of my all time favorite among breakfast dishes. I have never come across an Indian breakfast dish which has all the flavors infused in it. It is spicy and tangy at the same time. As the name suggests, poha is soaked in tamarind juice and thats what which makes it entirely a different kind compared to the other poha dishes. Though it is prepared as a breakfast, it is a prominent dish which appears in many South Indian house holds on religious fasting days like krishnastami and ekadashi days. My mom on vaikunta ekadashi day, after a day long fasting, used to prepare (and still prepares to this day) the same three dishes, year after year. Gojjavalakki used to be one of them, since it does not contain any onions. Even though, I knew what would be on the menu, I would eagerly wait for those lovely, mouthwatering dishes my mom going to prepare.


Here is the recipe for the gojjavalakki, which can be a meal, any time of the day. Don't be put off by the long list of the ingredients. Half of them just go into tadka and the rest are just mixed.

Ingredients:
Poha / Atukulu - 1 Cup
Powdered Jaggery - 1 to 1 & 1/2 Tbsp
Tamarind - Little (around a tablespoon)
Chillie Powder - 1 tsp
Salt - 1 tsp
Oil - 1 - 2 Tbsp
Peanuts - 1 Tbsp
Fresh coconut grated - 1/2 cup
Chanadal - 1 tsp
Mustard seeds - 1 tsp
Turmeric powder - 1/4 tsp
Hing - A little
Curry Leaves - Few
Water - 1 Cup

Dry grind poha using a blender into a coarse powder. You can grind the poha before hand and store it.
Soak the tamarind in little water for about 10 to 15 minutes. Squeeze the tamarind and collect the puree along with the water. Throw away the waste pulp.

Take coarsely powdered poha, chillie powder, salt, powdered jaggery and tamarind juice in a big bowl and mix well. Add a cup of water to the mixture, again mix and let it remain for 10 - 15 minutes. The poha mixture will absorb all the water and would be a dry mixture by this time as in the picture. Add a little more water, if your mixture is already dry even before the resting period.
Heat oil in a pan. Add peanuts, chanadal, mustard seeds to it. When peanuts and chanadal start to turn red, add turmeric powder, hing and curry leaves. When they are all done, add the poha mixture and the grated coconut, stir well. Check and add salt and chillie powder ,if needed and close the pan with a lid. Lower the heat and let it cook for 5 - 10 minutes. Stir again and switch off the stove.

Gojjavalakki is ready now. Serve hot.

Post a Comment

Friday, January 19, 2007

Mamidikaya Pachadi / Green Mango Chutney

Green mango is undoubtedly the king among the fresh produce, when it comes to making pickles / chutneys. Today's recipe is one such mouthwatering, spicy chutney involving mango - mamidikaya pachadi or green mango chutney. Pick a mango that is firmer and unripe. The flesh should taste sour not sweet. With some hot steamed rice and a spoon of ghee, this tempting, spicy, tangy chutney tastes heavenly.

Ingredients:
One medium sized green mango (1 cup when grated)
6 dried red chillies (adjust according to the spice level preference.)
Salt to taste
1 tbsp. oil
1 tbsp. urad dal / skinned blackgram
1 tsp mustard seeds  1/8 tsp. fenugreek seeds / methi seeds
A pinch of asafoetida powder / hing

Method:
* Heat oil in a small pan and add mustard and urad dal. When the urad dal starts to turn reddish, add methi seeds, asafoetida and red chillies. Methi seeds burn easily and hence need to be added almost at the end. When the urad dal & methi seeds turn red-brown, turn off the stove. Let the mixture cool.
* Mean while, peel the green mango and grate it. Throw away the seed. (I got a cup of grated mango from a medium sized green mango.)
* Grind the grated mango, the toasted urad dal mixture and salt coarsely in a blender. 
(Water is never added to grind chutneys to preserve them longer. However, if your grinder / blender does not cooperate, use a small quantity of water to grind. I used my small stone mortar and pestle to grind.)  
* Transfer the chutney to a bowl and serve. Left over chutney needs to be refrigerated.

Post a Comment

Thursday, January 18, 2007

Peanut Chutney

Chutneys usually accompany the breakfast dishes like dosas, idlis, upmas etc. There are many varieties when it comes to chutneys. Peanut chutney is one among them which is simple to make, tastes delicious and really don’t need many ingredients to prepare. Roasted peanuts are used to make this chutney and if you keep peanuts roasted beforehand, you can make this in a jiffy.

Ingredients:
Peanuts - 1 Cup
Green chillies - 4-5
Salt - 1 tsp or accordingly
Oil - 2 tsp
Mustard seeds - 1 tsp
A few curry leaves

Dry roast the peanuts on a medium flame (approximately for 10 minutes) till the peanuts turn light brown in color. The peanut chutney tastes good if they are properly roasted. (Chutney made using under roasted peanuts tastes like ground raw peanuts mixed with water and nobody would like to eat that). Cool and remove the peanut skins. (You can do this by rubbing peanuts between your palms).
Grind the peanuts, chillies and salt along with required amount of water in a blender. Remove and add to an empty bowl.

Heat oil in a small pan and add mustard seeds and curry leaves. When the mustard seeds start to splutter, remove the pan and add to the chutney bowl. Mix well and serve along with dosas / idlis / upma.

Post the Comment

Tuesday, January 16, 2007

Pinto Beans Masala

I am overly enthusiastic while shopping. That enthusiasm fizzles out when it‘s time to cook. My husband likes bean burritos and one day I promised him that I would make them at home. My poor husband who still believes me went and bought a bag of pinto beans. I promptly stacked it in my pantry and forgot about it for six months. One day, when I was going through the stuff, I saw these beans sitting at the back. So, atlast I thought to surprise my husband and came up with my own pinto beans masala. My husband thought, I prepared it with rajma.
Pinto beans (literally mean painted beans in Spanish) are popular here in US and Mexico. Since beans are rich protein source, I don’t mind using different kind of beans and ever since the first experiment, this has been an addition in my pantry. They don’t even need pre-soaking. They can be cooked directly and they don’t disappoint you when it comes to taste. When Pooja announced dried beans as the vegetable of the week , I said hooray. This is going to be my entry for her
vegetable of the week event.


Ingredients:
Pinto beans – 1 Cup
2 Onions - Chopped
2 Tomatoes - Chopped
Coriander (Dhaniya) powder - 1 tsp
Garlic powder – 1/2 tsp
Jeera (cumin) powder – 1/2 tsp
Turmeric powder – ¼ tsp

Chillie powder – 2 tsp
Salt - Accordingly
Oil – 1 Tbsp

Jeera - 1 tsp
Note : You can add garam masala , instead of dhaniya and jeera powders.

Preparation:
Heat oil in a pan. Add cumin seeds and when they start to sizzle, add the turmeric powder and onions. Saute onions till they turn semi translucent and add tomato. Lower the heat and cover it. Cook them till they are done.

Mean while, cook the pinto beans adding water in a pressure cooker till you hear 2 – 3 whistles. Let it cool. Now divide the cooked beans into 2 portions. Don’t throw away the water used to cook the beans. Grind one portion of the beans in a blender with the saved water into a fine puree.
Now add the beans and the bean puree, salt and all the powders to the pan. Let it simmer for a few minutes. Garnish with chopped cilantro.
Serve hot with rotis.


Post your Comment

Monday, January 15, 2007

Carrot Burfi


When we were kids, my sister used to be always behind my mom asking for Carrot Burfis. Growing up, we both sisters had different tastes when it came to burfis. I, being a coconut freak liked Coconut Burfis, where as my sister loved Carrot Burfis. So, my mom used to make these burfis especially for her.
Vitamin A is abundant in carrots and so, Carrot Burfis are healthier and nutritious for kids and adults as well. Calorie conscious people / diabetics can replace the sugar with sweeteners.
Making the Carrot Burfi involves 2 stages.
The first stage involves, absorption of milk & sugar by the carrots – which requires less supervision. The second part craves for our attention and time, during which the carrot mixture solidifies.
Using a nonstick pan / wok is better to make this burfi and adding nuts is optional. I just added some almonds to decorate.

Ingredients:
Carrots – 2 pounds
Sugar – 1 ½ cups or use sweetener
Milk – ½ - ¾ cup

Preparation:

Grease a tray with ghee and keep aside.
Peel and grate the carrots.
Heat a thick bottomed vessel or a non stick pan and add the grated carrot and milk to it. When carrot is half cooked, add sugar and continue to cook till all the milk and the sugar are absorbed by the carrots. Up to this stage, I cooked on medium to high heat to hasten the cooking.
Next, lower the heat and keep cooking and stirring. After some time, it starts to leave the sides of the pan and at one stage you will notice the mixture starts to turn a little whitish. It will take a while to reach this stage and this is your cue to turn off the stove. Pour the mixture in to the tray, level it evenly and mark into diamonds (or the desired shapes) with a knife, when the mixture is still hot. You can remove and store them when they are cool.


Post a Comment

Sunday, January 14, 2007

A bowl of sweet pongal


I am posting pongal recipe today as the festival Sankranthi / Pongal is not complete without the preparation of pongal at homes. Today, I thought of posting the sweeter version, which I learnt from my mom. This is called theepi pongali in telugu which means sweet pongal. This is my favorite pongal than the regular sweet version. It is a very simple dish to make and tastes a lot more better than the regular one. Even my husband who has an aversion towards coconut and sweets said, this was good.

Ingredients for the sweet pongal:
Rice - 1 cup
Moong dal – ½ cup
Powdered Jaggery – 1 cup
Dry coconut, grated ¼ - ½ cup
Cardamom (elaichi) powder – ¼ tsp
Ghee – As needed
Cashews and raisins – As needed
Water – 2 ½ cups or a little less

Dry roast the moong dal for a couple of minutes (till you start smelling the moongdal). No need to turn the moong dal red.
Wash the rice thoroughly. Cook both the rice and moongdal together adding water, in a pressure cooker until two whistles.
Heat a pan / wok. Add jaggery and a tbsp of water to it and let it cook on a medium flame till you get the desired consistency. My mom’s tip to know whether we have reached the desired consistency is to keep a small plate with some water near the stove. When you put a drop of jaggery syrup into the water, you must be able to form a small ball out of it. If you are not able to form the ball out of the syrup and it just melts in the water, then syrup is not ready and you must keep boiling the syrup. It would be done in around 3 –4 minutes.
After the syrup is ready, turn off the stove. Add the cooked rice - moongdal mixture, grated coconut, elaichi powder and mix well. You don’t have to cook further.
Heat ghee in a small pan and toast the cashews and raisins. Raisins turn plump and cashews turn a little brown. Add to the pongal.

Note:
Coming to the ingredients measurements, I did not use the standard cup. For this recipe, the ratio of Rice : Jaggery : Moong dal is always 2 : 2 : 1.
This pongal is supposed to be very dry and not mushy. I did use 2 & ½ cups of water to the 1 & ½ cups of rice and moongal mixture. It turned out good. I think 2 & ¼ cups of water will yield the right texture (like in my mom’s pongal).

I learnt that keeping cooked rice- dal mixture ready before preparing the jaggery syrup is a good idea. If you do the other way, the syrup becomes much thicker and you have heat it further to make it thinner.

Post a Comment

Saturday, January 13, 2007

Sankranthi Ellu - Bella / Sankranthi & Sesame Seeds

Happy Sankranthi / Pongal to all of you.


I celebrated only a few Sankranthis in Andhra. I know that there are a lot of beautiful and exciting aspects of the festival. But the few things which pop up whenever I think of it are the eye catching designs of rangolis, the bhogi pallu function and the picnic, we had at the banks of Penna river in Nellore, where my grand parents used to live. People used to gather there to have picnics on Sankranthi.

Sankranthi reminds me the muggulu (rangolis), made in front of the houses decorated with the colors, gobbemmalu and gummadi poolu (flowers from the pumpkin plant). Those beautifully crafted rangolis bring out an unofficial sort of competition among their creators (read young girls). Everybody want their rangolis to be the best in their alleys. I am not talking about the rangolis on the Sankranthi day. Girls start weaving their beautiful designs on the streets, a few weeks earlier. Every day there would be a new pattern and new decorations. My enthusiastic cousins would discuss what they are planning to do the next day. Probably they did not show that much of interest in their studies.

Sankranthi is a three day event in Andhra. The first day is celebrated as bhogi, the second day as sankranthi and the third day as kanuma. On bhogi's evening, an exciting, playful event called 'bhogi pallu poyadam' (pouring the fruits) with little ones is celebrated. Regi pallu, sugar cane pieces and coins are mixed and kept in several small containers. (Regi pallu are sweet & sour, brown colored berries. I have not seen those berries here and don't know their name in English. They are called regi pallu in telugu & elachi hannu in kannada). Infants and toddlers are colorfully dressed, seated and the women & older kids pour the fruit mixture over the little ones' heads. Sometimes neighbors are also invited to participate in the event. I know how much my kids enjoyed during this event during our last visit to India.

Where as when it comes to Sankranthi in Bangalore, it always reminds me the "Sankranthi ellu". Ellu is the kannada word for sesame seeds. Sesame seeds and other goodies are distributed among the neighborhood. Sankranthi , ofcourse is the harvest season and the custom probably started to share their harvest with others. On the festive day, beautifully dressed girls go house to house (known people's) in their neighborhoods distributing ellu, sugarcane, bananas and sankranthi special; sakkare achchu - the tiny sugar models of animals, gods etc. are made using special moulds. Even though our mom used to make plenty of them, it was fun to open the packets given by others just to see which design of sugar achchu we recieved and decide who gets what to eat.

Women prepare ahead, the ellu and the sugar achchus at homes with loads of vigor and enthusiasm. The white colored sesame seeds are slightly fried without browning. The stores sell pale - yellow colored blocks of jaggery, specially meant for the ellu, during the season. The jaggery is bought and cut into small squares. The copra's (dry coconut) black outer layer is scraped and cut into small squares. The peanuts are dry roasted well, skins removed and broken into halves. Roasted chana dal is added. To make it colorful, sugar coated jeera (cumin seeds) are added and are mixed well. My mom takes utmost care when it comes to ellu preparation. She makes sure that the copra is white, the copra and jaggery pieces are cut into uniform squares, peanuts are not roasted black and chanadal added is good. Small quantities of the mixture is put in a small paper bag along with a sugar mould and sealed. When we were young, my sister used to be very eager to go and distribute ellu. My mom learnt to make those sugar moulds for her. It brings me a smile on my face, when I think of it. I made the ellu yesterday for the first time with the ingredients what I could get here, to show my kids. Though my mom would cringe to see her daughter making the ellu which appear to be ready for throwing away.

Enjoy your Sankranthi !!!

Post a Comment

Friday, January 12, 2007

Kobbari Podi / Coconut Powder


One more yummy podi from Andhra's long list of podis, which requires only a few ingredients and very simple to prepare. If you are a coconut freak like me, then kobbari podi is the right one for you. It tastes delicious when served with rice and ghee. Here goes the recipe.
Ingredients:
Fresh coconut, grated - 1 Cup
Chillie powder - 1 tsp or Red chillies (fried a little so that they are crisp) - 6
Salt - 1 tsp or accordingly
Cumin seeds (Jeera) - 1 tsp

Dry roast the grated fresh coconut in a wok or pan on low flame.
Keep roasting until the coconut turns to golden brown in color. Remove and let it cool. Grind the roasted coconut with cumin seeds, chillie powder (or chillies) and salt in a blender into a coarse powder.
Post a Comment

Thursday, January 11, 2007

Dosakaya Pachchadi / Cucumber Chutney


No Andhra meal is complete with out pickles / chutneys. As I said in my earlier post, for every pickle, there would be a humble counterpart, an instant variety that can be loosely translated as chutney (prepared with the same main ingredient). Pickles are prepared taking utmost care so that they last longer. Their shelf life is more compared to the chutneys, which can be prepared at an instant. While pickles last for more than a year without refrigeration, chutneys can stay fresh less than a week (with a few exceptions) even after refrigeration. Coming to cucumbers, both pickle and chutney can be made using them. The cucumber pickle, dosaavakaya is famous in Andhra. The yellow-greenish, plump cucumbers replace the mango in the traditional avakaya recipe. These cucumbers have slight tangy flavor compared to the long, green cucumbers. Now coming to the chutney, green cucumbers can be substituted for the round, yellow ones when you cannot find them. The chutney is not ground into a smooth paste and tiny bits of cucumber is usually visible in the chutney. Also, the taste is at its best when prepared in a stone mortar because we don’t end up with a big smush of cucumbers instead of the chutney.

Ingredients:
2 tsp oil
1 tsp urad dal / split black gram
1/2 tsp mustard seeds
a pinch of methi seeds
a pinch of asafoetida
1/8 tsp turmeric powder (optional)
One long, green cucumber, chopped finely (about a cup)
2 - 3 green chillies (Serrano peppers)
little tamarind soaked in water (optional and if using, 1 tbsp juice is enough)
2 Tbsp cilantro leaves
Salt to taste

Method:
Heat oil in a small pan and add urad dal and mustard seeds. When mustard seeds start to splutter and urad dal turn slightly red, add methi seeds and turmeric powder. Turn off the stove when both urad dal and methi seeds turn red. Let it cool.
Grind it along with chillies, salt, soaked tamarind and finally cucumber. If using blender, grind all the ingredients (with a small quantity of cucumber pieces, if needed) before adding the cucumbers. After the ingredients are ground to the desired consistency, add the cucumbers and just turn on the blender for a couple of seconds so that the cucumber pieces are mixed well with the other ingredients and are slightly crushed.


Enjoy with hot rice and ghee.

Post a Comment

Wednesday, January 10, 2007

Godhuma Annam


I am posting something, which does not appear in any restaurant menu or for that matter, it is not commonly prepared one, even at our homes. It is not one of those fancy food items or mouth watering or lip smacking delicacies. Godhuma annam is healthy and probably people (from Andhra) might have heard it and may even prepare it if they have a diabetic at home. I have some one who is dear to me who is diabetic and personally know how hard and significant it is to maintain a diabetic diet regime. So, I had to post this.
South Indians' staple food is rice, since it is grown there. Their main source of carbohydrates is rice (primarily white rice) and they eat rice in almost all of their meals. But the same white rice remains no longer a friend, once you turn diabetic. Sometimes diabetics are advised by doctors to completely stop eating rice. Then the poor souls have to look out for other options. The next preferable, common choices are wheat and ragi. Among the wheat products, apart from the wheat flour (for rotis), semolina & vermicelli (for upmas), people have been using cracked wheat in place of rice from a long time. Cracked wheat is cooked and eaten just as rice.
 
Ingredients:
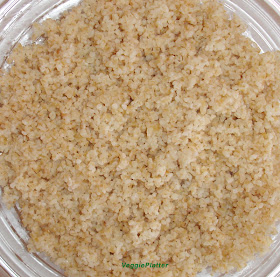
Cracked wheat – 1 cup
Water – 2 cups
Salt – ¼ tsp

Cooking: It tastes bland compared to rice when cooked. So, add salt. Cook in a pressure cooker (or as you wish) as you do with rice. This can be eaten (like rice) with pickles, sambhar, curries and rasam. A really healthy option for diabetics.

By the way, godhuma is the telugu (a south Indian language) word for wheat. Annam is the cooked rice.Wheat is cooked as rice and hence the name.

Post a Comment

Tuesday, January 9, 2007

Kobbarannam / Coconut Rice


The simplest and easiest to prepare among the rice dishes which I love to eat is kobbarannam or the coconut rice. If you have cooked rice, you can prepare this dish in a jiffy. If you have surplus coconuts (that always happen after our festivals) or on a lazy day when you feel like you have no energy or time to prepare anything, then this is the dish to go with. It is a satisfying meal on its own, any day. It is prepared with the simple ingredients found in any Indian kitchen. Today was my lazy day and I prepared kobbarannam for my lunch.

Ingredients:
Rice - 1 Cup
Fresh Coconut, grated / Frozen coconut, thawed- 1/2 cup
Peanuts - 1/4 cup
Red Chillies, broken into bits - 8- 10
Oil - 1 Tbsp
Chana dal - 1 tsp
Urad dal - 1 tsp
Mustard seeds - 1/2 tsp
Curry leaves - Few
Pepper Powder - 1/4 - 1/2 tsp or Few black pepper corns (whole or coarsely crushed) may be used.
Salt - As needed

Preparation:
Cook the rice.
Heat oil in a wok / pan and add the tadka ingredients in this order. Peanuts, chana dal, urad dal, mustard seeds, curry leaves and red chillies. Also add peppercorns if using. When the peanuts and dals turn golden brown, add the coconut, pepper powder and saute for a couple of minutes.
Then add the rice, salt to the wok and turn around the rice so that it is mixed well. Let it remain for a minute, Stir once again and turn off the stove.
Serve plainly or with chutney / Pickle.


Post a Comment

Monday, January 8, 2007

Orange Craisin Cupcakes


Orange Craisin Cupcakes are among one of the few goodies (to me) which I bake regularly. I saw this recipe a couple of years ago in a magazine. I was primarily attracted to this because it was eggless. I avoid the icing part since it tastes good even without it. For more kid- friendlier version, they can be decorated. Also, I am sure that people who are allergic to dairy products would love this as this doesn't contain any of them. I used dry craisins, since their sweet and sour taste perfectly complement the orange juice used in the cakes. Usage of dry craisins is completely optional and any chopped nuts or dry fruits can be used instead of them. These ingredients would make 18 cupcakes and you can halve the recipe.

Ingredients:
All Purpose Flour/Maida - 2 ¾ cups
Sugar - 1 ¼ cups
Baking Powder - 2 tsp
Baking Soda, seived - 1 tsp
Orange Juice - 1 cup
Vegetable Oil - ½ cup
Ripe, Mashed, Bananas - 2
Grated Orange Peel - ½ tsp
Dried Cranberries / Craisins (Optional) - ½ cup

Baking:
Preheat the oven to 375 degrees F.
In a large bowl, add flour, sugar, baking powder and baking soda.
Stir in orange juice, bananas, oil, orange peel and craisins just to combine.
Spoon the batter into the muffin cups, filling each one three - fourths full. Bake around 20 minutes, or until golden brown and a tooth pick inserted in the center comes out clean.
Let cool for 5 minutes in the muffin pan and then remove them from the pan.


Post a Comment

Sunday, January 7, 2007

Bombai Chutney


I don't know about the origins of the name of this recipe and whether this is prepared in Maharashtra. Bombai chutney happens to be a side dish commonly prepared in Andhra, using besan. It particularly goes well with rotis / pooris. One of my aunts makes this using potatoes or chayotes. My mother in law usually makes this with onions. I follow her recipe and add tomatoes too since I like the flavor they impart to the dish.
Update: I know now that it is Maharashtrian pithale.


Ingredients:
Besan / Gram Flour - 1/4 cup
Onion (Medium sized) - 2
Tomato (Medium sized) - 2
Green chillies - 4-5

Salt to taste
For tadka: 
1 Tbsp oil, 1 tsp mustard seeds, 1 tsp cumin seeds, few curry leaves 1/4 tsp turmeric powder
2 Tbsp minced cilantro to garnish 
Water as needed (around 500 ml or 1 & 1/2 cups)


My kitchen notes:
1. Besan doubles after cooking. So, even a small quantity of besan used here can generously serve two people. Usually (sour) buttermilk is used instead of water to make this chutney. When I try to make buttermilk from yogurt, using my blender, I cannot achieve a homogeneous mixture. When I use that buttermilk (with tiny globules of yogurt) in the chutney, it curdles and looks bad, even though it doesn’t ruin the taste. So, I stopped using buttermilk and had started to use water. If you use buttermilk, you can use buttermilk and water mixture in equal quantities. You dont have to use 1 & 1/2 cups of buttermilk.
2. Do not add besan directly to the cooking mixture. It will start to form lumps. Always add besan to a small quantity of buttermilk or water (cold) in a seperate bowl. Whisk it or mix finely with a spoon to avoid any lumps forming. Pass the mixture through a strainer if needed. Then add to the cooking mixture on the stove.


Preparation:
Chop the onions, tomatoes and green chillies. I prefer chopping them lengthwise for this particular recipe.
Add besan to a small quantity of water in a small bowl and mix without any lumps.

Cooking:

Heat the oil in a wok / pan. Add mustard and cumin seeds and when they start to splutter, add green chillies, curry leaves and turmeric powder. Stir for a few seconds and add onions. Lower the heat and cover the pan. Stir in between and when the onion turns  translucent, add tomatoes. When the tomatoes turn mushy, add the besan mixture to it.
Add sourmilk (if using) or water and salt and let it boil for a few minutes (It will take around 5 - 10 minutes) on low – medium heat. Keep stirring to avoid formation of lumps or the chutney getting burnt. Garnish with cilantro and turn off the heat.
Serve hot with rotis / pooris.


Post a Comment