Monday, October 29, 2007

Tomato Aavakaya

Here is a recipe for avakaya lovers. When first I heard about this from Deepthi (who had earlier shared the recipe of Sivangi pulusu here), I thought I have found a new, neat way of using tomatoes. Though it goes along the lines of mango and dosa (cucumber) avakayas, this pickle is quite different. The pickle is fried slightly, needs to be refrigerated and lasts for a couple of weeks.
This pickle can be dubbed as the regular avakaya with a tangy label. Though, due to frying part and infusion of the flavors, tomatoes here don't over power the sense of taste.

Ingredients:
Tomatoes, chopped into tiny bits - 1 cup heaped (I used three plum tomatoes)
Chili powder - 4 tsp
Salt - 2 tsp
Mustard seeds powder - 1 tsp (or less / more as needed)
Turmeric powder - 1/2 tsp
Methi (fenugreek) powder - 1/4 tsp
A little asafoetida
Mustard seeds - 1 tsp
Oil - 2 or 3 Tbsp

Preparation:
Wash the tomatoes with water and wipe them dry with no trace of moisture. Then chop them into tiny bits.
Heat the oil in a saute or small sauce pan. Add mustard seeds to the hot oil. When they start to pop, add asafoetida and saute for a few seconds. Then add the tomato pieces and saute for five minutes on low to medium flame.
Then add turmeric, mustard and methi powders to the tomato and fry for about 30 seconds and turn off the stove.
Transfer the mixture to a ceramic or glass bowl and add salt and chili powder to it. Stir well with a dry spoon. When the mixture cools, cover it with a lid and let it sit for atleast 10 hours for the flavors to blend.
Refrigerate it.

Other Tomato Pickles:
Tomato Ooragaya
Tomato Pachchadi

Post a comment

Thursday, October 25, 2007

Peach - Saffron Shrikhand

The lovely peaches always remind me the luscious mangoes I ate, back home. I feel their flavors are kind of similar. From a long time, I therefore have been toying around the idea of a peach shrikhand along the lines of amrakhand. The Fruit of a month - Peach and Think spice - Saffron events were the perfect occasions for me to create this shrikhand version.
Shrikhand, the delightful Indian dessert is prepared using strained yogurt and sugar with the addition of saffron and cardamom flavorings. While it is eaten as a dessert in Maharashtra, shrikhand is served as a side dish to pooris in Gujarathi Cuisine.


This shrikhand was so yummy and tempting that we could not wait till it chilled.
Ingredients for about a cup of shrikhand:
Yogurt - 3 cups (yogurt prepared from whole milk is preferred)
Sugar - 1/4 cup (or more depending upon the sweetness preferred)
Peach slices (bigger ones) - 4 to 5
Saffron - Two pinches
Cardamom powder - 1/2 tsp
Chopped almonds and pistachios - 1 Tbsp
Warm milk - 1 Tbsp


Preparation:
Spoon the yogurt into a muslin cloth/ thin cotton cloth and tie into a knot. Put a cutting board / flat plate in the sink. Place the cloth with the yogurt on it. Place another flat item like a cutting board over it. Then place a heavy object (I usually place a big bowl with water) over the top cutting board. Let it remain for a couple of hours. By the time, the water / whey from the yogurt would have drained and you would be left with a thick block of yogurt (about a cup). (If you don't want to drain the whey down the sink, you can collect it by placing a bowl underneath the cutting board).


Thick, water / whey drained yogurt in the cotton cloth
  • Soak a pinch of saffron in the warm milk.
  • Powder the sugar. I have found powdering the sugar makes it more convenient while mixing it with yogurt. You can use it with out powdering as well.
  • Puree the peach slices in a blender. I have used peach slices from the can. If using fresh fruit, peel and use it accordingly.
  • Combine thick yogurt, peach puree, sugar, cardamom powder, milk with the saffron and stir / whisk well. Use a blender if needed. (I added all the items together since powdered sugar was used. If not using powdered sugar, first combine the yogurt and sugar and thoroughly stir till all the sugar is dissolved. Then add the remaining ingredients).
  • Cover and chill shrikhand until it is ready to serve.
  • Warm the other pinch of saffron in MW for 30 seconds and crush it with your fingers.
  • Sprinkle the crushed saffron and nuts before serving.


Post a comment

Wednesday, October 24, 2007

Aval (Poha) Payasam & Thenkuzal


My husband's family celebrates Sri Krishnastami with great devotion and fervor. They fast the whole day and perform the pooja in the evening. Various savory and sweet dishes are prepared for the occasion. Some of the commonly prepared dishes in the evening are various kinds of chaklis, paalakayalu and poha dishes.
The usually preferred and prepared chakli happens to be thenkuzal or thentharlu, one of our family favorites. Though aval or poha payasam is not prepared at our home, I thought it would be a perfect dish on this asthami. I got to try them both for the first time and they turned out fabulous.
Aval Payasam and Thenkuzal are my contributions for Sri Krishnastami - RCI - Tamil Festival Foods, hosted by dear Viji of Vcuisine.

Aval Payasam:
Payasam lovers would just fall in love (as we did) with this simple yet scrumptious dessert. I have used evaporated milk to make the kheer extra creamier and thicker. It is optional though.


Ingredients:
Poha - 1/2 cup
Milk - 1 cup (Whole milk is preferred)
Evaporated milk - 12 oz / 1.5 cups (or substitutewith whole milk)
Sugar - 1/2 cup
Cardamom powder - 1/2 tsp
Cashews and raisins - 1 Tbsp
Ghee - 2 Tbsp


Preparation:
Fry the poha in one Tbsp ghee till it turns golden brown. Add the milk to poha and cook it till it is done. (If the mixture has become solid before getting cooked, add sufficient evaporated milk). Then add sugar, cardamom powder and the evaporated milk (if not added already) and cook till the sugar melts. Then simmer it on low flame for about 10 - 15 minutes and turn off the stove.
Heat the other tbsp of ghee in a small pan. Add cashews and raisins to it. Fry till the cashews turn golden brown and the raisins turn plump. Add this to the above cooked poha. Stir well.


Note: The above measurements would yield a payasam with a thicker consistency, which I personally prefer. 1/2 to 1 cup of extra milk may be added, if more liquid is preferred and the sugar level may need to be adjusted as well.
Thenkuzal / Thentarlu

This heavenly tasting, crunchy, munchy snack is called thentarlu in our family. It is paler in color compared to murukku, simple to prepare and is perfect for every occasion. My mom or MIL would have gone with a freshly milled batch of flour. I have used the store bought rice flour and urad flour and thenkuzal were great.


Ingredients:
Rice flour - 2 cups
Urad flour - 1/2 cup
Melted butter - 1 Tbsp
Cumin seeds - 2 tsp
Sesame seeds - 2 tsp
Salt - 1 tsp
A pinch of asafoetida
Water - 1 & 1/4 cups (I needed this much. This may vary)
Oil to fry
A deep frying pan & a Chakli press
Making Thenkuzal:
Mix well all the ingredients (except water & oil) in a mixing bowl. Then gradually add water to the bowl and make a dough, almost like rice flour rotti dough. It should not be watery or very hard, should be somewhere in between.
Heat oil in a small wok / deep frying pan. When the oil is hot enough to fry, turn down the heat to medium flame. To know whether the oil is hot enough do this little test. Put a pinch of the dough in the hot oil. If it sizzles and come to the surface of the oil immediately, then it is ready. If the pinch of the dough stays at the bottom, then the oil is not hot enough.
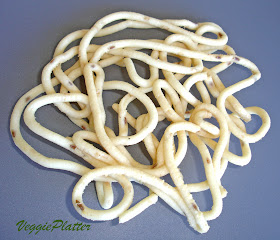
Usually the chakli press is sold along with several plates which are interchangeable. For Thenkuzal, use the thenkuzal plate, the one which has bigger perforations than a sev one or simply, the one with plain holes. After fixing the plate, take a small portion of the dough and fill it into the chakli press and in a circular motion, press out the dough into the oil. The coils of dough would form a concentric circle. This dough is easy to work with and you can make two to three separate circles at a time or a single one.
Fry till they turn attain a slight golden tinge. You don't have to fry them till they turn golden brown as murukku. Remove them with a slotted spoon and drain them on paper towel covered plates.
Repeat the same process with the remaining dough and fry them in batches. Frying thenkuzal takes very less time, if you do it on a medium flame.


Post a Comment

Friday, October 19, 2007

Munchable Moong Dal

Here is a simple, protein rich snack great for munching.
Usually I buy fried dals when ever I go shopping for Indian groceries since my kids' seem to love them. This time, I tried frying moong dal (in oil) at home for the first time. I had heard my MIL 's recipe from my husband and so followed those instructions. It is quite a simple preparation.
I also tossed a batch of dal coated with oil in the MW to see how they turn out. I was a little skeptical about frying moong dal in the MW because I was expecting the dal to get burnt. I did it anyway and to my surprise, the experiment was a success.
Both the versions tasted identical. The MW method takes a bit longer compared to the oil fry method and (very slightly), the dal may not be uniform in color.
Oil fry method:
Ingredients:
Moong dal - 1 Cup
Baking soda - 1 tsp
Oil to fry - 1 to 1.5 cups
Salt
Method:
Wash the moong dal in water once or twice and throw away the water used.
Soak them in enough water in a bowl with baking soda over night and then drain all the water. Spread the moong dal on a cotton cloth for about 10 - 1 5 minutes or pat them dry with a towel. (No need to completely dry them. I did this to avoid spluttering.)
Heat oil in a deep frying pan or a small wok. When it reaches smoking point, turn down the stove to medium heat setting. Fry moong dal in batches till they turn slightly golden brown or a shade lighter. It would take a couple of minutes. Frying the dal longer makes it harder to chew.Remove them with a slotted spoon and put them on a plate lined with paper towels so that extra oil is absorbed. Change the paper towels for each batch to make the dal less oily. Each batch would take around five minutes to turn golden brown.
Sprinkle them with enough salt and mix well. To make it hot, chili powder can be added. Cool the mixture and store it in a air tight container.
Using Microwave:
Wash, soak and dry the moong dal as mentioned above.
I used 1/2 tsp of oil for 1/4 cup of moong dal. Mix oil and moong dal well so that the dal is uniformly coated with the oil. Place oiled moong dal in a single layer on a flat microwaveable plate. Microwave till the dal turns slightly golden brown. Keep stirring the dal frequently for uniform frying. (It took 12 - 14 minutes in my microwave). Timings vary depending upon the microwave used and keeping an eye on the dal is important to avoid it from getting burnt.
Remove the dal and spread on paper towels to absorb the oil. Then sprinkle some salt and mix well. Cool the mixture and store it in an air tight container.
This goes to 'cooking 4 all seasons' Srivalli's MEC- Snack event.

Tuesday, October 2, 2007

Genasugadda Pachchadi / Sweet Potato Chutney

When ever I hear about 'Cooking with pedatta' book on other blogs, it always reminds me, my own paternal aunt. The only paternal aunt I had, whom we fondly called atthaiyya. Whenever we had annual family gatherings at my father's place, she was the one whom we kids would cling to. Besides her other amazing skills in various fields which I slowly learnt through my 'grown up' eyes, we were basically drawn towards her for her story telling abilities. She was a master in that. She never was in need of a story book to amuse us. She would then and there create a story based on listeners' demand. Yes, listener demand :) . We kids would ask her to tell a story about 'something' and she would then and there spun an amazing story which sustained our attention through out.
Kids' dinner and story time were meant to be together for us. We kids would be sitting on the cots spread in the court yard on moon lit nights and she would bring the food in a plate. After deciding what story we are going to listen to, she would start the story and at the same time each kid would go on eating 'muddas' (Small portion of food made into a ball) from her hand. By the time the story finished, every kid would have eaten enough pachchadi annam (rice and pickle), Koora annam (rice and vegetable) pappu annam (rice and dal) and perugu annam (rice and yogurt). Now when I think of those precious moments, I yearn for more.
This recipe is a little tribute to my aunt, who lost her battle to cancer a couple of years ago. Her name was Annapoorna and she was literally one, when it came to culinary skills. This chutney was her creation at one of the family gatherings. She prepared this chutney and asked us to guess what it was. Till then, no one in the family had ever heard of sweet potato chutney. The best answer everyone could come up with was coconut chutney. That's how this chutney tastes. Subtly sweet and spicy at the same time. It can be prepared in a jiffy as the recipe demands no roasting / frying of the vegetable.


Ingredients:
One cup peeled, grated sweet potato
One Tbsp Uraddal
One tsp mustard seeds
1/4 tsp fenugreek seeds
Little asafoetida
6 Dry red chillies
2 Tsp oil
3/4 tsp salt

Preparation:
Heat oil in a small pan and add mustard seeds and uraddal. When uraddal starts to turn red, add fenugreek seeds, red chillies, asafoetida. When urad and fenugreek seeds have turned red, turn off the stove. Let it cool.
Grind this mixure with grated sweet potato and salt coarsely using a little water if required.
It stays fresh for a couple of days, refrigerated.