Monday, February 28, 2011

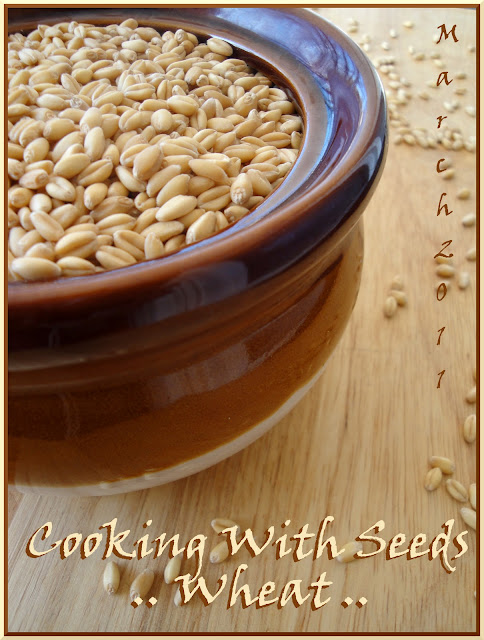
Guest Hosting "Cooking With Seeds" March 2011 Edition


Dear Priya's "Cooking with Seeds" event is being guest hosted at veggieplatter this month and I am inviting all the fellow foodies to join in with their yummy entries.
And my choice this month is going to be wheat berry. The term wheat berry refers to the entire wheat kernel comprising the bran, germ and endo sperm. The wheat kernel is the seed from which the wheat plant grows and the three distinct parts are separated during the milling process to produce flour. The kernel of wheat is a storehouse of nutrients essential to the human diet. (Source & for interesting wheat facts, check Wiki)

I am accepting any vegetarian entry with wheat as the main ingredient in it. Wheat can be in any form - kernels, cracked wheat / bulgur wheat, couscous, whole wheat flour, semolina, Indian vermicelli, whole wheat pasta or any other form you can think of.

Please follow these simple guidelines to participate in this event.

1. Cook and post anything vegetarian with wheat and send it to me through March 2011. No eggs please. Any useful tips / info regarding wheat is welcome as well.
2. Please link back your entry to this announcement page.
3. Multiple entries are allowed. Entries from archives are welcome too if they are reposted with this link.
4. Email me at
toveggieplatter@hotmail.com with subject as Wheat with the following details.
Your name
Recipe name
Recipe URL / Link
Picture of the dish (300 pixels)
5. Non bloggers can email me the recipe and I would include them in the final round up.
6. Usage of the logo is appreciated.


Please do send in your entries by March 31st, 2011.

Tuesday, February 15, 2011

Blogging Marathon Day 7 ~ Papdi Chaat / Papri Chaat


I have never continuously posted for a week in my four years of blogging. I go by my own slow pace and usually post around 1-3 dishes per week depending upon my moods and what I cook. There were times when I didn't post for months either because of a valid reason or due to sheer lethargy. This was indeed a mini marathon for me. Apart from a couple of recipes that were in my drafts, I cooked the rest this week during the marathon. I prefer, prepare and post simple and quick food most of the time and this marathon was no exception.
I started this blog to record our family recipes four years ago and mostly know the Indian food bloggers who had been already blogging (and sadly some who no longer are blogging) by then and those who started around the same time as me. Now there are a myriad number of talented bloggers out there that it is hard to keep track of everyone. The "Blogs I follow" list on the sidebar of my blog needs an update real badly. Thanks to Srivalli, this marathon gave me a small opportunity to connect with a few such bloggers and hopefully our relation continues in the future. :)
Now moving on to the last post of this blogging marathon, I am left with the street food theme and I am going with papdi chaat. Chaats are a family favorite and even the little finicky one at home loves it because she gets to choose the toppings of her liking. She enjoyed it with a sense of pride yesterday for being able to create her own chaat and of course, it was a onion-green chutney free version.
Like the rest of the chaat family, papdi chat is also full of flavorful layers and as the name suggests, papdi / papri is the main ingredient.
Most of the chaats have a common theme when it comes to the ingredients. The green chutney, the sweet date chutney, sev, cooked garbanzo beans, chopped onion, tomato & cilantro, yogurt are the very basic and common ingredients found in most of the chaats. If you have them ready, assume that the significant part of the job is done. The chutneys can be done ahead and refrigerated. Garbanzo beans can be cooked in a large quantity and stored in a freezer in small portions for later use. Similarly sevs, papdis can be prepared in advance and stored in airtight containers. And if you don't find time to do everything from scratch, there is always the option to buy at stores. Chutneys, sev, papdis are available at Indian grocers and canned chickpeas/yogurt box serve the purpose.
If you go by the store option, then all you have to do in this particular recipe is boiling potato cubes in a microwave, chopping the veggies, assembling the ingredients and enjoying a bowlful of flavorful chat.

What you need for this chat:
Papris / Papdis (See the recipe below.)
Sev (Recipe found here.)
Green chutney
Sweet chutney
Boiled potato cubes
Cooked garbanzo beans
Sweetened / Plain yogurt
Finely minced onion, tomato and cilantro
Chat masala for garnish (optional)


Note: I had not noted down the quantities for the chutneys and so will post the recipes next time.

Papdi / Papri Recipe:
Ingredients: (Makes about 3 dozen)
2 cups all purpose flour / maida
Salt to taste
4 tsp hot oil
Oil to fry the papdis


1. Combine the first three ingredients in a mixing bowl. Add enough water to form firm dough. If not using immediately, cover the dough.
2. Pinch off a lime sized portion and shape it into a ball. Roll it out thinly like you do for rotis, dusting with flour if necessary. Prick the rolled out dough with a fork randomly to avoid papris puffing up while frying. I rolled out a big roti and cut out small circles of about 1&1/2 inches diameter.
3. Heat enough oil for deep frying in a kadai / deep pan. When the oil is hot enough, let the stove setting be at low. Drop the dough circles into oil and fry them till they turn light golden brown on both sides. Drain them on absorbent paper towels.
4. Cool and store them in an air tight container.


Assembling the papdi chaat:
Though the chaat is conveniently eaten in a bowl, I have arranged them on a tray just to have a better look at the various layers of flavors that go into this. Also I have added the toppings in smaller quantities for photographic purposes. Be generous while serving. :))
Take a wide and deep serving bowl / plate. Place 4-5 papdis, layer each papdi with boiled potato cubes and boiled chickpeas. Next go the chutneys. Sprinkle chopped onion and tomato. Spoon sweetened yogurt. Finally finish off with sev and coriander leaves. Garnish with some chat masala if you prefer. Repeat the layers if you wish. :)


The recipes I posted in this blogging marathon under "Special Choice" theme are
1. Sweet recipe - Oats - Coconut Laddu
2. Book marked recipe - Kalkandu Sadam
3. Rice recipe - Menthya Rice
4. Kid friendly dish - The all American Mac n Cheese
5. Starters - Guilt FreeTomato Soup
6. Regional Special: Dosavakaaya 

I am sending this over to Srivalli's Kid's Delight - Street Food event.

Indian Cooking Challenge ~ Gujarati Dal from Sukham Ayu


Being born in a South Indian vegetarian family, dals (bean stews, loosely translated) have been a vital part of my everyday diet since childhood.  It is the ultimate comfort food for our family and so it infers that any dal variety is welcome at our kitchen table. For this month's Indian Cooking Challenge, Srivalli chose "Gujarati Dal" from Sukham Ayu. This award winning ayurvedic cook book has been coauthored by Prathiba Jain and Jigyasa Giri. The recipe was appealing for many reasons and I was excited to try it. First, it had my favorite vegetable yam in it and then it was on those lines of the sweet - sour dal dishes like the gojjus and theeya pulusus I love. Also the addition of dates was a new thing. Usually I keep procrastinating things till the last minute while cooking for Indian cooking challenges but this time the recipe was tempting enough to try out immediately.
The preferred vegetables in this dal are said to be drumsticks & yams or clusterbeans might be a good substitute. Otherwise the authors are mentioning to go ahead with out any addition of veggies. Next time I have to try with a medley of vegetables and see how it turns out. My dal was a tad sweeter since I added more jaggery to it but I was not at all complaining. It reminded me of my ammamma's pulusu (grandmother's dal) that used to be on the sweeter side. We thoroughly enjoyed this dal and it is going to be cooked in my kitchen many more times. Though this dal was simple and quick in terms of preparation, it was full of flavor and zest.
I thought I would couple this month's Indian cooking challenge with my Special choice - Regional theme for the blogging marathon. Yesterday, I was planning to prepare a chaat item and publish about it since the only theme left for me was about street food. However, the sun kept playing peekaboo and so I kept wondering whether there would be any light by the time I was ready with the dish. And so, I chose to go with dosavakaya instead. By afternoon, however there was plenty of sunshine. :( What does that mean? I have to publish two posts today. :) The first one is here.

Ingredients for about 4 servings:
1/2 cup toordal
1/4 tsp turmeric powder
10 drumstick pieces (of about 2 inches length)
10 yam / suran / kanda pieces (about 1 inch cubes)
4 -5 pieces of dry soft kokam or 2 Tbsp tamarind pulp 
1 Tbsp jaggery (or as needed)
4 dry dates, halved (optional & I used pitted variety)
2 Tbsp peanuts
2 green chillies, slit
2 tsp coriander powder (I used 1 tsp)
1 tsp cumin powder (I used 1/2 tsp)
Salt to taste
For tadka / tempering:
2 tsp ghee, 1/2 tsp grated ginger, 1 tsp each mustard seeds & cumin seeds, ¼ tsp fenugreek seeds, 2 dry red chillies - broken into bits
For garnish:
¼ tsp garam masala and minced coriander leaves

My modifications:
1. I had to use frozen drumsticks and yam and so I cooked drumsticks along with the toordal in the pressure cooker. Yams and peanuts were cooked together in the microwave.
2. I used pitted dates since I didn't have dried ones.
3. I used 6 red chillies instead of 2.

Making dal:
1. Wash and pressure-cook the dal along with drumstick pieces & turmeric, adding a cup of water. After the valve pressure is gone, remove the dal container and mash it into a soft consistency.
2.  Heat the ghee in a kadai or pan and add the grated ginger, mustard seeds and cumin seeds. When mustard starts to crackle, add the fenugreek seeds. When they change their shade, add the green chillies, red chillies, curry leaves and asafoetida and sauté for a few seconds. Then add the mashed dal along with the drumstick, cooked yams, sliced dates, peanuts, tamarind, jaggery, coriander powder and cumin powder to the pan. Add about a cup of water to get the desired consistency. Simmer for about 10 minutes, stirring occasionally.
* Garnish with garam masala and fresh coriander leaves. 

Serve as an accompaniment to steamed rice or roti.

My Lunch - Rice, Gujarati Dal, Carrot Subzi and Yogurt

Post a comment

Monday, February 14, 2011

Blogging Marathon Day 6 ~ Dosa Avakaaya (Dosaavakaya)


Today's 'Special Choice' post - Regional Cuisine (I chose Andhra)

Pickle making process (in India) is often considered a tedious and laborious task and this is indeed true to some extent. Our home state Andhra, the land of spicy food lovers can boast about the variety of pickles they make ranging from vegetable to meat based ones. Each year, people there dedicate a few summer days to prepare a variety of large batch of pickles that could be used for the rest of the year. Pickle filled large ceramic jars adorning the kitchen shelfs is a common scene in Andhra homes. 
Though pickle making sounds intimidating for amateurs, there are a few Andhra pickles that are super easy to prepare. Dosa avakaya happens to fall under this easy breezy category and all you need is some vegetable chopping skills. :) Also this is almost a guilt free pickle since this does not ooze with oil as the other pickles do. The star ingredient in this pickle happens to be dosakaya - the round cucumbers available locally in Andhra that range from greenish to yellow color. The regular, slender green cucumbers are not a substitute. 


Ingredients to make about 1.5 cup pickle:
2 dosakayas / yellow cucumbers (About 1.5 cups dosakaya cubes)
4 Tbsp chili powder (or as  needed)
1&1/4 Tbsp salt
3 Tbsp sesame oil (I used olive oil)
1.5 Tbsp mustard seeds powder

Note:
1. Choose firm cucumbers without any blemishes. There is no need to peel the dosakaya since the crunch offered by the peel is preferred in this pickle. Though I have removed the seeds, deseeding is entirely optional. If you prefer the seeds, they can be added as well.
2. Either mustard seed powder can be bought from the stores or prepared at home. If you choose to prepare it at home, it is quite an easy process. Just dry toast the mustard seeds for a few seconds, cool and grind them fine. Ditto with the chili powder. Lightly toast the red dried chillies, cool and grind them. Or use the store bought one.
3. This pickle is supposed to stay fresh for a few months, even unrefrigerated. I prefer to refrigerate it but leave the pickle outside two days before doing so.
4. Take care that the working surface, dosakaya and the utensils used are completely DRY. Even a trace of moisture would mean less shelf life of the pickle.

Making the Pickle:
* Wash the cucumbers and dry them thoroughly so that there is no trace of moisture left. Quarter them and remove the seeds, if not using them. Chop the cucumbers into small cubes.
* Take a clean dry bowl and add the cucumber pieces, chili powder, mustard powder, salt and the oil to it. Mix well and adjust the quantities of salt and chili powders if needed. Cover it and leave it overnight.
That's it. It is ready to use from the next day.

Dosa Avakaya - Cucumber pickle in a pungent mustard base 


Sunday, February 13, 2011

Blogging Marathon Day 5 ~ Guilt Free Tomato Soup

Today's "Special Choice" - Starters

Srivalli announced mini blogging marathon last week, where the participants had to post each day without fail for 7 days. To make the process more interesting, she came up with several themes as well. Each participant had the choice to choose any one theme and post the recipes under that category. The themes given were
1. Book marked recipes from other blogs
2. Kid friendly dishes
3. Rice dishes
4. Specialty Regional cuisine
5. Starters
6. Street food
7. Sweets
8. Special choice - One dish each from the above categories

This blog followers might have already noticed that I chose and has been posting "special choice" themed dishes. So far in the blogging marathon, I have posted
1. Sweet recipe: Oats - Coconut Laddu
2. Book marked recipe - Kalkandu Sadam
3. Rice recipe: Menthya Rice
4. Kid friendly dish - The all American Mac n Cheese

For today's starter / appetizer theme, I chose this guilt free tomato soup. Tomato soup recipe could be altered depending upon our moods, seasons and the pantry. I have kept it pretty basic and simple though it could be enriched with cream / milk at the serving time. Also can be garnished with cheese / crackers instead of croutons. Addition of the above ingredients however wouldn't keep this soup guilt free any more. :)

Ingredients for 3 servings:
3 tomatoes
1 -2 Tbsp olive oil (or butter if not counting the calories)
1 garlic clove, peeled & crushed / garlic powder (optional)
1 onion, finely minced
1 Tbsp flour / maida
1.5 cups vegetable stock / water (I had used water + Knorr vegetable bouillon)
Salt & freshly ground pepper to taste
Bread croutons for garnish

Note:
Today I went the reverse way. Instead of pureeing the done veggies at the end, I blanched the tomatoes initially and extracted the tomato juice and used it in the recipe. I cooked the soup in the microwave to speed up the process in the later part but the cooking part can be continued on the stovetop. It takes a little longer and needs to be cooked till the raw smell of the tomatoes disappears.

Soup making:
1. Add water to a saucepan and bring it to boil. Add the washed tomatoes and let it cook for about 60 - 90 seconds. Then immediately scoop up the tomatoes and add it to cold water kept in another bowl. Remove the skins.
2. Meanwhile when the water is boiling for the tomatoes, add the oil to another saucepan. Add garlic and sauté for a few seconds and then fry the onions till they turn golden brown on low flame. Then add the flour and fry for a few seconds. Then add the stock / water and bring to a boil. Keep stirring to avoid any lumps formed. When the water starts to boil, add the boullion cube and let it melt.
3. Adding water, grind the tomatoes to make about 2 cups of juice. At this point, if you don't want to see the onion bits in your soup, you can puree the above mixture in step 2 along with the tomatoes. Or you can leave the onions alone.
4. Pour the onion mixture and tomato juice to a microwave safe bowl and cook for about 5 minutes. Stir in salt, pepper powder and garlic powder if using and put it back in the microwave again and cook for a couple of minutes more.
5. Taste and adjust the seasonings if needed. Serve with croutons.

And let's check the other interesting dishes the marathoners have come up with today.

Saturday, February 12, 2011

Blogging Marathon Day 4 ~ Aksha's "Fav-uh-ret" Macaroni and Cheese


Today's "Special Choice" for the marathon - Kid Friendly Dishes

I should say "Mac n Cheese" is cooked in my kitchen as frequently as I prepare rice and dals. I probably have cooked it hundreds of times over the years after my daughter started taking lunch box to the school. I don't remember how or when it started, it remains her favorite lunch box item from a long time. There have been days when she had eaten this favorite dish of hers' for her breakfast and lunch over weeks. I sometimes have my suspicions over what her lunch mom's thoughts are about my cooking skills or our financial situation. :) 
My daughter also has a preference how it needs to be done. She can give you the recipe with hers eyes closed since her Kindergarten days. No addition of vegetables / spices and it has to be served with only ketchup. If you forget to drizzle ketchup, the lunch box comes back uneaten. She is petite and eats so less that I am tempted to make it once or twice in a week just to see that her lunch box is finished.
Though packaged version seems to be more convenient to busy moms, preparing it freshly is not that tiresome or time taking.  Addition of vegetables would make it more wholesome for kids.
And here is how I make her fav-uh-ret and America's beloved 'Mac n Cheese'.

Ingredients needed for 4 generous servings:
2 cups elbow pasta or any tiny tubular ones
1.5 cups grated cheddar cheese
2 cups milk
2 Tbsp butter
3 Tbsp unbleached flour
Salt to taste

Cooking part:
* Bring 3 - 4 quarts of water to a rapid boil and add macaroni to it. Cook uncovered until al dente and drain.
* While the macaroni is cooking, prepare the sauce. Mix the flour in about 1/2 cup of milk until lump free. Add this flour mix, remaining milk, butter and cheese to a saucepan. On low flame, bring to a simmer and keep stirring often. Cook until a smooth, thick sauce is formed and then turn off the stove.
* Combine the cooked macaroni and sauce. Season with salt and serve.

My kids love Mac & cheese with tomato ketchup.


Check what my fellow marathoners are cooking today!
Azeema, Bhagi, Champa, Gayathri Anand, Gayathri Kumar, Harini, Jay, Kamalika, Meena, Minu, Padma, Pavani, PJ, Priya Mahadevan, Priya Suresh, Priya Vasu, Rujuta, Santosh, Saraswathi, Savitha, Shanavi, Smitha, SowmyaSrivalli, Usha, Veena


Post a comment

Friday, February 11, 2011

Blogging Marathon Day 3 ~ Menthya Bhath

 
Menthya Soppu - Fenugreek greens in Kannada, Bhath - Rice

My 'Special Choice' for marathon today - Rice Dish

Here is one more palate pleasing rice dish from Karnataka that happens to be a family favorite and appears frequently at our lunch table. Menthya bhath aka menthya soppina bhath is a very popular one around Bangalore region, especially in vegetarian homes. The strong flavored fenugreek greens happen to be the star of this dish and hence the name. Lightly sautéed flavorful fenugreek greens with the fresh peas and the filling potatoes combined with perfectly done rice and the aromatic, flavorful spices makes a filling dish on it's own. This is not to be confused with the methi pulao recipe and I personally feel this menthya bhath tastes way better than the pulao.

Ingredients for about 6 servings:
1.5 cups rice (preferably sona masuri kind)
3 potatoes (peeled and chopped into cubes, about 2 cups)
2 cups washed and roughly chopped methi leaves / fenugreek greens
1/4 cup fresh / frozen green peas
Salt to taste
For tadka: 2 -3 Tbsp oil, 1 Tbsp chanadal, 1 tsp mustard seeds and 2 Tbsp cashews

Ingredients for the vangibhath powder:
1/4 cup chana dal 
1 Tbsp coriander seeds 
4 cloves
8 one inch cinnamon pieces
2 -3 Tbsp dry coconut / copra
(Dry toast the chanadal till it starts to turn reddish. Then add the coriander seeds, cloves and cinnamon and sauté for a few seconds. Remove from heat and cool them. Grind them along with the coconut to a fine powder.)

Method:
* Add 3 cups of water to the rice and cook in a pressure cooker or electric cooker. Let it cool a bit.
* Heat oil in a kadai or a big non stick pot. Add the cashews and toast them till they turn golden brown. Remove them with a slotted spoon and keep aside. Add chanadal and mustard seeds to the same oil and sauté till the dal turns reddish.
* Add then the potato cubes, stir them once and cook till they are done, covered. The potatoes must be done but still hold their shape and not turn mushy. Alternatively, you can cook them in a microwave with little water, drain and add to the tadka. When the potatoes are almost done, add the peas and the fenugreek greens. Stir them and sauté till the leaves are wilted and appears done, about 5 minutes.
* Add the vangibhath powder and salt to the pan and mix properly so that the vegetables are well coated. Then add the cooked rice and mix well. Taste and adjust the seasonings if needed. Garnish with the toasted cashews.
* Serve with some yogurt to make it a wholesome meal. Or with some papads / chips.


Note:
1. I make a large batch of vangibhath powder and refrigerate it for later use. I usually use all (or 2 Tbsp less) the powder that I get from the above mentioned measurements since we prefer it spicier. If you like it mild, reduce the quantity of the vangibhath powder. Taste the rice and adjust accordingly. Or store bought MTR brand powder works well too.
2. This recipe doesn't need lime / lemon juice.

Check what my fellow marathoners are cooking today!
Azeema, Bhagi, Champa, Gayathri Anand, Gayathri Kumar, Harini, Jay, Kamalika, Meena, Minu, Padma, Pavani, PJ, Priya Mahadevan, Priya Suresh, Priya Vasu, Rujuta, Santosh, Saraswathi, Savitha, Shanavi, Smitha, SowmyaSrivalli, Usha, Veena


Thursday, February 10, 2011

Blogging Marathon Day 2 ~ Kalkandu Sadam


Today's 'Special Choice' post - From any other blog.

When I saw Srivalli's Kalkandu Sadam recipe more than a year ago, I was bowled over even though it was just a simple one. I think the color of the finished product and the usage of the candy / rock sugar in a recipe got me. However, I didn't have enough candy sugar at home then and could not find it locally. I had to wait till I got some from India and this remained in 'must to do' folder of my brain. I could not prepare it till today even though I got the rock sugar later.
I think no Indian needs introduction to the rock sugar or the candy sugar. Everyone in their childhood must have enjoyed this treat. My grandfather always used to carry a pack of tiny white ones in his pocket. Whenever he had sugar cravings, he would pop some into his mouth or share with us, his grandkids. For the uninitiated, this rock sugar is sweeter as the regular sugar but with a better taste. Tiny white cubes are also available but the large rock kinds are yummier. If they are not small enough to pop into your mouth, break them using a hammer or a real rock. :) The most common shades that I have seen in India are deep orange and white ones.

Rock Sugar / Candy Sugar / Kalakanda / Kallu sakkare

This recipe uses the orange shaded one and if you have white colored rock candy, you can go ahead. You will end up with an equally yummy dish, only with out the color or add some orange food color if you are particular about the hue. 
Today at my home, Gods had these yummy, creamy kalakanda pongali/ paramannam as neivedyam. If you love chakkera pongali, then this fabulous dish is for you. Replacing sugar / jaggery with rock candy in the traditional sweet pongal recipe really rocks.

Ingredients for about 6 servings:
1 cup rice
2.5 cup milk (I used full fat milk for a rich pongal)
2 cups rock / candy sugar
1 tsp cardamom powder
1 Tbsp each - ghee, cashews & raisins
A little orange / kesari food color (very optional)

Note:
1. This time I didn't use the standard American size cup but went along with a small cup I had which is a little smaller than a standard 1/2 cup size. I used the same cup for all the measurements here.
2. I used extra long grain rice instead of sona masuri. I prefer ELG rice for making pongals & bisibelebhaths for it's creamy texture. I cook it in a pressure cooker adding 1.5 cups water for each cup of rice used. Also today instead of three whistles, I let it to go till 7 -8 whistles so that the cooked rice was automatically mushy.

Method:
* Wash the rice and add 1.5 cups of milk to it and cook it in the pressure cooker till done. Or it can be done on stove top as well. If using sona masuri kind, increase the quantity of the liquid by 1/2 cup more. Half quantity of the milk can be replaced with water.
* After the valve pressure is gone, remove the rice and just mash with a ladle. It would be soft. Add a cup of more milk and combine well.
* Meanwhile, add a few Tbsp of water and the rock sugar to a sauce pan. Turn on the heat and let the rock sugar melt. To make the process faster, powdered rock sugar can be added. Melting is a lot easier than powdering it and cleaning up after the mess. :) The rock sugar batch I had was clean and so there was need to strain any impurities. Do strain if there is a need. When it starts to bubble, add the food color if using and the cardamom powder. Now combine the cooked rice and the rock sugar syrup and mix well.
* Garnish with the ghee toasted cashews and raisins. I added some pistachios and coconut as well.


Check out what the other marathoners are up to!

Wednesday, February 9, 2011

Day 1 of Blogging Marathon ~ Oats - Coconut Laddu


Chicago land was the one worst hit by last week's blizzard that had created havoc allover the Midwest. It has created a record of being in the top three blizzards, locally. Most of the areas were covered in about 20 inches or more of snow and there were even driving bans in some of the neighboring counties.
The help we had hired to shovel had promised to come by the evening. I didn't want to end up shoveling ice instead of snow in the evening if he did not show up. I therefore started to shovel with my son’s help though M was vehemently saying not to do it. Later he had to give in and join us. We totally had put together around 5 hours to clear a part of our driveway. It had been extremely frizid since then. Today the wind chill is around - 15 and the temperature when the kids left for school was 2 deg F (-16 deg C). Dreary weather seems to be ruling everywhere.
Shoveling that amount of snow has left me very badly sore. I could not walk up standing staight for two days. Lesson learnt. Never try to shovel manually after a blizzard. :) To cheer up myself and get out of the gloomy mood, I prepared these laddus today. Sweets tend to lift up spirits, atleast mine. :)

As usual, I went with a quick kind. Combined oats to my grandma's rava laddu recipe to prepare this yummy and healthier version. Already I had toasted semolina and oat flour and so these were made in a jiffy.

Ingredients for about 14 laddus:
1 cup shredded, fresh coconut
1/2 cup oats (I used quick cooking oats)
1/2 cup semolina
1/2 cup sugar
1 tsp cardamom powder
1 Tbsp ghee, 1 Tbsp raisins & 1 Tbsp cashews

 
Making laddus:
* Lightly toast the oats, about 2 minutes. Cool and grind it coarsely.
* Fry the semolina on low flame till it starts to give a strong aroma and turns light brown. Let it cool.
* If using frozen coconut, thaw it.
* Heat ghee in a small pan. Toast both raisins and cashews in the ghee till cashews turn golden brown and raisins turn plump.
* Now combine the semolina, oats flour, sugar, coconut, cardamom and the toasted raisins & cashews in a mixing bowl and leave the mixture covered for about five minutes.
* Make about lime sized balls / laddus out of it and refrigerate them.

Clicked through our living room window, this is how the home opposite to ours looked last week.


And our front yard. We could clear the snow in our driveway to let one vehicle pass through. After the blizzard, we had two more snow falls and our driveway right now looks pretty bad.


When I see some of the bloggers who do blog on a daily basis, I am amazed at their energy levels and interest. When Srivalli mentioned about the blogging marathon, I wanted to see how it goes if I accept the challenge and here I am with the first recipe. I chose to go with 'special one' and today's choice is 'sweet'.

Check out what the other marathoners are doing on the first day!

Monday, February 7, 2011

Oats Rotti


Rottis happen to be one of the popular breakfast / snack items in Karnataka and we grew up eating them very frequently. Though the rice/ragi/jowar flour rottis are more common, semolina / sajjige version taste equally delicious. I have tried adding oats to the classic sajjige rotti version to make it healthier and this version was appealing too. 

Ingredients for about 7 rottis:
1 cup oat flour*
1 cup semolina / rava
1 cup rice flour
1/2 tsp turmeric powder (optional)
Salt to taste
1/2 cup shredded, fresh coconut
4 - 5 green chillies
1 cup finely minced onion
2 Tbsp finely minced cilantro


* Toast the quick cooking oats on medium flame for 2 -3 minutes. Cool the oats and grind into a coarse / fine powder.

Preparing the rotti dough:
Semolina can be lightly toasted before adding. Combine the oat flour, semolina, rice flour, turmeric powder and salt in a mixing bowl. Finely minced chillies can be directly added to the mixture. However if serving kids or do not like to bite on green chillies, grind the coconut and chillies adding a little water. Add this coconut - chillie mixture, onion and cilantro to the flour mixture. Form a firm dough adding water as needed.


Making rottis:
Pinch about a big orange sized portion from the prepared dough and shape into a ball. Pour about a tsp of oil at the center of a griddle and place the dough ball on it. Pat it into a thin, flat circle and pour a tsp of oil around the edges and cover with a lid. Now turn on the stove and let it cook on a low - medium flame, about 3 - 4 minutes. When it appears cooked on the bottom side, flip it. Again add a tsp of oil around the edges if needed. Cover it again and cook till the other side is done too.
Repeat the procedure with the remaining dough. Be sure to turn off the stove and cool the griddle slightly so that it is safe to pat the next dough ball on it. Or alternatively use 2 griddles. Repeat the process with the remaining dough.


This goes to Priya's CWF- Oats, an event originally started by Kiran.