HOME        |        ABOUT        |        COPYRIGHT        |        CONTACT        |         RECIPE INDEX        |         INDIAN THAALIS        |         MILLET RECIPES        |        EVENTS' ROUNDUP        

Showing posts with label Gujarati Snacks. Show all posts

Wednesday, September 9, 2020

Green Peas Dhokla / Matar aur Besan Ka Dhokla

We are moving towards the western state of Gujarat for today's breakfast. After yesterday's fried affair, here is a healthier breakfast option from this breakfast platter I posted earlier. A steamed, protein rich and nutritious breakfast where green peas play the star role. It is a filling treat that can be served as a breakfast, snack or as any meal.

There is an unmistakable but not overpowering green pea flavor in this dhokla. My family could not guess they were made with peas though they thought it tasted different than the regular version. I also found these to be not very light / airy as the regular chickpea flour / besan version. They are lightly on the denser side though it is not an issue while eating them. It may be because of the addition of green pea puree. To make it more fluffier, I am guessing adding some semolina and increasing the quantity of chickpea flour or reducing the peas quantity by half might help.

Ingredients for dhokla batter:
1/2 tsp. citric acid crystals + 1 tbsp. water
1.5 cups green peas (I used frozen peas.)
1 green chili
1 inch piece ginger
1 cup sieved chickpea flour / besan
Salt to taste 
2 tbsp. sugar ( I used two 1 oz. packets of stevia+ monk fruit blend sweetener.)
1/2 cup water
1 and 1/2 tsp. Enos fruit salt
2 tbsp. water
Oil to grease the dhokla plate

Ingredients for seasoning:
2 tsp. oil
1 tsp. mustard seeds
1 - 2 green chillies, finely minced
2 pinches of asafoetida powder
1 tbsp. water

Ingredients for garnishing:
Chopped Cilantro 
Shredded coconut (Fresh/ Frozen coconut can be used. Just thaw the coconut if using frozen one.)

Directions:
1. Dissolve the citric acid crystals in the water. 
2. Puree peas, ginger and green chili together in a blender. 
3. Add the ground paste, chickpea flour, sugar, salt, citric acid water in a mixing bowl. Add 1/2 cup water and mix well without any lumps. (I added the ingredients to the blender and pulsed to combine.)

4. Heat water in a steamer or the base of a pressure cooker. 
5. Brush a 7 inch thali with oil. (Use any plate / container with at lease one inch depth.) 
6. Add fruit salt to the prepared batter just before steaming.

 7. Sprinkle about 2 tbsp. water over fruit salt.

8. Gently combine the mixture.

9. Pour the mixture into the greased plate. Shake the plate gently to even the level of the batter.

10. Place the batter in the steamer / pressure cooker and close the lid. (There is no need to put the whistle on if using the pressure cooker.)
11. Steam until a toothpick inserted at the center comes out clean. (It took me about 30 minutes on low flame though the original recipe mentions the steaming time as about 12 minutes.)

12. Remove the dhokla plate after about 10 minutes. Run a knife around the edges of the plate and reverse the dhokla plate onto a wider plate and unmould the dhokla. 

13. Heat oil in a small pan for seasoning. Add mustard seeds and when they start to sizzle and sputter add green chilies and asafoetida. Saute for about 10 seconds or so and add water. 

14. Turn off the stove and pour the seasoning over the dhokla.

15. Cut into squares and serve them warm with green chutney.


Saturday, September 14, 2019

Khandvi (Pressure Cooker Method)


So far in the series,

First week - Sweets
Malaadu / Hurigadale Unde
Dry Gulab Jamun
Coconut Burfi / Kobbari Mithai
Almond Halwa / Badam Halwa
Elaneer Payasam
Godhuma Sojjappalu

Second week - Snacks from Gujarat
Damni Dhokla
Doodhi Muthia / Lauki Muthia
Dal Pandoli

Here is my final dish of the week, another steamed delicacy from Gujarat. Khandvi - the chick pea flour and yogurt based snack that is popular in Gujarat and Maharasthra as well. The chickpea flour and butter milk mixture flavored with chili and ginger is cooked, continuously stirring until it thickens and spread on a greased plate, allowed to cool a bit and cut into strips and then rolled. It is then tempered and garnished with coconut and cilantro. Cooking khandvi for a beginner using this traditional method is quite tricky, especially when one doesn't know when to stop cooking the chickpea flour based paste. That's when this pressure cooker method khandvi comes handy.

I tried making khandvi twice for the ICC event a few years ago in the traditional way and promptly trashed the stuff thinking that I overcooked it. It is hard to understand the required consistency while cooking the chickpea flour paste in the khandvi preparation when one doesn't have any reference point. If you have never seen the preparation, it becomes even harder to imagine the soft paste becoming pliable enough to cut into non sticky rolls. The instructions like 'Cook the paste until glossy' or 'Stir until the paste is cooked' are just that, instructions. Instructions that aren't helpful for those who are trying the dish for the first time. When I look back now, I realize that probably I cooked the mixture to the correct consistency but didn't figure it out then. 

I came across the concept of pressure cooking the paste in a khandvi preparation instead of keeping stirring in a pan when I was searching for steamed Gujarati snacks. I must admit even the first attempt of pressure cooker khandvi ended up being a disaster. I followed a version which used less liquid and it kind of ended up being an under cooked dhokla without any sponginess. This version ended up being perfect though I have seen some versions using flour and liquid in the ratio 1:3. The pressure cooker method is an easy, fail-proof way to make khandvi.

I prepared a small batch of khandvi for the first time when I captured these images. I could do better khandvi the second time but was lazy to photograph them. Also it is hard to take the images in the middle of spreading the khandvi. The mixture thickens very quickly and once it thickens, it is hard to spread. One needs to be quick for this reason. Also more than one thaali / steel plate or a baking sheet is needed to spread this quantity of khandvi. Or one can use both sides of a thali / baking sheet.

Ingredients for khandvi:
1 cup sour yogurt + 1 cup water or 2 cups butterrmilk
1 cup chickpea flour / besan
1/4 tsp. turmeric powder
Salt to taste
1 tbsp. green chili paste
1 tsp. grated ginger / ginger paste
Ingredients for tempering:
1 tbsp. oil
1 tsp. mustard seeds
 2 red chillies, broken into pieces
few curry leaves
Ingredients for garnish:
Minced cilantro 
Shredded fresh coconut

Directions:
* Sieve chickpea flour. Blend yogurt and water together. Grease two wide plates or a large baking sheet on both sides and keep aside.
* Combine flour, turmeric, salt, chili and ginger paste in a bowl.
* Next add yogurt and water mixture to the bowl and mix well taking care that they are no lumps. 
* The consistency of the mixture is thinner than the bajji batter as shown below.
* Pressure cook the mixture for 3 whistles. Remove the cooker lid once the valve pressure cools down. Whisk the cooked dough well.
* Put the mixture quickly on the greased plate and spread as thinly as possible and quickly using a spatula. 
*  These pictures were taken when I cooked a small quantity but the mixture still got thickened as I was trying to take pictures. I made these one more time and could make good khandvi but there wasn't enough light to capture them.
* Allow it cool slightly and cut them lengthwise, 2 inches apart. Starting from one end, roll each piece tightly.

* Heat oil in a small pan add mustard seeds. When they start to crackle, add curry leaves and chillies and turn off the stove. Pour this tempering over khandvi.
* Garnish with minced cilantro and coconut before serving. This snack can be served both warm and cold. 


Check out the Blogging Marathon page for the other Blogging Marathoners doing BM#104.
You are invited to the Inlinkz link party!
Click here to enter

Comments

Friday, September 13, 2019

Methi Khakhra

These 'not so perfectly shaped' khakhras hands down win 'the most time taking recipe' among the lot that I has ever tried cooking in my kitchen. Maybe because it was a regional preparation that I did not have any first hand reference to, I don't know. In the time I cooked these, I could have walked, to my local "Patel brothers' store, bought varieties of khakhra and came back home, twice. Even though the recipe tested my patience and time, the silver lining had been that the khakhras were thin and crisp. I think it is hard for beginners to replicate the machine made, commercially sold khakhras that come with a uniform hue through out.

Khakhras are thin, crisp crackers that are made with wheat flour, that are eaten along with tea in the mornings or as a snack both in Gujarat and Rajasthan. Khakhras are sold / made both in plain and flavorful versions like methi/fenugreek green, garlic, mint, and other innovative versions. The modern versions are made with other flours too. They were traditionally made with left over rotis. Or if starting from scratch, the dough prepared is the same as roti dough base, plain or flavors added and they are rolled super thin. They are lightly toasted once, allowed to cool down and again toasted until they turn crisp. It was mentioned in the recipe that I followed that all the lightly toasted rotis would be neatly stacked over one another on the tawa, pressing down applying pressure on the top one while the bottom ones gets crisp. The bottom one will get removed once it turns crisp and the process continues until all are turned into crisp khakhras. I don't think people nowadays have the patience to make these when they are easily available commercially. 

The concept of 'rotis to khakhras' has always been intriguing to me as a non-local and I have always wondered whether the commercially sold version can be replicated at home. If it can be then I marvel at the skilled expertise of those who can do so. We always keep stock of varieties of khakhras bought from store and so until now I never thought of going through the hassle of making them at home since they are easily accessible. While I was planning non fried and guilt-free Gujarati snacks for this week, I thought of giving them a try. The methi khakhras I tried were crispy and kinda tasted plain though they were fenugreek flavored. I know this was my first and last attempt at making khakhras but retrospectively the experience was not bad but it was time consuming and one needs to be in front of the stove constantly. Some of the tips I gathered along the way.

1. Roll the rotis very very thin. I could have easily rolled mine some more thinner but didn't realize at that time but my khakhras were thin anyway.
2. Cut the rolled out dough discs into perfect circles using a sharp rimmed plate. Everyone cannot roll uniformly sized, perfect circles. Mine looked fairly fine shaped when they were rotis but once they were toasted to khakhras, I could see the imperfect edges.
3. The locals use a khakhra press, a wooden disc with a handle to press the khakhras. In lieu of it, a potato masher / rolled kitchen towel works fine. I tried my athirasam / arisela press and after a while, it started to hurt holding the press in the same position. I used a rolled paper towel instead since I didn't want to stain my kitchen towel.
4. Khakhras are toasted on low flame. My first one took about 40 minutes to cook that way and there was not a single brown spot. And then I figured it out that khakhras can be made interchanging the heat setting from low to medium and vice versa, as required. I browned my last khakra at the center on purpose.
5. Use a tawa / low rimmed pan that is slightly concave which gives the khakhras their distinct shape. There is no need to worry if one doesn't own that kind of pan. Also place a pot or something on the khakhras when done to retain the depression at the center. (I did not do it. This is a tip from blogger friend, Vaishali which I noticed after I had made these.)
Recipe source: Here
Ingredients: (Yield - 6 khakra)
1/4 cup washed and roughly chopped fenugreek greens / methi
1 cup wheat flour / chapati atta + extra for dusting
1/4 tsp. turmeric powder
Salt to taste
1 tsp. chili powder or green chili paste (adjust to taste)
2 tbsp. oil 
1 tsp. melted ghee / oil for greasing

Directions:
* Add fenugreek greens, flour, salt, turmeric powder, chili powder / green chili paste and 2 tbsp. oil to a mixing bowl.
* Mix the ingredients well with hand and add water in slow increments and make a soft, pliable dough like chapati / roti dough.
* Allow the batter to rest for about 30 minutes. Add about 1/2 tsp. oil and knead the dough for a minute until smooth. Divide the dough into 6 to 8 equal sized balls.
* Flatten a ball while keeping the other balls covered.
* Roll each ball into a circle, as thin as possible. (I easily could have rolled them even thinner as the recipe needed but somehow I did not.) Use flour if needed for dusting. 
* Roll out all the balls into circles and keep them aside. Mine were not sticking to each other and so I piled them. One can always spread them individually on a wide plate to avoid sticking. 
* Heat lightly a tawa or a lightly concave pan. Don't make it too hot. Place a rolled out disc on it.
* Our purpose is here not to make a roti and so, when it starts to dry and just bubbles start to from, flip it.
* Cook the other side as well until bubbles starts to form. There is no need to cook until you see the spots. 
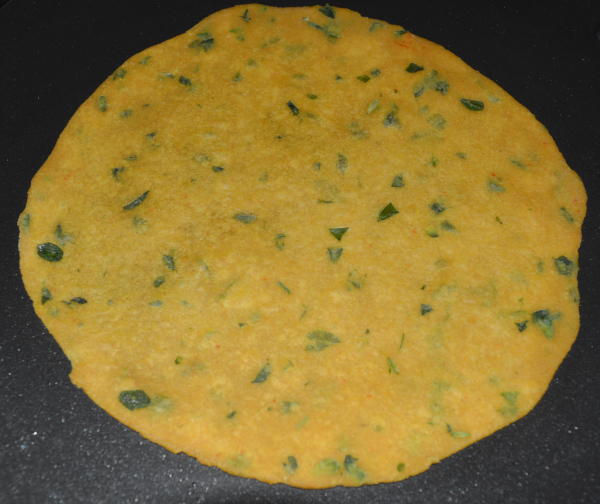
This is how we need it, lightly toasted without any spots. Finish toasting all the discs this way. This step doesn't take much time.
* Grease on both sides of the prepared rotis, with oil / ghee very lightly. Just very lightly. Let them cool.
* Now comes the part which demands some patience and time. Turning the rotis into crisp khakras. Start from a low flame and keep interchanging the heat between low and a little more higher setting as you keep cooking. Our goal here is not let the bubbles form and turn the soft roti real crisp. Place a partially cooked roti on the warm tawa and when ever you notice bubbles keep pressing them with a khakra press, kitchen towel or a potato masher, whatever works for you.
* Start pressing along the edges first and then keep going to center of the roti. Keep pressing down any bubble that starts to form.
* Flip and keep doing the same step as above.
* (In the middle of it, I realized a paper towel works best.) Pay attention to the heat and keep pressing until it turns crisp. (I took more than 30 minutes for the first one since I did it on the lowest flame possible on my gas stove, through out the process. When I got a hang of it, I realized I could increase the heat and can keep adjusting as needed. I made my first five khakhras patiently without a brown spot.)
* Repeat the process with the remaining rotis. Store them in an airtight container once they cool down.
* Serve them with tea and pickle / methia masala.


Check out the Blogging Marathon page for the other Blogging Marathoners doing BM#104.
You are invited to the Inlinkz link party!
Click here to enter

Comments

Thursday, September 12, 2019

Sev Khamani

So far in the series,

First week - Sweets
Malaadu / Hurigadale Unde
Dry Gulab Jamun
Coconut Burfi / Kobbari Mithai
Almond Halwa / Badam Halwa
Elaneer Payasam
Godhuma Sojjappalu

Second week - Snacks from Gujarat
Damni Dhokla
Doodhi Muthia / Lauki Muthia
Dal Pandoli

Today's snack is another steamed delicacy from Gujarat called sev khamani. This dish uses either freshly made or left over khaman, which are savory, steamed cakes that can be eaten either as a snack or a light meal. This dish is eggless, vegan and gluten free if semolina and asafoetida are left out. These khaman can be made using freshly ground chana dal (split chick peas) batter or besan aka chickpea flour. If using chana dal, it is soaked ahead for about 3 hours, ground adding green chillies, ginger, garlic, etc and then the batter steamed. The steamed block is then crumbled and passed through a sieve to get a mixture with a consistency resembling semolina. It is then tempered, slightly moistened adding water and topped with ingredients like sev, cilantro and other stuff.

The chickpea flour version is an instant one which cuts down the time since it needs no soaking and grinding. I made the version in the microwave which further cuts down the cooking time and makes it a quick fix snack. Khaman could be done under 10 minutes including prep work for one cup of chickpea flour used in the recipe. I usually use this recipe and it can be used here and cooked in two batches instead of the recipe below. I make dhoklas regularly at home but this caught my husband's fancy and I have been been requested to repeat this recipe regularly. Of course he adds everything he finds in the box of spice powders and makes it his own dish at the end.

This recipe has been on my to do list for years but somehow never got made. This time I didn't even bother when I couldn't procure good colored pomegranate arils and went ahead. They ended up being sweet and juicy in spite of their dismal look and made a very delicious topping for this sev khamani. In fact, they were the star of this sev khamani. Use pomegranate and sev in generous portions. Garlic is another interesting addition to this sev khamani which can be added either as a paste to the batter or minced and fried in the tempering.  

I noticed online that the topping can be done in two ways and did both. The common toppings used are coconut, cilantro, sev and pomegranate arils. A street food video showed that the crumbled khaman is moistened with water to almost a lumpy consistency like a moist upma, and then topped with a fried green chili, sev, cilantro and minced onion. I liked this sev khamani without onion somehow,

Ingredients for khaman:
1 cup chick pea flour / besan
2 tbsp. semolina
1 tsp. sugar
Salt to taste
2 pinches of asafoetida
1 tbsp. green chili paste (Adjust as needed)
1.5 tsp. garlic paste
1 tsp. ginger paste
1 tsp. oil
1 tsp. lemon juice
3/4 cup water (1 or 2 tbsp. less)
1 tsp. Eno's fruit salt

Ingredients for tempering: (Version 1)
1.5 tbsp. oil
1/2 tbsp. mustard seeds
1 or 2 green chillies, finely chopped
2 pinches of asafoetida powder
1/8 tsp. turmeric powder
2 tbsp. water
1/2 cup nylon sev
1/2 cup pomegranate arils
Minced cilantro to garnish
Fresh, grated coconut (optional)
Lemon juice

Ingredients for tempering: (Version 2)
1.5 tbsp. oil
3 /4 green chillies
1/2 tbsp. mustard seeds
2 pinches of asafoetida powder
1/8 tsp. turmeric powder
2 tbsp. water or more
1/2 cup nylon sev
Minced cilantro to garnish
Minced onion to garnish


Directions:
* Grease a microwave safe bowl.
* Combine all the ingredients under 'khaman' list in a mixing bowl except water and fruit salt. Add 1/2 cup water initially and then in slow increments, add about 2 to 3 tbsp. water. Make a medium consistency batter and transfer to the microwave safe bowl.

* Add fruit salt and sprinkle a tsp. of water over it. 

* Mix the batter well and cover with a microwave safe lid. 

* Place it in the microwave and cook until a tooth pick / knife inserted at the center comes out clean, about 5 - 7 minutes depending upon the strength of microwave.

* Let the mixture cool down and then crumble it using fingers, breaking any tiny lumps present.

Tempering for version 1:
* Heat oil in a pan and add mustard seeds. When they start to crackle, add green chillies and saute them for few seconds. Then add asafoetida, turmeric and mix. Immediately add the crumbled khaman and sprinkle about 2 tbsp. of water. Mix well and cook for a minute or two.

* Divide the mixture into 2 or 3 serving bowls. Top with sev, cilantro, coconut and pomegranate arils. Squeeze lemon juice over and serve immediately.

Tempering for version 2:
* Heat oil in a pan and add green chillies. Saute them, remove and keep aside. To the same oil, add mustard seeds. When they start to crackle, add asafoetida, turmeric and mix. Immediately add the crumbled khaman and sprinkle about 2 tbsp. of water. (More water can be added if preferred.) Mix well and cook for a minute or two.
* Divide the mixture into 2 or 3 serving bowls. Top with fried green chili, sev, cilantro, and onion. Sprinkle some lemon juice and serve immediately.


Check out the Blogging Marathon page for the other Blogging Marathoners doing BM#104.
You are invited to the Inlinkz link party!
Click here to enter

Comments