HOME        |        ABOUT        |        COPYRIGHT        |        CONTACT        |         RECIPE INDEX        |         INDIAN THAALIS        |         MILLET RECIPES        |        EVENTS' ROUNDUP        

Showing posts with label Cocoa Powder. Show all posts

Monday, March 19, 2018

Chokladbollar - No Bake Swedish Chocolate Balls

These yummy coconut coated oat - chocolate balls are from Sweden and are quite kid friendly. They are very easy to prepare and can be made in no time. The liquid traditionally used to bind these balls is coffee though any other mentioned in the list below can be used if serving kids.

Ingredients: (Yield 6 balls)
2.5 to 3 tbsp. butter, softened but not melted
1/4 cup powdered sugar
1.5 tbsp. cocoa powder
1/2 tsp. vanilla
3/4 cup rolled oats
1 tbsp. liquid (It can be coffee, water, cream, milk, chocolate, orange juice or any other liquid of your choice.)
Shredded coconut

 Method:
* Add all ingredients except coconut to a bowl and mix until well combined.
* Divide the mixture into 6 or 7 portions and roll each into a ball and keep them aside.
* Now roll the balls in shredded coconut and refrigerate them until firm. Or freeze them if in a hurry.

bmlogo
This goes to Blogging marathon #86, under the theme 'All that come round are laddus?'. Check out the page to read what other marathoners are cooking.

Comments

Sunday, February 19, 2017

Double Chocolate Banana Cake (No Eggs and No Butter / Oil Recipe)

I came across this moist and yummy cake when I was looking for something that included both chocolate and banana. The person who posted this baked it in a 8x8 pan but I halved the recipe and baked in a 6 inch loaf pan since I was baking this for one, my daughter. The loaf uses a good dose of fruit in the form of banana and apple sauce. The latter replaces the fat (butter/oil) and hence cuts down some of the calories from the recipe. I further cut down the calories by omitting the egg from the recipe. It was not a light and airy cake but still was a super moist one and was surely a winner. Everyone at my home loved the texture and taste of this treat. I am sure that this guiltless treat is going to be featured in my kitchen more and more in the future. Unfortunately, the tiny loaf was gone before I could take the pictures of the sliced cake and all I could manage were these pictures. I am going to update them later.
Source: Here
Ingredients:
1/2 cup all purpose flour
1/4 cup unsweetened cocoa powder
1/2 tsp. baking soda
1/4 tsp. salt
2 bananas
1/4 cup unsweetened apple sauce
6 tbsp. brown sugar
1 tsp. vanilla extract
 1/2 cup semisweet chocolate chips

Method:
* Preheat the oven to 350 deg F. Grease a 6 inch loaf pan.
* Mix together flour, cocoa powder, baking soda and salt in a bowl.
* Blend bananas and brown sugar together. Add apple sauce and vanilla and mix together.
* Next add the dry ingredients to the wet ingredients and mix well to incorporate. Fold in the chocolate chips, saving some. 
* Pour the mixture into the loaf pan. Sprinkle the saved chocolate chips over the surface. (I ended up with a little left over batter that yielded me an extra muffin.)
* Bake until a tooth pick inserted at the center comes out clean, about 35 - 40 minutes.
This goes to the following events.
1. Blogging marathon #73
2. Srivalli's Kids' Delight event, hosted by Kalyani this month with the theme 'Chocolate'.

Comments 

Friday, August 5, 2016

Mushi Pan / Double Chocolate Steamed Cake

This is one of the dishes I prepared for the marathon early on blogging marathon when I did the global cuisine and has been in my drafts folder for the past two years. This was supposed to be for J - Japan which I tried twice and these steamed cakes had turned out nice and fluffy each time. The original recipe is egg-based one and the buns had nice domes with slight cracks. I used different egg substitutes each time I made them but both times the tops cracked and I wasn't happy with the look and so another dish was picked for that event. However as I mentioned earlier, they have perfect texture and taste and my kids loved them. And so I thought why not publish it at least now? Perfect tasting dishes don't need to look perfect, right? Besides they can be prepared in a small quantity and one doesn't need to turn on the convection oven to prepare these. These are steamed and are ready on the table in a short time, the time that one needs to preheat the oven. And of course these cupcakes can be topped with frosting and none can get wiser about any cracks on the top. :)

The original recipe gave two versions, one with corn and cheese and the other one with chocolate and I went with the latter. I  prepared these in a wide pressure pan though they can be steamed in a frying pan with a lid.
 
Recipe Source: Here
Ingredients:
1/2 cup all purpose flour
1 tsp. baking powder
1.5 tbsp. unsweetened cocoa powder
1 egg substitute
3 tbsp. milk
2 tbsp. sugar
2 tbsp. vegetable oil
2 to 3 tbsp. chocolate chips
4 ramekins + 4 cupcake liners / 4 steel bowls

Method:
* Glass ramekins with paper liners can be used if using the frying pan. I used small stainless steel bowls. Cover the lid with kitchen towel. This will prevent the water formed from condensation to drop on the steamed cakes.
* Add water to a wide pressure / frying pan so that the water level would come halfway up the ramekins / bowls being used. Bring the water to a boil.
* Sift flour, cocoa powder and baking powder into a bowl. Whisk egg substitute, milk, sugar and oil together in another bowl until combined. Pour the wet ingredients into the dry ingredients and mix to combine. Stir in the chocolate chips.
* Pour the mixture up to 2/3rd of the paper liner / cups. Place the ramekins / bowls into the pan and cook covered on medium heat, until a skewer inserted at the center comes out clean, about 8 to 10 minutes.
This is going to be a part of Blogging marathon #67 under 'Pick one appliance and Cook 3' (My choice being pressure cooker). Check here to find out what other marathoners are cooking today.
 

Comments

Sunday, January 24, 2016

Vegan Banana Rabanada / Brazilian French Toast


Rabanada is a Brazilian version of French toast and is served as part of Christmas breakfast there. The bread slices are dunked in egg and milk mixture, soaked, fried and served with a generous sprinkling of cinnamon-cocoa mixture. This vegan version is made with bananas, milk and cornstarch and of course uses no eggs. I went by Pavani's idea to serve it with maple syrup as my daughter too preferred it that way though originally, maple syrup is not associated with rabanada. This rabanada had become her recent favorite and thanks Pavani, for the recipe. And there may be extra banana mixture leftovers if serving only 2 or 3 as it happened to me and I used it to make pancakes later.


Ingredients:
1 baguette
2 very ripe bananas
1&1/2 cups almond milk or any other non-dairy milk
2 tbsp. cornstarch
1 tsp. vanilla extract
Vegan butter / Cooking spray
1 tsp. ground cinnamon
1 tbsp. unsweetened cocoa powder

 Method:
* Sliced baguette diagonally into 1" pieces.
* Blend bananas, milk, cornstarch and vanilla until smooth.
* Arrange the baguette slices in a single layer on a baking sheet. Pour the banana mixture over the bread and flip the slices to coat all over evenly. Let them sit for 10 minutes. Then flip them over and soak again for 10 more minutes.
* Preheat a non-stick skillet, over medium heat. Melt butter over the pan or spray with cooking spray. Place as many bread slices as the pan can hold. Cook for 5 -7 minutes or until it is toasted golden brown. Flip to the other side and cook until it turns golden brown as well.
* Keep them covered with foil to keep them warm while cooking other batches or serve them immediately.
* Mix together cinnamon and cocoa powder together in a small bowl. 
* When ready to serve, arrange the french toast on the serving palte and generously sprinkle the cinnamon-cocoa mixture. 
* Serve with maple syrup / fruit if desired.

This goes to Blogging marathon #60 under the theme 'Bookmarked Recipes'. Check the link to see what other marathoners are cooking.


 Comments

Saturday, September 13, 2014

A Lazy Cake from Lithuania ~ Tinginys

 
Event: BM #44 , Around the World (A - Z series) 
Choice of Country: The Republic of Lithuania
Capital City: Vilnius
Official Language: Lithuanian

Lithuania is a country in northern Europe and is situated along the southeastern shore of the Baltic Sea. It's cuisine features the products suited to the moist and cool northern climate of Lithuania. Potatoes, barley, rye, berries, beets, greens and mushrooms are grown locally and widely used. Dairy products are one of it's specialities. It's cuisine is similar to the Eastern European regions since it shares a similar climate and agricultural practices. The centerpiece of it's cuisine is dark rye bread and the national dish is 'Cepelinai' - a potato dumpling filled with minced meat. Apples, plums and pears are widely used fruits while most frequently used meat is pork followed by beef , lamb, chicken, rabbit, duck and goose.

I came across 'Tinginys' when I was looking for some Lithuanian desserts and it right away caught my attention, for a right reason. This cake is quick and easy to put together and no baking involved. It cannot get easy anymore and so they have aptly named it 'Tinginys' which translates to lazy. Primarily the recipe requires four ingredients - hard biscuits like butter biscuits / digestive biscuits, sweetened condensed milk, butter and cocoa powder.
It is said that a Lithuanian woman accidentally created this recipe in 1967. She added more sugar while cooking chocolate, resulting in a syrupy liquid. The woman deciding to salvage the recipe added some biscuit bits to it. The mixture when cooled resulted in a new dish, tinginys.  Later modifications occurred, such as letting the mixture cool down, rolling it on a plastic bag, and then cutting it into pieces. People decided to called it "lazy" because it was very easy and quick to prepare.
Another take on this lazy cake that has originated in Italy and have become equally popular among other European nations is chocolate salami. Though it doesn't contain any salami, it is named so because of the appearance. It contains chocolate, eggs and alcohol though the latter went missing from the recipe while crossing over countries and cultures. 

Ingredients:
14 oz can sweetened condensed milk
7 tbsp  / 100 grams melted butter
5 - 6 tbsp. cocoa powder
200 grams biscuits (We are looking for plain, hard and not too much crumbly kind
A handful of dried fruits & nuts (Optional. I used dried, sweetened cranberries and walnuts.)

Note:
It was too sweet for our taste and I would suggest adding unsweetened condensed milk and adjust the sugar quantity to taste. Icing sugar / powdered sugar would be convenient.

Method:
* Break the cookies into about half inch sized bits.
* Combine butter, condensed milk and cocoa powder in a mixing bowl until smooth without lumps.
* Pour the mixture on biscuit pieces and just stir to coat. Stir in any dry fruits / nuts if using.
* Place the mixture on a wax paper / parchment paper / foil and fold the paper over. Shape the cookie mixture into the shape of a rectangle and wrap it tightly inside the parchment paper or aluminum foil.
* Chill in the refrigerator or the freezer. Slice when ready to serve.

Comments

Wednesday, February 12, 2014

Vegan Orange - Chocolate Cupcakes

 
I stumbled upon this recipe when looking for any fruit and chocolate based cupcakes and oh boy, I am glad that I did. This is almost a 5 star recipe, in my opinion. I should however admit that in the middle of baking, my heart sank seeing the sinking tops of the cupcakes. I had zeroed in on this recipe and was in no mood for further recipe hunting. I gave up and thought that I may have to fall back on any standard banana chocolate one. However by the end of baking they rose again, leaving a big happy smile on face. And so if the cupcakes sink in the initial stages of baking following this recipe, I guess there is no need to worry.
The taste and the texture of the cupcakes are fabulous. You can also add a tsp. of orange zest to enhance the orange flavor. The recipe had nuts in them but instead I chose to go with chocolate chips as this was a chocolate based theme. This is basically a cake recipe and suggests to use a 8-inch square or 9-inch round baking pan. I decided to use a muffin pan instead since I was planning to bake cupcakes for the marathon.

Ingredients: (Yield 16 cupcakes)
1/2 cup soy milk at room temperature (or milk for a non vegan version)
2 tbsp. apple cider vinegar
1 & 1/2 cups all purpose flour
1 tsp. baking soda
1/3 cup unsweetened cocoa
1 cup sugar
1/2 cup mixed chopped nuts (optional)
1/2 cup vegetable oil
1/2 cup orange juice
2 tsp. vanilla extract
1/2 cup vegan chocolate chips (or chopped nuts)
 
Method:
* Grease the cake tin / muffin pan you are going to use and keep it aside. Or liners can be used for the muffin pan. 
* Whisk milk and vinegar in a bowl and leave aside for 3 to 4 minutes.
* Preheat oven to 375 deg F / 190 deg C.
* Sift flour, baking soda and cocoa powder into a mixing bowl. Add sugar and mix well.
* Mix orange juice, oil and vanilla and add it to the vinegar mixture. Beat just to combine.
* Add the liquid ingredients to dry and whisk to combine forming a non lumpy batter.
* Bake for 25 - 30 minutes or a tooth pick inserted into the center comes out clean. I halved the original recipe to get 8 cupcakes and mine were done in about 25 minutes.
See how beautiful the texture is.
 
This is going to be a part of BM # 37 under the theme of "Chocolate Based Muffins / Cupcakes".
 

Monday, February 10, 2014

Basic Vegan Chocolate Cupcakes

Chocolate, cheese and olives come under 'I absolutely love" category for my daughter and she rarely refuses them when offered. When I say chocolate, not only the candies and other chocolate based desserts, she even doesn't spare the bitter chocolate chips. On the spur of the moment, I picked chocolate based muffins/ cupcakes theme for this week's marathon keeping her in mind. Later when I started thinking about the recipes and the quantity of cupcakes I may end up with, I started to feel hesitant. Besides, I didn't want to end up with repetitive looking recipes. However after some investment of time online and other sources, I got to try some recipes for the first time in my kitchen that turned out to be absolute hits.
The first recipe inspired from here is a basic vegan version of chocolate cupcakes. It is a fool proof version and yields very yummy, perfectly done cupcakes. Moist and fluffy - the kind anyone would love to have. Going by the reviews, the frosting suggested in the recipe is equally delicious but the lazy me decided to skip it. I halved the original recipe, reduced the sugar quantity and got half a dozen cupcakes.

Ingredients: (Yield 12 cupcakes)
1 cup soymilk (or plain milk for non-vegan version.)
1 tablespoon apple cider vinegar
3/4 cup granulated sugar (Vegan sugar)
1/3 cup canola oil (or softened butter for non-vegan version.)
1 teaspoon vanilla extract
1 cup all-purpose flour
1/3 cup cocoa powder
3/4 teaspoon baking soda
1/2 teaspoon baking powder
1/4 teaspoon salt
Method:
* Sift together flour, cocoa powder, baking soda, baking powder, and salt in a bowl and keep it aside.
* Whisk together milk and vinegar in a large bowl and set aside for 3-4 minutes to curdle.
* Preheat oven to 350°F. Grease the muffin pan or line it with paper or foil liners.
* Add sugar, oil and vanilla extract to the soy milk mixture and beat until foamy. Add the dry ingredients to the wet ingredients and beat till no lumps are left.
* Pour the batter into muffin cups, filling up to 3/4th of them.
 * Bake for about 18 to 20 minutes or until a toothpick inserted into the center comes out clean.
* Transfer to a cooling rack and let cool completely.

This is going to be a part of BM # 37 under the theme of "Chocolate Based Muffins / Cupcakes".
 
Comments

Sunday, January 19, 2014

Vegan Chocolate Crinkle Cookies

 
The first thing we do when planning a long train / bus journey in India is to book tickets as it is hard to get reservations at the last moment if you don't plan ahead. Here in US, it is complete opposite. Though the fares are drastically cheaper and tickets would be readily available, long bus / train journeys are practically zero occurrence for us. While exploring these options, we have noticed that sometimes one might need to take a very, very long route than required, ending up spending more time than needed in travel. If it is a 1000 mile round trip and it is summer, we prefer our minivan to travel and if the distance is more, we just fly. I prefer to travel in our own vehicle than a flight because of the convenience and more luggage space. Besides, we get to visit and explore whatever catches our fancy along the route. And I can stuff as much as food as I like. :)
Though I don't sit and make rotis for our travel here, I use ready made puliyogare mix or prepare tamarind gojju in advance so that we have one substantial meal during the travel. Besides savory stuff, I bake a subtly sweet bread and a couple of variety of cookies for my kids. These chocolate crinkle cookies inspired from here is one such variety of cookies that are good for travel and especially for kids like my daughter who loves chocolate. They are easy, "no fuss" cookies, taste good with an appealing crinkled look. The only catch is the dough needs to be chilled for at least 6 hours. If you are interested, here are lime crinkled cookies that taste fabulous as well. 

Ingredients: (Yields 1 & 1/2 dozen cookies)
1/2 cup + 4 tsp all purpose flour
1/2 tsp baking powder
1/8 tsp salt
1 tbsp. flax meal powder
3 tbsp water
7 tbsp. sugar
3 tbsp. vegetable oil (I used canola oil)
1/4 cup cocoa powder
1 tsp vanilla extract
Powdered sugar / Icing sugar for coating

Preparing cookie dough:
* Mix flax meal and 3 tbsp. of warm water in a small bowl and keep aside for about 5 minutes.
* Mix flour, salt and baking powder in a mixing bowl and keep it aside.
* Beat oil and sugar in another large mixing bowl. Then add cocoa and beat just until combined.
* Next add flax meal mixture and vanilla to the sugar mixture and beat once again.
* Add the flour mixture gradually to the cocoa mixture, beating well. If the dough becomes thick and if you are not able to beat at this stage, work with hands until the dough is formed. It would be slightly sticky.
* Cover and refrigerate the dough for at least 6 hours. I refrigerated it overnight, for about 10 hours.
The Baking Part:
* When ready to bake, preheat the oven at 350 deg F / 175 deg C for 10 minutes. Grease the baking sheet or line it with parchment paper.
* Take the dough out of the refrigerator and shape it into 1/2 tbsp. sized balls and roll them in icing sugar.
 * Arrange them on the prepared baking sheet, 2 inches apart.
 
* Bake for about 10 to 13 minutes or until almost no indentation remains when touched lightly. Don't be tempted to bake longer.
* Let them cool slightly and transfer them to a wire rack and cool completely. Store them in airtight container.

This is my post under "Travel Dishes" theme for BM#36. Check here to know what other marathoners are cooking. 

Comments  

Saturday, January 12, 2013

Eggless Chocolatey Cucumber - Walnut Cupcakes


Each month, Kalyani keeps throwing an interesting combination of two ingredients for Magic Mingle, which seem to not at all work together in any recipe. I guess that's what makes this event more challenging. I don't wrack my brain over our personal issues as much as I do for blogging events, my husband notes amused. A salad was out of question as I had already posted it. This time as usual when I was going bonkers over cucumber - walnut combination, my husband decided to put me out of my misery and suggested to core the cucumber and fill it with walnut stuffing. I wasn't sure whether he was serious or joking. I therefore decided to leave it for another time. :)

I took the hint of walnuts and decided to settle with a baking recipe since I like the crunch, the nut offers. And also I wanted it to be chocolatey to mask the flavor of cucumber, if any present. I  prepared these cupcakes inspired by these zucchini ones from here.

I didn't cream the sugar and butter since I was using a smaller proportion of ingredients. I just combined all the ingredients as in case of muffins. I used the chocolate frosting and sprinkled with walnuts. The resulting cupcakes had a perfect fluffy, moist texture with current amount of sweetness. Even the kids couldn't guess the presence of cucumber.

Ingredients: (yield 7 cupcakes)
3/4 cup all purpose flour
2 Tbsp cocoa powder
6 Tbsp sugar
3/4 baking soda
1/4 tsp salt
1/2 cup milk + 1 Tbsp vinegar
2 Tbsp melted butter
1 tsp vanilla
1/2 cup peeled and shredded cucumber without seeds
1/2 cup roughly chopped walnuts (Save 2 Tbsp for sprinkling on the tops.)

Method:
1. Add vinegar to milk in a cup and leave aside for five minutes for the mixture to curdle.
2. Preheat the oven to 350 deg F. Line the muffin cups with paper liners or grease them.
3. Sift together flour, baking soda, salt and cocoa powder.
4. Add the curdled milk mixture, butter, sugar, vanilla, cucumber and walnuts to the dry ingredients. Stir until just combined.
5. Fill the muffin cups up to about 2/3rds with the batter and bake for 15 - 18 minutes or until a toothpick inserted at the center comes out clean. Mine were done in 16 minutes.
6. Cool them on a wire rack. Remove them from the muffin tin and frost them when they are completely cool. Frost and sprinkle the remaining walnuts.

Note:
If not frosting, increase the sugar quantity in the recipe by 2 -3 Tbsp. They will be bland otherwise.

 
This goes to BM#24 under the theme of "Cooking with Appliances". Check here to find out what others are cooking during the marathon.

Thursday, January 10, 2013

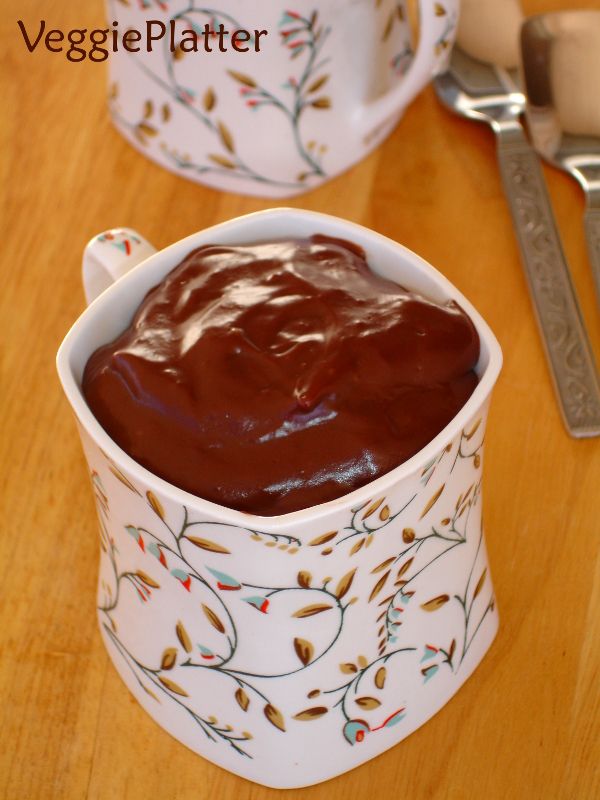
Quick Microwave Chocolate Pudding


Whenever I ask my 11 year old to make a list for our weekly grocery shopping, the two things instantly that come to her mind are chocolate pudding and macaroni & cheese. They are so appealing to her that she never gets tired of them. If given a choice, she can survive on them alone. Chocolate pudding is her most favorite evening snack and so obviously, none of our grocery shopping goes by without buying cartons of chocolate pudding.
While she enjoys those store bought puddings, I keep worrying looking at the long list of chemicals added in the form of preservatives to the simple pudding. And so I was thinking of trying it at home from a long time now. Recently when I was browsing for condensed milk recipes, I came across this recipe at allrecipes and was impressed by the positive reviews the recipe got. The recipe is very simple even for a novice cook and can be prepared in a jiffy. I consider it a hit as my daughter was happy with this pudding. Try it if you are looking for a quick one to satisfy your sweet tooth. 

Ingredients: (4 servings)
1/2 cup sugar
1/3 cup cocoa powder
3 Tbsp cornstarch
2 cups milk (at room temperature or warm)
1 tsp vanilla essence

Method:
* Mix sugar, cocoa and cornstarch in a microwave safe bowl.
* Gradually add milk to the bowl and whisk so that no dry lumps are present.
* Microwave the mixture for 3 minutes on HIGH. Remove and stir the mixture. Again at one minute intervals, cook for about 2 minutes or until shiny and thick.
* Stir in the vanilla and butter.
* If serving cold, place a piece of plastic wrap directly on the surface of the pudding to prevent a skin from forming and chill. (I skipped this step as my daughter likes to eat the pudding at room temperature.)

Note:
* I halved the recipe to get 2 servings and it was done under less than 4 minutes.

This goes to BM#24 under the theme of "Cooking with Appliances". Check here to find out what others are cooking during the marathon.

Comments
 

Wednesday, December 26, 2012

VeggiePlatter Turns 6


I guess "double birthday and a triple chocolate cake" would have been an apt title for this post. :)

The idea of a recipe journal took the form of VeggiePlatter, this month six years ago. This online culinary journey of mine has been fun so far, earning friends along the way as an added bonus. I would like to take this opportunity to thank my readers/fellow bloggers who invest their time going through this blog & leave comments and to those strangers who email me appreciating my work. Thank you. :))

And BTW, yours truly, you know who celebrated her birthday yesterday. Hope I turned wiser as well along getting older. :) My daughter who is turning into a chocoholic wanted me to bake a chocolate cake on the occasion. Though I have a chocolate cake recipe, I used the chocolate muffins recipe for the cake as we had really liked it earlier and also I had to get rid of some overripe bananas. I used store bought Pillsbury chocolate fudge frosting and some decors upon my daughter's insistence. My daughter enjoyed it meaning the recipe was a hit. It is a flavorful cake and the texture is somewhere between fluffy and dense.


I just doubled the recipe I used for the muffins but again mentioning the ingredients anyway.
 
Ingredients:
1/4 cup milk + 1 tsp apple cider vinegar
1&1/2 cups all purpose flour
1/4 cup cocoa powder
1 tsp baking soda
1/4 tsp baking powder
1/2 tsp salt
1 cup sugar
1/2 cup semisweet chocolate morsels
1 tsp vanilla extract
1 & 1/3 cup mashed bananas
5 Tbsp melted butter / oil
1/2 pound chocolate frosting
1 Tbsp cake sprinkles (optional)
 
 
Method:
1. Add vinegar to the milk which is at room temperature. Leave aside for five minutes.
2. Preheat the oven at 350 deg F. Grease a cake pan.
3. Sift flour, baking soda, baking powder, salt and cocoa powder.
4. Add milk-vinegar mixture, vanilla and butter to a bowl and mix well. Add mashed bananas, sugar and combine well.
5. Now add the sifted dry ingredients from step 2 to the wet ingredients in step 3. Mix well and stir in the chocolate chips.
6. Pour the batter into the prepared pan and bake for 40 - 45 minutes or until a toothpick inserted at the center comes out clean.
7. Cool the cake and remove from the cake pan.
8. Apply the frosting and decorate if desired.


Wednesday, April 25, 2012

Chocolate - Walnut Pedas

C for Chocolate - Walnut Pedas

These are no cook, no fuss pedas that were inspired from here. Really perfect ones on festive days or when you have unannounced guests since they can be done in a jiffy with minimal efforts. These delicious pedas were done in about five minutes and we finished them in one go. Check what other marathoners are cooking during BM#15..

Ingredients: (I got about 9 pedas)
1/4 cup cocoa powder
1/2 cup milk powder
1/2 cup walnuts
6 Marie biscuits
3 Tbsp sugar powder or as preferred
1 - 2 Tbsp milk


Method:
Grind finely all the ingredients except milk. Divide the mixture into eight portions. Add milk as needed and shape them into pedas.

Comments

Sunday, February 19, 2012

Eggless Brownies


I don't fuss about calories and such when I come across a good brownie. I have been in love with brownies since the first time I ate them 14 years ago and don't mind eating a whole piece when offered. My kids too love it and so thought of trying them this marathon when I am posting under "Eggless / Vegan Baking" theme. My son has been raving about the awesome brownies his friend's mom makes but since I have to yet get her recipe, I thought of trying them from here in the meantime since they were eggless.

I don't own a brownie pan and so I increased the quantity of the ingredients by 50% more and baked in a loaf pan and got chunky brownies. After trying them, we felt that the brownies need to be more moist though it is hard to figure it out from the images. I skipped the jam and not sure whether it has to do anything with the final outcome. The recipe needs a little tweaking to suit our tatsebuds, if I try it the next time.

Ingredients:
1 & 1/4 cups all purpose flour / maida
1/3 cup cocoa powder (I used Hershey's brand.)
3/4 tsp baking powder
1/4 Tbsp coarsely chopped walnuts
3/4 cup sugar
1/4 cup butter (at room temperature)
1/2 cup + 2 Tbsp yogurt
1/4 cup milk
1 tsp vanilla essence

Method:
* Preheat the oven to 375 deg F / 190 deg C.
* Sieve together flour, cocoa and baking powder.
* Cream butter and sugar in a bowl. Add milk, yogurt, vanilla essence to the sugar-butter mixture and mix well. Then add the sieved dry ingredients and half of the walnut pieces and mix well.
* Grease and dust a brownie pan with flour. Add the batter to it and sprinkle the remaining walnuts on the top.
* Bake until a toothpick inserted at the centre inserted comes out clean or for about 35 - 40 minutes.
* Cool and cut into squares.


Linking this to
1. Srivalli's "Kid's Delight" event, guest hosted by Priya this month with the theme "Eggless / Vegan Bakes".
2. Anjali's "Cakes, Cookies & Desserts" event.

Check here to find out what the other marathoners participating in this BM are cooking.

Comments

Monday, December 26, 2011

Eggless Brownie Cookies


This is one of cocoa recipes that I bookmarked recently to try. If my memory serves me right, it must be from diabetic living website. The recipe attracted me since it was mentioned that these cookies taste like rich brownies and to top that, they were eggless. The recipe is quite an easy one and so I tried them around 11 pm last night when I was not feeling sleepy. :)
The recipe mentioned that the cookies would be set by 8 - 10 minutes. The scoops of dough remained unaltered in shape until the sixth minute and so my daughter and I sat in the kitchen thinking that they would be ready by the next couple of minutes. However, after that period, they started to spread and began to become almost gooey. I thought that this experiment was going to end in a disaster and started to curse myself for trying those at the middle of the night. However, I kept them baking for around 8 - 10 minutes more and removed them thinking that probably they would end up in trash.
Nope, I was wrong. They were absolutely delicious and crispy. I forgot to sprinkle the powdered sugar at that hour but they were absolutely good. They are very dark brown in color, just like brownies but were perfectly done. They were more like chocolate cookies than brownies and received more than a seal of approval from my kids. I need to bake one more batch this week. :)

Ingredients:
(The following ingredients yield 24 cookies. If you want to halve the recipe to get a dozen cookies, use the ingredients mentioned in the parentheses / brackets. )
1 cup all-purpose flour (1/2 cup)
1/4 teaspoon baking soda (1/4 tsp)
1/4 cup butter (2 Tbsp)
2/3 cup sugar (5 Tbsp)
1/3 cup unsweetened cocoa powder (Heaped 2 Tbsp)
1/4 cup packed brown sugar (2 Tbsp)
1/4 cup buttermilk or sour milk* (2 Tbsp)
1 teaspoon vanilla
Nonstick cooking spray
1 tablespoon sifted powdered sugar (I didn't use it. )
Note
* To make 1/4 cup sour milk, pour 3/4 teaspoon lemon juice or vinegar to a glass measuring cup. Add enough milk to make 1/4 cup total liquid; stir. Let mixture stand for 5 minutes before using


Method:
1. Combine flour and baking soda in a bowl and set aside. Melt butter in a saucepan and stir in sugar, cocoa powder and brown sugar. Add buttermilk, vanilla and flour. Stir just until combined. Cover and chill dough for 1 hour. When you remove the dough out, it would be firm. 
2. Preheat the oven at 350 degrees F.
3. Drop chilled dough by rounded teaspoons onto a greased cookie sheet. The cookies will spread while baking and so space them accordingly.
4. Bake for 8 to 10 minutes or until edges are set. (Actually I baked around 16 - 18 minutes since they were not set by 10 minutes and were almost at semi liquid stage.)
5. Transfer to a wire rack after a couple of minutes and let cool.
6. Sprinkle with powdered sugar.


This is my day 4 post in BM#11 with "eggless baking" theme. Check here to find out what my fellow marathoners are cooking during this marathon.

I am sending these to the following events -
Bake Fest # 2, hosted by Sangee, originally started by Vardhini
Bake With Your Heart by Khushi
CC - Holiday Baking by Sravs
Christmas Delicacy by Julie
Let's Cook - Baked Goodies, an event by Radhika.
Sinful Delights hosted by Vardhini
Sweet Baked at Krithis and Dennys.

Comments

Sunday, July 17, 2011

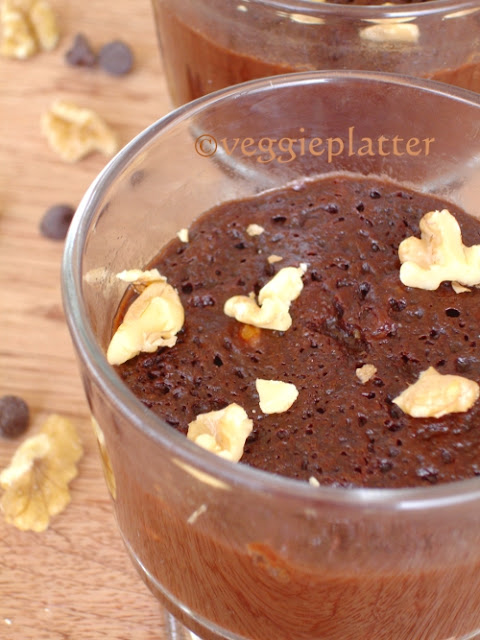
Easy, Eggless Microwave Brownie in Two Minutes


Before proceeding to the recipe, I should mention that this is such a ridiculously easy and quick recipe that even a kid (of course a responsible one) can master it. It is rich, decadent and more over an eggless version. It can be put together under 5 minutes - 2 minutes for preparation and 90 seconds cooking time. What else do we need in a recipe? J
Over the years, I kept noticing this particular recipe in blogosphere under different names. A mug cake / an instant microwave cake / microwave brownie / microwave chocolate cake or what ever it was, the idea of a baked dessert under 2 minutes sounded so preposterous that I had to check it personally. Somehow the time never came until I saw Prathibha's recipe and her tempting images. I did try it at last and the recipe was an instantaneous hit at my home. We liked the 'not overly sweet' flavor of this moist brownie / cake and seems like have developed a kind of addiction to it. The kids would go "Mom, could you please make that MW brownie, it is so easy, right"? What would you do when the kids are asking so politely and you can whip up a dessert under less than 5 minutes? Of course you oblige. Probably I have cooked this for about 40 times so far and each time, it was a success and we have loved it.
My 12 year old opted for this when he had to cook in front of his class because of the ease and simplicity of the recipe. And one should not forget how rich and delicious it tastes.


Ingredients: (1 - 2 servings)
2 Tbsp unsalted butter + a pinch of salt or 2 Tbsp salted butter
2 Tbsp milk
1/2 tsp vanilla essence
4 Tbsp icing sugar (or powdered sugar)
2 Tbsp all purpose flour / maida
2 Tbsp cocoa powder
2 Tbsp chocolate chips / dark chocolate bits
2 Tbsp walnut pieces

Method:
* Melt the butter (and salt if using) in a microwave safe bowl and let cool. Then add milk and vanilla essence to it and whisk well.
* Next add all the dry ingredients to another bowl and mix well.
* Then combine the wet and dry ingredients in another microwave safe bowl and mix well.
* Microwave the mixture for only 90 seconds. The surface would be soft and dry by the time. Let it stand for a couple of minutes and then remove from the microwave and enjoy while it is still warm.
* It can be served with vanilla ice cream or some chocolate sauce or whipped cream for extra decadence. J


My kitchen notes:
1. Measure accurately the ingredients or else you will end up with not such a delicious product.
2. Even cooking for an extra 30 - 60 seconds have resulted in a powdery brownie.
3. The brownie mixture expands while cooking and so, the initial mixture should fill only about 1/2 of your baking utensil.
4. I have baked this in microwave safe bowls and coffee mugs.
5. Also preparing this in large qunatities haven't yielded good results for me.


This is my second day post of blogging marathon #7 with the theme of 'Microwaved based' cooking. Check what the other marathoners are cooking today.
This goes to "Only Baked" event at Tamalapaku, an event originally started by Pari.

Comments