HOME        |        ABOUT        |        COPYRIGHT        |        CONTACT        |         RECIPE INDEX        |         INDIAN THAALIS        |         MILLET RECIPES        |        EVENTS' ROUNDUP        

Showing posts with label Microwave Cooking. Show all posts

Sunday, February 4, 2018

Salted Peanuts (Microwave Version)

It is turn again for another recipe that needs only three ingredients. The ingredients which are commonly found in most of the kitchens. The recipe is for salted peanuts, a common snack sold on many Indian streets / beaches. I toasted them in microwave and they would be ready in about 5 minutes.
Ingredients: (Yield 2 -3 servings)
1.5 cups raw peanuts
Salt to taste (or about 1/4 tsp.)
Water 

Method:
* Rinse the peanuts with water in a colander and drain completely.
* Sprinkle salt over them and mix well to coat the peanuts.
* Spread the peanuts in a single layer on a microwave safe plate. I used a glass pie pan.
* Toast the peanuts until they turn crispy, turning them intermittently. It took me about five minutes to toast them crisp.
 
This post goes to Blogging marathon #85 under the theme "Recipes using three ingredients". Check out the page to read what other marathoners are cooking.
 bmlogo

Comments

Saturday, February 11, 2017

Low Cal, Microwave Version Carrot Halwa

This microwave version of the north Indian classic treat carrot halwa aka gajar ka halwa is a great substitute if one is looking for a quick and low calorie version. I am the one who mostly ends up consuming the sweet stuff prepared in my home and so, I try to cut calories from those dishes whenever and as much as possible and go for quick versions. This version though not as rich as the traditional version, still tastes good. This can be prepared on the stove top too. I have prepared a small portion here but it can be scaled for a larger quantity.

Ingredients:
2 cups grated carrot
1 cup fat-free milk 
Sugar to taste (I used 6 gm. splenda)
1/4 tsp. ground cardamom
Nuts to garnish
Method:
* Add milk and carrot to a microwave safe bowl and cook stirring occasionally in the microwave, until the milk evaporates. (Saute carrot in a tbsp. of ghee before adding milk if preferred.)
* Next add sugar and cardamom to the carrot mixture. Continue to cook until the mixture until the sugar dissolves and incorporates into the mixture.
* Garnish with nuts and serve warm or chilled.

Other versions posted here.
Carrot - Almond halwa
Carrot Halwa (Microwave version)

This goes to Blogging marathon #73, under the theme 'Sweets prepared in less than an hour'. Check here to find out what the other marathoners are cooking as part of the BM.

Comments 

Friday, March 4, 2016

Microwave Coconut Oatmeal

 
Everyone out there knows that oatmeal is one of the quickest and healthy breakfast options around and I don't need to reiterate the benefits of this humble dish. However oatmeal may get monotonous after certain point, if one sticks to the plain version despite the healthy goal dangling in front of our eyes. I usually keep rotating the variations for the same reason and today's version uses coconut. I finish off the preparation of oatmeal with a generous dose of coconut milk and use some fresh fruit and a sprinkling of sweetened desiccated coconut in place of the sweetener and the result is a tasty bowl of jazzed up oatmeal that can be prepared in a jiffy.
 
Ingredients: (1 serving)
1/2 cup old fashioned oats
3/4 cup dairy milk / water
3/4 cup coconut milk
2 tbsp. toasted desiccated sweetened coconut
1/4 cup chopped fresh fruit / dry fruits / nuts
Sweetener to taste if preferred

Method:
* Add the desiccated coconut to a pan and toast until it turns golden brown, stirring constantly to avoid burning. Remove from the fire and keep it aside.
* Meanwhile, add oats and water / dairy milk to a microwave safe bowl and place it in the microwave. Cook until the oats are done.
* Remove the bowl and stir in the coconut milk, toasted coconut, fresh fruit and sweetener if using. Serve immediately.


This is going to be a part of Blogging marathon #62 under the theme 'coconut' and check here to find out what other marathoners are cooking today.

Comments

Tuesday, December 22, 2015

Recipe Index - Microwave Cooking

Here is a list of dishes that I have posted so far that are cooked using a microwave.  

BAKING:

Apple Crisp in 2 Minutes
Banana Mug Cake 
Bitter Gourd Crisps
Chocolate Mug Cake
Chocolate - Popcorn Trail Mix
Dhokla 
Eggless Brownie in 2 minutes
Eggless Custard Powder Cake in 5 Minutes
Eggless, Microwave Cake (10 minutes)
Gulkand - Nutella Mug Cake
Mac and Cheese in a Mug 
Masala Peanuts
Moongdal
Nutella Mug Cake 
Orange Mug Cake  


BASICS:
Roasting Dals/Flours/Nuts/Spices
Toasting Papads/Fryums
  
DESSERTS:

ABC Halwa
Apple Crisp in 2 Minutes
Banana Mug Cake 
Banana Payasam
Beetroot - Dates Halwa
Carrot Halwa
Chocolate Pudding
Condensed Milk Halwa 
Dates - Nuts Pudding
Eggless Brownie in 2 minutes  
Eggless Custard Powder Cake in 5 Minutes 
Eggless, Microwave Cake (10 minutes)  
Gulkand - Nutella Mug Cake
Kalakand 
Orange Mug Cake
Pineapple - Almond Kheer 
Sweet Potato Kheer 
Vermicelli-Almond Milk Kheer
Wintermelon Halwa
 
RICE / BREAKFAST:
Arroz Com Coco
Borugula Upma / Puffed Rice Upma
Coconut Oatmeal
Khichdi

SNACKS:

Bitter Gourd Crisps
Dhokla
Masala Peanuts / Spicy Peanuts
Salted Peanuts 


SOUPS / STEWS:
Creamy Cauliflower Soup
Danedar Dal
Masoordal - Chayote Sambhar 
Potato - Carrot Soup
Vegetable Soup

VEGETABLES:
Aloo Methi Matar
Asafoetida Flavored Potatoes
Aviyal
Bitter Gourd Crisps
Cucumber - Coconut Subzi
Palakoora Pulusukoora
Spicy Potatoes
Spinach Raita


JAMS / CHUTNEYS:
Pear Jam
Pineapple Jam
Tomato - Capsicum Chutney
Tomato - Cilantro Chutney

Comments

Wednesday, November 4, 2015

Microwave Dates - Nuts Bread Pudding


This is a simple and easy bread pudding that I saw on one of the cook shows I used to watch earlier. The pudding takes altogether about 10 minutes from start to finish in a microwave and is a yummy way to use up any leftover bread one might have. I usually like to prepare this in small bowls for individual servings and so have given measurements for that as well.

Ingredients:
1/2 liter boiled and cooled milk
1/4 cup sugar
3 tbsp. custard powder
6 whole wheat bread slices
1/2 cup chopped dates
10 gm. each - raisins, cashews & almonds

Method:
* Add sugar to milk and stir until it dissolves. Then add the custard powder to the milk and whisk/ blend until there are no lumps. Keep it aside.
* Chop off the edges of bread slices. Cut each bread slice diagonally into 2 triangles.
* Arrange the 3 cut bread slices in a microwave safe pan in a single layer next to each other and sprinkle dates on top. Next sprinkle raisins, cashews and almonds uniformly. Place the remaining 3 triangular slices of bread over them and sprinkle dates and the other nuts as in the previous step.
* Pour the custard powder - milk mixture over the bread slices and let it sit for 2 minutes to soak up the milk.
* Microwave for 5 minutes and serve immediately. Garnish with honey if desired.

Ingredients for 2 individual servings:
2 & 1/2 whole wheat bread slices
3/4 cup boiled and cooled milk
3 tbsp. sugar
2 tbsp. custard powder
1/2 cup nuts and dry fruits (I used chopped dates, walnuts, cashews, dried cranberries and raisins.)

Method:
* Trim off the edges of the bread slices and tear them into small pieces.
* Take one cup sized microwave bowl and arrange the bread pieces in a single layer. Try to fit as many pieces as you can at the bottom of the bowl so that there are no gaps and no overlapping.
* Sprinkle about 2 tbsp. of dates and other nuts used, uniformly over the bread slices.
* Repeat the bread and nut layers one more time.
* Add sugar to milk and stir to dissolve. Next add custard powder and whisk until lump free. Pour half of the milk mixture over the bread and nut layers and let it sit for 2 minutes.
* Take another one cup sized microwave safe bowl and repeat the above steps with the remaining ingredients.
* Microwave each bowl for 5 minutes and serve immediately.

This is my entry to
1. Blogging marathon #58
 
2. Srivalli's Kids' Delight event, hosted by Kalyani this month under the theme 'Cooking with Whole Grains'.

Comments

Monday, October 12, 2015

Gulkand - Nutella Mug Cake (Eggless)

 
Yes, you read that right. Today's 'Mug Treat' is made with gulkand, the popular rose petals' preserve from the Indian subcontinent. The gulkand I used here had travelled with me all the way from India during our last trip. Usually I refrain from carrying food items from India excepting one or two items that I cannot get hold of here locally. I had visited the Coorg area during our India trip this summer and while returning from Talakaveri, the husband spotted shops selling the locally harvested treasure - varieties of coffee, tea, honey and spices to name a few. As usual, he bought loads of stuff as if we were locals and eventually those had to be gifted to our folks back home. I bought a bottle of gulkand just because I happened to spot it and hadn't tasted it in decades. Besides the pretty lady at the counter had mentioned that they promote the local women by selling their homemade jams / preserves and chocolate and I decided to support the cause.
I thought of making a mug cake based on gulkand alone when I started the recipe but the daughter decided that she would prefer a Nutella based one. I didn't want to disappoint her and so happened to stir in just a spoonful of Nutella to fool her. However it turns out that even the tiny amount of Nutella used dominates the flavor department. The cake turned out chocolaty with hints of gulkand flavor. It was yummy though I would prefer to omit the chocolate part next time just to savor the robust flavor of gulkand.

Ingredients:
3 tbsp. all purpose flour / wheat flour
1/4 tsp. baking powder
A pinch of salt
2 to 3 tsp. powdered sugar 
3 tbsp. warm milk
1/2 tsp. apple cider vinegar
2 tbsp. gulkand
1/2 to 1 tsp. Nutella
1 tbsp. oil
Method:
1. Combine flour, baking powder, salt and sugar.
2. Add warm milk and apple cider vinegar to a bowl and stir. Leave it for about 10 seconds or until the mixture curdles. Add gulkand, Nutella, oil and all the dry ingredients from the step 1 to the bowl. Mix the ingredients well without any lumps. (Or you can prepare the cake batter directly in the mug.)
3. Transfer the mixture to a microwave safe, 1 cup capacity mug / cup. Bake for about 1 to 1 &1/2 minutes, depending upon the microwave strength or until a toothpick inserted at the center comes out clean. Serve immediately and enjoy.
 
This goes to blogging marathon #57 under the theme 'Mug Treats' and check here to find out what other marathoners are cooking today.

Comments

Sunday, October 11, 2015

Orange Mug cake

 
This is one fluffy, quick treat that can be prepared in a microwave in no time. The orange blossom water in my refrigerator gave the idea for this flavorful sweet treat when I was looking for ideas other than a chocolate based mug cake. The orange blossom water lends a very pleasing flavor  to this mug cake that is hard to miss.

Ingredients:
1/4 cup all purpose flour
3 tbsp. powdered sugar
1/4 tsp. baking powder
2 tbsp. oil
3 tbsp. orange juice (I used unsweetened juice.)
1/2 tsp. orange blossom water
Few drops of orange food color (optional)
Slivered almonds to garnish (optional)

Method:
* Combine all ingredients in a mug (1 cup capacity) without any lumps.
* Microwave on high for 1½ to 2 minutes or until a toothpick inserted at the center comes out clean.
 
This goes to blogging marathon #57 under the theme 'Mug Treats' and check here to find out what other marathoners are cooking today.

Comments

Saturday, October 10, 2015

Banana Mug Cake


This week, I am planning to post some of those one serving cakes or other baked treats that are made in a mug in the blink of an eye, using a microwave. I really love the simplicity of a mug cake since all we need to do is to combine all the ingredients in a mug and bake. Besides these mug cakes are the perfect candidates for those quick fix treats when a sweet craving hits suddenly. I had bookmarked this vegan mug cake from Pavani's blog some time ago and this week's blogging marathon seemed like a perfect time to try the yummy treat. She had served it with cream cheese frosting which I let go since the cake itself was too sweet for me.

Ingredients for the cupcake:
1/3 cup all purpose flour
2½ to 3 tbsp. sugar (original version had 1/4 cup.)
1/4 tsp. baking powder
1/8 tsp. ground cinnamon
A pinch of salt
1 tbsp. oil
1/4 cup mashed banana
2 tbsp. milk
1 tbsp. coarsely chopped walnuts
Ingredients for the frosting:
1.5 tbsp. cream cheese
1.5 tbsp. powdered sugar
1 tsp. milk
1 drop of vanilla
(For a vegan version, use vegan cream cheese and soy milk.)

Method:
* Add flour, sugar, baking powder, cinnamon and salt in the mug. Combine the wet ingredients and add to the mug. Mix well to combine. Sprinkle some nuts on the top if preferred.
* Microwave on high for 2 - 2½ minutes or until a toothpick inserted at the center comes out clean. (Mine was cooked through and the center portion which looks uncooked is actually a tiny amount of banana pulp that wasn't mashed good.)
* For the frosting: Combine all the ingredients under frosting until light and fluffy. Transfer the frosting into a small Ziploc bag and snip one end. Pipe the frosting onto the cake and enjoy.
 
These go to blogging marathon #57 under the theme 'Mug Treats' and check here to find out what other marathoners are cooking today.

Comments
Friday, June 5, 2015

Microwave Bitter Gourd Crisps


I am not a fan of bitter gourd from any angle for the obvious reason. I just used to manage eating kakarakaya podi that my mother prepared because of the delicious and crisp besan coating it had. And my husband who seems to be an opposite, loves the vegetable to the core and keeps buying it for himself. Right now, I have a dozen gourds sitting in my refrigerator as I am writing this. However these bitter gourd crisps have managed to change my opinion about the vegetable and have turned me into a fan to some extent. I enjoy these immensely (not needing any push at all from my husband to try) since the bitterness of the gourd is hardly noticeable in this case and I don't mind chewing away these healthy and guilt-free crisps. They are that good. Serve them as a side dish for sambhar / rasam dishes or just serve them as an evening snack.

Ingredients:
1 to 2 bitter gourds, depending on the size (I had about 35 slices.)
2 tbsp. chickpea flour / besan
2 Tbsp. Oil
Chili powder to taste
Salt to taste

Method:
* Wash and pat dry the bitter gourd. Slice the bitter gourd into thin discs. Discard any mature seeds. I used a large gourd and had about 35 slices.
* Combine besan, chili powder and salt in a wide bowl or a large plate. Add oil and the bitter gourd slices to the bowl and mix well so that each disc is coated with the besan mixture.
* Grease a microwave safe glass plate and arrange the discs in a singer layer on it.
* Microwave for about 5 minutes, checking once intermittently to make sure that discs have not stuck to the plate.
* Flip them and continue to microwave, checking once every two minutes. Remove once they turn crisp.
* Depending upon the microwave power, these crisps should take about 10 - 12 minutes from start to finish.

This is my post under '3 Ingredient Dishes' since oil and salt are not counted. Check the blogging marathon page to see what my fellow marathoners are cooking for BM#53.

Comments

Thursday, June 4, 2015

Mac & Cheese in a Mug

I came across this mac n cheese in a mug version while looking for mug cake ideas some time ago. I cook macaroni and cheese from scratch almost everyday for my daughter and this quicker microwave version instantly attracted me. I could somehow retain the recipe in my head for this long though I forgot where I saw it. This mug sized single serving portion takes just around 5 minutes to cook and makes a great impromptu meal for kids.

Ingredients: (Yield 1 serving)
1/3 cup macaroni
1/2 cup water (Add extra 2 to 3 tbsp. water if using a mug.)
1/4 cup shredded cheddar cheese
1/4 cup whole milk

 Method:
* Add macaroni and water to a mug and place it in the microwave.
 
* Place the mug on a large plate to catch drips. Cook for a couple of minutes and stir. Repeat the process until the pasta is done to the desired consistency and all the liquid is absorbed (about 3 to 4 minutes). Add extra water if needed in case if the macaroni is not done.
 
* Remove the mug / bowl from the microwave and add milk and cheese. Stir and cook for one more minute. 
 
* Stir once again before serving. 
 
Notes:
1. My macaroni took about 4 minutes to get done. I added the extra 2 tbsp. of water since the water spilled over during the cooking. Using a large bowl would prevent the spilling.
2. You can cook macaroni directly in the milk instead of water if you want it to be more creamier. And if using milk, I would recommend using a big mug or a bowl and also keep an eye through out the cooking to avoid spilling.

This is my post under '3 Ingredient Dishes'. Check the blogging marathon page to see what my fellow marathoners are cooking for BM#53.

Comments

Sunday, May 3, 2015

Microwave Masala Peanuts / Spicy, Chickpea Flour Coated peanuts

I guess I am still being fired up by the baking marathon event and the inspiration seems to have just rubbed off for this week's marathon as well. The week is new, the theme is new but I chose to clear some of the recipes from my 'to do' list that I had shortlisted  for the baking marathon. I am doing 'Cooking Substitutions' theme for the current week and my first substitution is for the cooking method. I am going with masala peanuts that are toasted in a microwave instead of a deep fried version. 

No Indian living on this planet needs any introduction to this addictive peanut snack. However for the uninitiated, the raw peanuts are lightly coated with a spicy chickpea flour paste and later given a hot oil bath aka deep fried, resulting in crispy peanuts with a spicy, crunchy coating. The seasonings used in the recipe vary regionally but chili powder and salt form the base in all the versions.

Masala peanuts are traditionally deep fried but they can be also toasted in a convection oven or a microwave oven for guilt free snacking. The microwave method is the safest and quickest method among the three, if you ask me. It involves a tiny fraction of the oil compared to the deep frying version and is hard to ruin the dish in the microwave if directions are properly followed. And it gets done in the time in an oven gets preheated. And these taste exactly like the fried version without all the oil, calories and the guilt associated with it.

We like them so much that we had made them already thrice this week. I had made two batches earlier. Today my teenage daughter who can handle spices no better than a toddler decided that she will have her own batch with little spices and made about a cup of peanuts. She is in so much love with these peanuts as her mother is, even though she ends up with a red face and teary eyes each time she tastes the store bought spicy peanuts. She was enjoying the lightly spiced peanuts today saying that these were the best she had eaten so far. 

Ingredients:
2 cup peanuts
1 cup sieved besan / chickpea flour
2 tbsp. rice flour (Don't skip it. Rice flour adds crispiness.)
Salt to taste
1.5 tsp. red chili powder (or adjust the quantity.)
1/4 tsp. garam masala (optional)
1/4 tsp. turmeric powder
A pinch of citric acid (optional)
2 tbsp oil
Water as needed 

Method:
* Wash the peanuts in a colander and drain.
* Combine besan, salt, chili powder, garam masala, turmeric and citric acid in a wide bowl. Add the peanuts to the mixture and combine well. Add the oil next and mix well to coat. Now add water in slow increments until the mixture just roughly comes together. (I added about 3 -4 tbsp. water.) Don't make it watery. The mixture should be dry enough but the peanuts still should have the coating.
* Grease a wide microwave safe plate and spread the peanuts in a single layer.
* Microwave the peanuts until they turn crispy, intermittently turning them once in every two minutes. Depending upon the strength of the microwave, the peanuts would be done anywhere between 6 - 8 minutes. (The timings may increase if the quantity of the peanuts increase.)
* If still not done by the mentioned time, toast them for some more time, checking once after every one minute.
* Let cool and store them in airtight container.

Check the blogging marathon page to see what my fellow marathoners are cooking for BM#52.

Comments

Tuesday, April 28, 2015

Tuesday Treat ~ Eggless, 4 Ingredient Nutella Mug Cake

The other day I was finishing off a Nutella mug cake when my daughter entered the kitchen. She stood quietly for a few seconds before asking me what I was doing. It must have come across as a shock seeing mom eating something without sharing it with anyone else. Actually it is not my fault. Apart from me, my son is the only one with a sweet tooth at home and he was not home when I made the mug cake. My husband would not even spare a glance towards these kind of desserts and my daughter doesn't care about Nutella. I said a mug cake and she peeked into the mug and asked whether it was a chocolate one. Though it was not an accusatory tone, I understood what she meant. She is the chocolate fanatic at home and here I was going on without asking her. I thought she may not like it as it has Nutella and told her so. She is a self proclaimed Nutella hater though she loves chocolate and I am not able to understand the reason behind her dislike until now since she has not tasted it even once. Next came the question, "Did Shreyas get it?""I am thinking of preparing him over the weekend as he is going to come home late", I answered her. She stood there for some more seconds watching me enjoying the treat and she couldn't take it anymore. Then came the question whether it really tastes like chocolate. Of  course it would, I told her since Nutella is but chocolate and hazelnut. Finally the temptation won and she gingerly ate a spoonful, and was beaming with joy. Next came the request for a mug cake of her own. And of course I made it in a small measurement for her, the one that is pictured above.

I love mug cakes for the fact that they are super quick to prepare and a small serving of dessert can be enjoyed without any guilt. This Nutella cake from here involves only four ingredients and is very easy to remember the recipe. This yummy microwave cake can be done in one minute or under depending upon the measurements. I have prepared this twice once using milk and once with yogurt. Both turned out good but I am partial towards the yogurt based one. The small measurement one really works if one wants to portion control.
Ingredients for one mug cake:
1/4 cup all purpose flour
1/4 cup Nutella
3 tbsp. fat free milk / fat free yogurt
1/2 tsp. baking powder

Method:
* Combine all the ingredients in a small bowl and whisk it until smooth. Add it to a mug that is about 1 & 1/4 cup size.
* Microwave it for about a minute. A sharp knife or a tooth pick inserted should come out clean and the top of the cake should look done by the time. If not done, microwave for another 20 seconds. Don't be tempted to microwave longer since it will dry out. Let it cool before serving

Note:
For a small serving, halve the recipe and use a 3/4 cup sized mug. Microwave it for about 40 - 50 seconds.

Thursday, January 10, 2013

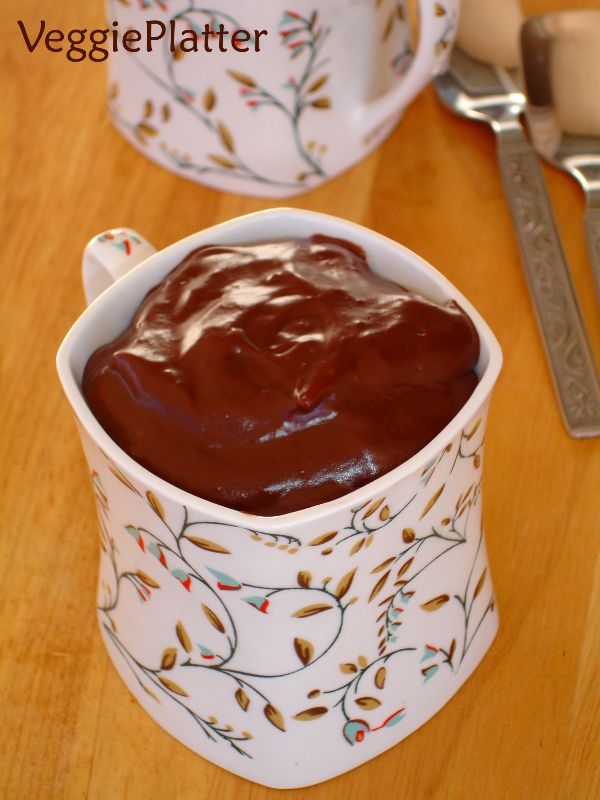
Quick Microwave Chocolate Pudding


Whenever I ask my 11 year old to make a list for our weekly grocery shopping, the two things instantly that come to her mind are chocolate pudding and macaroni & cheese. They are so appealing to her that she never gets tired of them. If given a choice, she can survive on them alone. Chocolate pudding is her most favorite evening snack and so obviously, none of our grocery shopping goes by without buying cartons of chocolate pudding.
While she enjoys those store bought puddings, I keep worrying looking at the long list of chemicals added in the form of preservatives to the simple pudding. And so I was thinking of trying it at home from a long time now. Recently when I was browsing for condensed milk recipes, I came across this recipe at allrecipes and was impressed by the positive reviews the recipe got. The recipe is very simple even for a novice cook and can be prepared in a jiffy. I consider it a hit as my daughter was happy with this pudding. Try it if you are looking for a quick one to satisfy your sweet tooth. 

Ingredients: (4 servings)
1/2 cup sugar
1/3 cup cocoa powder
3 Tbsp cornstarch
2 cups milk (at room temperature or warm)
1 tsp vanilla essence

Method:
* Mix sugar, cocoa and cornstarch in a microwave safe bowl.
* Gradually add milk to the bowl and whisk so that no dry lumps are present.
* Microwave the mixture for 3 minutes on HIGH. Remove and stir the mixture. Again at one minute intervals, cook for about 2 minutes or until shiny and thick.
* Stir in the vanilla and butter.
* If serving cold, place a piece of plastic wrap directly on the surface of the pudding to prevent a skin from forming and chill. (I skipped this step as my daughter likes to eat the pudding at room temperature.)

Note:
* I halved the recipe to get 2 servings and it was done under less than 4 minutes.

This goes to BM#24 under the theme of "Cooking with Appliances". Check here to find out what others are cooking during the marathon.

Comments
 

Tuesday, December 20, 2011

Virtual Baby Shower for PJ ~ Eggless Custard Powder Cake in 5 Minutes


We came to know during last blogging marathon that PJ, a blog buddy is expecting her second child in a few weeks and we marathoners thought of celebrating this joyous occasion by throwing a virtual baby shower to her. Each one of us are cooking from her blog and bringing her a delectable platter to enjoy, virtually of course. Check the following bloggers' links to know what has been brought to this party.

Aarthi    http://yummytummy-aarthi.blogspot.com
Cool Lassi(e)    http://pangravykadaicurry.blogspot.com
Gayathri Kumar    http://gayathriscookspot.blogspot.com
Kalyani    http://itsnotmadrasi.blogspot.com
Kaveri    http://palakkadcooking.blogspot.com
Mireille Roc    http://gourmetglobal.blogspot.com
Pavani    http://cooks-hideout.blogspot.com
Pradnya    http://pumpkinfarmfood.blogspot.com
Priya Srinivasan    http://enveetukitchen.blogspot.com
Priya Suresh    http://priyaeasyntastyrecipes.blogspot.com
Srivalli     http://spicingyourlife.blogspot.com
Sushma    http://sushmapinjala.blogspot.com
Vardhini     http://vardhiniskitchen.blogspot.com
Veena     http://veenasvegnation.blogspot.com

Aarthi came up with this beautiful logo using the images from posts.


I chose to go with her Microwave eggless custard powder snack cake since it was my kind of dish - a quick and easy one. I have baked earlier three different kinds of microwave cakes and they turned out pretty good. I so guessed that this one would be delicious as well and tried it. One can have this cake ready to be served by the time a convection oven gets preheated.


Ingredients:
3/4 cup - All purpose flour / Maida
5 to 6 Tbsp (a little more than 1/4 cup) - Vanilla flavored custard powder
Scant 3/4 tsp - Baking powder
1/2 cup Sugar
5 Tbsp / 75 grams Butter, at room temperature (I just melted it in microwave.)
1/2 cup /125 ml Milk

Method:
* Sieve the flour and custard powder. Combine the dry ingredients in a bowl.
*  Beat milk, butter, sugar until creamy. Add the dry ingredients to it and whisk till you get a smooth batter.
* Grease a microwave proof dish and pour in the batter.


* Microwave on high for 5 minutes or until a toothpick inserted comes out clean. Remove after 5 minutes, cut into slices and enjoy.

PJ mentioned to check it for doneness from the 4th minute onwards since microwaves vary. Mine was exactly done in 5 minutes. It doesn't raise much as my
other microwave version cake and so use a baking utensil accordingly.


Verdict:
It is eggless and baking time is five minutes. What can get better than that? :) From preparation to plate, it hardly takes 15 minutes including the waiting period and an apt one for snacking as the title of the original recipe says. This is a good one for those who enjoy vanilla custard since this cake is just that; filled with that flavor. The texture is perfect as you notice from the image.
The only drawback was that I could not get the cake by inverting the bowl but I am not complaining. It is sliceable but a thin layer of cake at bottom was sticking to the bowl.  


Check here to know what my fellow marathoners in BM#11 are cooking today.