HOME        |        ABOUT        |        COPYRIGHT        |        CONTACT        |         RECIPE INDEX        |         INDIAN THAALIS        |         MILLET RECIPES        |        EVENTS' ROUNDUP        

Showing posts with label Chocolate. Show all posts

Saturday, November 3, 2018

Dutch Hagelslag & Bread

Here is a quick breakfast / treat from Netherlands with hagelslag aka a 'hailstorm' of Dutch sprinkles on buttered bread. I have been making these sprinkles n' bread for my daughter ever since I came across the Australian version, fairy bread. While fairy bread is considered a kids' treat, this bread with hagelsag is commonly eaten in Netherlands by all ages and is a popular one. Dutch hagelsag (sprinkles) were invented in 1936 by a Dutch company named Venz which became popular because of it. They created the first machine to produce the tiny cylindrical shaped treats and named them after their resemblance to a local weather phenomenon of hail. All sprinkles seem to not qualify for being called hagelsag. Only those sprinkles with cacao percentage of more 32% can bear the name chocolade hagelslag. Nowadays hagelslag comes in all shapes, sizes and flavors. 
A good quality chocolate sprinkles should do for those who don't have access to the original deal. All one needs to make this treat are some bread slices, good quality butter and sprinkles. One can use the white bread or the brown one. (They can be toasted if preferred.) Slather the bread slices with softened butter generously and sprinkle on hagelslag. 

Thursday, February 25, 2016

Eggless Chocolate Pancakes


When I picked Kids' Delight theme for this week's blogging marathon, I let my daughter know about it since she is fond of chocolate. I wanted to see whether she would prefer any dish in particular and as predicted, she came up with a ton of ideas, of course with her favorite chocolate chip cookies being top on the list. I already have two chocolate cookie recipes that we are all fond of and so I had to scratch them off the list. Her next request was chocolaty pancakes and I came up with this kid-friendly version, loaded with chocolate chips. My kids loved these pancakes and were happy to gobble them up with chocolate syrup instead of maple syrup. Yup some more chocolate and it turns out that a drizzle of chocolate syrup over chocolaty pancakes isn't overkill as I thought it would be. And of course one need not go with maple / chocolate syrup at all. Any other preferred choice of toppings like fruits, butter, honey etc. should work too. 
Ingredients: (Yield 6 pancakes)
1 tbsp. flax meal + 3 tbsp. warm water *
1 cup all purpose flour
1 tsp. baking powder
1/4 tsp. salt
2 tbsp. cocoa powder
2 tbsp. sugar
2 tbsp. melted butter
1/2 cup chocolate chips
* Any substitute for one egg 
 Method:
* Whisk flax meal and warm water together and leave aside for about 5 minutes.
* Heat a griddle / non stick pan on medium heat such that a drop of water beads when dropped on it.
* Blend the flax meal mixture and the remaining ingredients mentioned above into a thick batter. Leave the chocolate chips if you prefer sprinkling them on the pancakes instead, while preparing them.
 
* Pour about 1/4 cup batter of batter onto the pan. If chocolate chips was not added to the batter, then sprinkle some on the top. Cook until bubbles appear on the surface and the bottom side turns golden brown. Flip the pancake with a spatula and cook until it is done on the bottom side too. Transfer onto a serving plate. Repeat the steps with the remaining batter.
* Serve the pancakes warm. Top them with chocolate syrup / maple syrup.
 

These pancakes are going to be a part of 
1. Blogging marathon #61 and check here to find out what other marathoners are cooking today.
2. Kids' Delight event, hosted by Kalyani this month under the theme 'Chocolate' with a #KidsDelightChocoGiveaway.

Comments

Wednesday, February 24, 2016

Chocolate Milkshake

 
My mother over our phone chat the other day was mentioning that the hot summer season is slowly creeping in on them and it is already hot in some parts of India. We on the other side are still in the middle of the winter considering that there will be a few snowfalls even during the spring season. Officially, we are yet a month away from the spring season and need to get past that for the summer season to make it's presence in our parts. In fact, a winter storm is blasting through our region right now as I am drafting this post. We are expecting to cleanup a pile of snow, first thing in the morning tomorrow. A post on hot chocolate would have sounded perfect on the occasion but alas I am here with a chilled milkshake that is chocolaty and yummy. I prepared it yesterday when the sun peeked through and the weather seemed warmer and glorious succeeding a few cloudy, gloomy days. Of course the post wouldn't sound off the season, considering those living on western or southern coasts who seem to have summer weather all year long. :) Besides I had to send it to  'Kids' Delight' event, hosted by Kalyani, this month under the theme 'Chocolate', with a #KidsDelightChocoGiveaway
 
The recipe is quite a simple one considering that all you do is blend the ingredients together.

Ingredients: (Yield 1 serving)
3/4 cup chilled milk
1/2 cup chocolate ice cream
1 tbsp. chocolate syrup
Chocolate sprinkles(optional)

Method:
Blend milk, ice cream and syrup together. Garnish with chocolate sprinkles if using and serve immediately.
 
Check here to see what other marathoners are cooking for BM #61.


Comments

Monday, May 4, 2015

Eggless Zucchini- Chocolate Chip Muffins

 
I had asked the other adult at home to get a zucchini and as usual I ended up getting four instead. And also was told that I would find ways to use them anyway. That was true in a sense and I made some crisps, and a bread but was still left with one zucchini. It was not sufficient to make a chocolate zucchini bread but I could bake some muffins instead. I found a recipe online which had eggs and the muffins looked super moist going by the images. I was so tempted by those images that I made them instantly converting it into an eggless version and was very much pleased with the results. Somehow I could not trace the original recipe now as these were made a few weeks back and I forgot to save the link.  

I am surprised to notice that my muffins are kinda looking dry in images but they were moist in reality. I forgot to take pictures showing their crumb and by the time I remembered, there were no muffins left to try. Usually I take a bite of what I bake to notice their texture and taste but I ended up eating the whole muffin as it was really good. The base of the muffins are subtly sweet and the sweetness comes more from the chips when you bite into the muffins. They were moist and yummy and the latter part was certified by my daughter as well who sat and ate three in one sitting. That's like a aatwa ajooba (8th wonder) in my home considering that she needs a lot of cajoling and threatening to eat anything.

Ingredients: (Yield 9 muffins)
1 flax egg or go with any other substitute
1/2 cup whole wheat flour
1/2 cup all purpose flour
1/4 cup unsweetened cocoa powder
2 tsp. baking powder
1/4 tsp. salt
6 tbsp. brown sugar
2 tbsp. oil
1/2 cup + 2 tbsp. milk
1 tsp vanilla
1/2 cup peeled and grated zucchini
1/2 cup semi sweet chocolate chips

Method:
* If using flax egg, combine 1 tbsp. flax meal with 3 tbsp. warm water and let it sit for five minutes.
* Preheat the oven to 425 deg F.  Grease a muffin pan or line them with paper cups.
* Combine the flours, cocoa powder, baking powder and salt in a mixing bowl.
* Whisk the flax egg, brown sugar, oil, milk and vanilla in another bowl.
* Add dry ingredients to wet ingredients and stir just until combined. Finally stir in grated zucchini and chocolate chips.
* Fill the muffin cups up to 2/3rds with the batter and place the muffin pan in the preheated oven.
* After 5 minutes, lower the temperature to 375 deg F and bake for another 15 minutes or until, a toothpick inserted at the center comes out clean.

Check the blogging marathon page to see what my fellow marathoners are cooking for BM#52.

Comments

Sunday, October 5, 2014

Chocolate Covered Pretzel Sticks with Sprinkles

My daughter knows about my food blogging and sometimes she just checks the pictures on this blog to know what I am blogging about. Yesterday in a casual conversation she learnt about my participation in blogging marathons and my 'themed' posts. After hearing about this week's theme, she thought that Valli genuinely was looking for ideas and was going to prepare these dishes on her kids' birthdays. I couldn't stop laughing at her naivete but went ahead with her suggestion of a 'chocolate treat' for the party.

These chocolate-sprinkle covered pretzel sticks are a hit with my kids and so I thought of sending them over to this virtual anniversary party. All you need to make these yummy treats are a few pretzel sticks, a melting variety chocolate and some sprinkles to decorate. One can leave the decorating job to enthusiastic kids as I did. My daughter used nonpareils, chocolate sprinkles and confetti sprinkles to decorate and some of the pretzels were left with just chocolate coating.
Method:
* Cover a baking sheet with foil / wax paper.
* Pour the sprinkles in small shallow cups and keep them handy.
* Melt the chocolate using double boiler method or in a microwave. (I prefer the former method since the chocolate remains melted for longer time compared to the microwave method as I leave the chocolate pan on the hot water pan until I am done.)
* Dip half of the sticks in chocolate and roll them in sprinkles. 
* Lay them on the baking sheet and stick it in the refrigerator to dry them quicker.
Notes:
1. Small or jumbo sized pretzel sticks or small sized pretzels can be used. 
2. White or dark chocolate can be used. One oz of baking chocolate covers about 65 - 70 small sized (2.5 inch) pretzel sticks. I used Baker's semi-sweet baking chocolate.
3. Nuts / dessicated coconut can be substituted for sprinkles. 


This is going to be my contribution to 
1. Blogging Marathon #45
2. Kids' Delight - Potluck Party.

Comments

Saturday, September 6, 2014

F for France ~ Mendiants au Chocolat

 
Event: BM #44  
Choice of country: French Republic
Capital City: Paris
Official Language: French

I would like to visit Paris one day and leisurely explore the city. Technically I have set my foot in the city several times over the years, as I usually catch my connecting flight to India from there. I am always in a hurry to reach India to meet my loved ones instead of breaking off my journey and so couldn't visit the city yet. Hopefully I will make it during my next visit. 
Besides, my son is studying French at school and would love to learn more about that country. We wanted to send him on a student exchange program to Paris during last summer but couldn't do so because of dietary restrictions. As part of the program, he would have spent his summer in France, with a sponsoring French family learning about their language, culture and traditions. While we would have done the same here in US, welcoming a French student to our home. At the last moment, I got cold feet to send him alone and besides being a vegetarian, there was the issue of food. I promised myself at that moment that he would get an extensive tour of the country. In fact, not only him but every one of us. In the mean time, we are set to enjoy some French food at home. I prepared a French treat for us called "mendiants au chocolat"


A mendiant is a traditional French confection that was usually made during Christmas. It is a chocolate disk studded with dry fruits and nuts and is very easy and quick to put together. They were traditionally meant to represent the four monastic orders of middle ages in Western Europe -  Dominicans (or Jacobins as they were called in France), Augustinians, Franciscans and Carmelites. These monastic orders were mendicant orders, mendicant coming from a Latin word meaning "to beg". These monks renounced every worldly possession and were bound by a vow of poverty. They depended upon charity / begging for their livelihood.

Each of the dry fruits and nuts traditionally used stood for the color of the monastic robes they wore - Raisin for Dominicans, hazelnut for the Augustinians, dried fig for Franciscans and almond for Carmelites. The modern versions have moved away from the traditional combination and today, one can use their choice of dry fruits, nuts, fruit peels, seeds, coconut flakes and so on. I guess you got the idea. Adorn the chocolate dollops with your favorite toppings or any odds or bits of nuts / dry fruit you want to use up from your pantry. Besides no need to wait until Christmas to enjoy these delightful treats.

Making mendiants is surprisingly simple. Basically, chocolate is melted by double boiler method and about tbsp. sized melted chocolate is dropped as dollops on a foil / parchment paper lined cookie sheet. They are then decorated with toppings and are refrigerated until they are set.  

Pronunciation:
I suddenly realized at some point that it is a French recipe name and possibly shouldn't be pronounced like an English word. I had even seen recipe titles like "Recette de Mendiants aux fruits secs et au chocolat" for mendiants and thought the one I chose is short and sweet. My son explained me that the long title just means "a recipe for mendiants with dry fruits and chocolate". Phew. Anyone wondering how to say "Mendiants au chocolat"? 
Chocolat is of course "shoh-koh-lah" meaning chocolate.
Au is pronounced as an English 'o' and means 'with' in the cooking context.
And for mendiants, check it here. I am having hard time to write it even though I learnt how to say it from my son. It is said with a nasal voice and it goes like "moan-dyon"

Ingredients to make about a dozen:
Dark chocolate / white chocolate / chocolate chips (I used 1 cup chopped chocolate pieces)
Assortment of dry fruits and nuts of your choice

Preparation:
* Avoid chocolate coming in contact with water at any point of time during the preparation. Keep your work station, pan in which you are melting chocolate and spatula completely dry.
* Line a cookie sheet with foil / parchment paper or use a silicon mat.
* Chop the chocolate into small bits. If using chocolate in large quantity, do it in batches. 
* Keep your toppings ready.

Method:
*  Use a sauce pan and a metal / glass bowl that fits snugly over the top of that pan. Fill the sauce pan with water such that the quantity of water should provide heat but not touch the base of the bowl in which chocolate is going to be melted. 
* Put the sauce pan with water over a low heat and place the chocolate bowl over it. Melt it over low heat, stirring occasionally with a rubber spatula.
* Drop a tbsp sized melted chocolate on the prepared cooking sheet. Gently shape the chocolate into a disc using the back of the spoon. Repeat the steps quickly until you have made about 4 discs. Decorate them with your choice of toppings.
* Again repeat the steps doing about 4 discs before decorating, to avoid getting chocolate cold quickly.
* Let cool and refrigerate them until they are set. Once set they peel off easily.


Sunday, August 24, 2014

Banana - Chocolate Smoothie

I had chosen "Smoothies" theme for this week's blogging marathon and the timing wouldn't have been more perfect than this. Our summer months here are June through August and we hit very few 80 deg F (around 26 deg C) kind of temperatures until the middle of August this year and I was enjoying the balmy weather. I had even mentioned to my mother a couple of weeks ago, that we had relatively a mild summer here in Chicago-land compared to previous summers. I had spoken too soon it seems and from last few days even though I am not seeing sun much, temperatures are more or less around 90 deg F. I know if I mentioned this to any southerner or people living along the west coast, they would have been wrinkling their noses at me. :)
This heat and muggy weather is making everyone at home preferring cold smoothies, ice-creams, chilled juices and that kind of stuff. My daughter who seldom throws a look at chilled stuff  has been reaching for that chocolate ice-cream carton in the freezer more and more. I had prepared this yummy smoothie a few days back with some leftover overripe bananas. Make sure that sweet variety kind bananas are used. Add frozen banana / some ice cubes if not using frozen yogurt. 

Blend the following ingredients to a smooth consistency and serve immediately.
1 sweet variety banana (Bananas can be frozen ahead too.)
2-3 tbsp chocolate chips
2/3 cup frozen yogurt (or substitute chocolate ice cream.)
Sweetener if needed

Comments

Thursday, June 26, 2014

Chocolate-Nut Covered Strawberries

Though today's post looks like catering towards a valentines day treat, it is actually not. It is for the "iron rich foods" based theme of this week's blogging marathon. Believe it or not, dark chocolate with at least 70 cacao solids is a rich and an unexpected source of iron. Our body can absorb iron better in the presence of vitamin C, for example like citrus fruits. So this dark chocolate covered berries happen to be a good source of iron. I rolled them in crushed peanuts for an extra dose of iron. It can be substituted with other iron rich nuts like almonds, cashews, etc. Sweet, plump strawberries paired with chocolate and nuts is a delicious treat and a kid approved one at my home.

Ingredients:
About 4 - 5 oz of bitter chocolate, chopped
A pint of strawberries
1/4 cup of crushed nuts

Method:
* Wash the berries and pat them dry.
* Melt chocolate in a microwave-safe bowl or in the top of a double boiler over simmering water.Stir until chocolate is smooth. 
* Holding the berries by stem, dip them in the molten chocolate one by one, about 3/4th of the way to the stem.
* At this point if you prefer, roll them in crushed nuts.
* Place the berries stem side down on parchment paper lined plate or on a paper plate.
* Chill in refrigerator until hardened.

These go to the following events.
1. Blogging Marathon #41
2. Srivalli's "Kids' Delight", hosted this month by Kalyani with the theme "Iron rich recipes". 

Comments

Wednesday, February 5, 2014

Biscotti Bites

I saved the best for last. "Best" according to my daughter. I consider a baking experiment hit when my daughter is ready to finish off the entire batch without sharing it with any one. I consider it a super hit when my daughter keeps asking me for another batch without forgetting about the stuff even after a month or so. This is what happened with these cookies and my daughter absolutely loved them.
I tried them from Martha Stewart Living magazine, which I subscribe regularly. I tried these cookies the day I got that particular edition since the picture of these bites got my attention. I instantly knew that my daughter was going to love these chocolate covered bites. It is like a quick take on the traditionally twice baked crunchy biscotti. The only goof up I did was heaping a tablespoon of batter instead of a teaspoon though my daughter didn't complain. And so instead of bites, I ended up with chunky cookies.
I halved the original recipe and should have got around 50 bites according to the recipe. I did not get that many may be because I used a tablespoon sized dough for each bite. The recipe also had about a tbsp. of grapefruit zest that I omitted.

Ingredients:
1/2 cup + 2 tbsp. all purpose flour
1/2 cup + 2 tbsp. fine cornmeal (I had coarse cornmeal and so substituted it with all purpose flour.)
1/4 tsp baking powder
1/4 tsp coarse salt
1/3 cup unsalted butter, at room temperature
1/2 cup granulated sugar
1 tbsp. flax seed meal + 3 tbsp. water
1/2 to 3/4 cup sweetened shredded coconut
5 oz bittersweet chocolate, chopped
Fine sanding sugar, for sprinkling (I didn't use it.)
Method:
* Combine flax seed meal and water in a small bowl and keep it aside for 4 -5 minutes.
* Mix flour, cornmeal, baking powder and salt in a bowl.
* Beat butter until smooth. Add granulated sugar and beat again until fluffy. Add flax seed mixture and beat again until well combined. Add flour mixture and beat on low speed until just combined. Next beat in coconut and half the chocolate until evenly distributed.
* Line the baking sheets with parchment paper. Drop heaping teaspoonfuls of dough, spaced 1 inch apart, on the sheets. I would recommend slightly flattening them with fingers. Sprinkle sanding sugar if using. Refrigerate for 30 minutes.
* Preheat the oven to 350 deg F / 175 deg C. Place the cookie sheets in the oven. Bake rotating sheets halfway through, until golden, 18 - 20 minutes. Let them cool completely.
* Melt remaining chocolate in a bowl set over a saucepan of simmering water, stirring until chocolate turns smooth. Dip bottoms of cooled cookies in melted chocolate.
* Set them on parchment lined baking sheets and again refrigerate them until chocolate is set.
This is going to be a part of
1. BM # 37 under the theme of "Baked Snacks".
2. Srivalli's "Kids' Delight" event, hosted by PJ this month with the theme "Baked Treats For Kids".
 

Friday, May 10, 2013

Chocolate - Nut Covered Bananas


"Kids' Delight" is hosted by Pavani this month with the theme "5 Ingredient Fix". Obviously, one has to send her recipes suitable for kids, prepared using five or less ingredients. If interested, check her post for more details. Also second week of BM#28 starts from today and I have picked the above mentioned theme. 

Here is my first entry that involves three ingredients and very minimal work that yields a very impressive snack. I found this recipe sometime ago during one of my browsing sprees and right now am not able to figure out where. I had an idea and so went along. Anyway it was hard to mess up since there is nothing to mess up really. :) I have used semi sweet chocolate and salted peanuts here and so it doesn't taste that sweet at all. If you prefer the outer layer to be sweeter or preparing only for kids or planning to pass it on as a dessert, sweet baking chocolate can be used. Also salted cashew nuts can be another variation. I had refrigerated the pieces and we had them the next day. The bananas inside were fresh and they were good.

Ingredients: (6 pieces)
2 Bananas
4 oz semi sweet baking chocolate (or sweet baking chocolate if you prefer sweet pieces.)
4 - 6 Tbsp salted peanuts 
6 small sized ice cream sticks


Method:
* Crush the nuts you are using coarsely and keep aside.
* Melt the chocolate using a microwave / double boiler method.
* Peel the bananas and cut the edges. Cut each banana into three pieces.
* Insert the sticks through the center of each banana piece all the way through.
* Holding the stick, roll each banana piece in the melted chocolate so that they are well coated with chocolate and sprinkle with nuts.
* Refrigerate them until the chocolate coating hardens.
* Eat immediately or can be refrigerated for a couple of days.

Check out here to know what other participating marathoners are cooking.

Comments 

Wednesday, April 24, 2013

Chocolate Cups


Srivalli threw a googly towards us during this month long marathon with the final theme related to "Crafting / Carving kind of Stuff", challenging us to be creative. I haven't got even a single cell that can claim to be creative and so obviously was going crazy over this theme. Soon I was relieved to notice that some other marathoners were also sailing in the same boat. Valli, as usual pulled us all out of our misery by mentioning that we can go with our own themes if we could not come up with any interesting ideas with the given theme. I haven't prepared anything for this particular week but have decided to stick to recipes as this is a food blog. 
I am going with kid-centric recipes (probably :)) and these cute, edible cups made with chocolate is going to be my Day 1 post of this week's marathon. It is pretty simple to prepare these cups and can be made ahead. They can be used as delicious, edible cups to serve cut fruit, ice creams or any similar kind of desserts. They can be a fun part of any parties, especially the kid-centric ones. 

What you would need:
Semi sweet chocolate chips
Small silver foil paper baking cups
(For about 1/2 cup of chocolate chips, you would get around 5 cups.)


Method:
* Place the chocolate chips in a microwave safe bowl and melt them, passing at 30 seconds intervals. Or place chocolate chips in a heatproof bowl and set over a pot of simmering water. Stir until chocolate melts. Remove from heat.
* With the back of a teaspoon / spatula, coat the sides and bottom of the baking cups with chocolate. Put the cups in muffin pan or small cups.
* Place them in a refrigerator and chill until the shells harden.
* Tear away the foil once the shells are hardened. The cups would be ready to serve.


Wednesday, April 3, 2013

Chocolate Bark


Chocolate barks are one of the easiest holiday no-bake treats. They are great to pass on as gifts during the holiday season and can be done in no time. Preparation of bark is really a child's play and nothing can go wrong with the preparation. You just melt and stir. Go with dark / milk chocolate or chocolate chips. Nuts / dry fruits / seeds / pretzels / anything you prefer can be the additions. I went with cashews, pistachios, almonds, raisins, dried cranberries and white chocolate chips. They disappear in no time at my home when my daughter is around.

Ingredients:
Dark chocolate / Milk chocolate/ Chocolate Chips - one pound
Preferred toppings - 1/2 to 3/4 cup

Method:
* Line a baking sheet with aluminum foil or parchment paper.
* Place chocolate /chocolate chips in a heatproof bowl and set over a pot of simmering water. Stir until chocolate melts. Remove from heat.
* Pour melted chocolate onto the baking sheet and spread it evenly. Sprinkle toppings over chocolate. I added the toppings into the melted chocolate directly and spread it on the sheet and so there are few toppings.
* Refrigerate until firm. Remove from the foil and break bark into pieces.
 

Check what other marathoners are cooking during this month long marathon. 

Comments

Thursday, January 10, 2013

Quick Microwave Chocolate Pudding


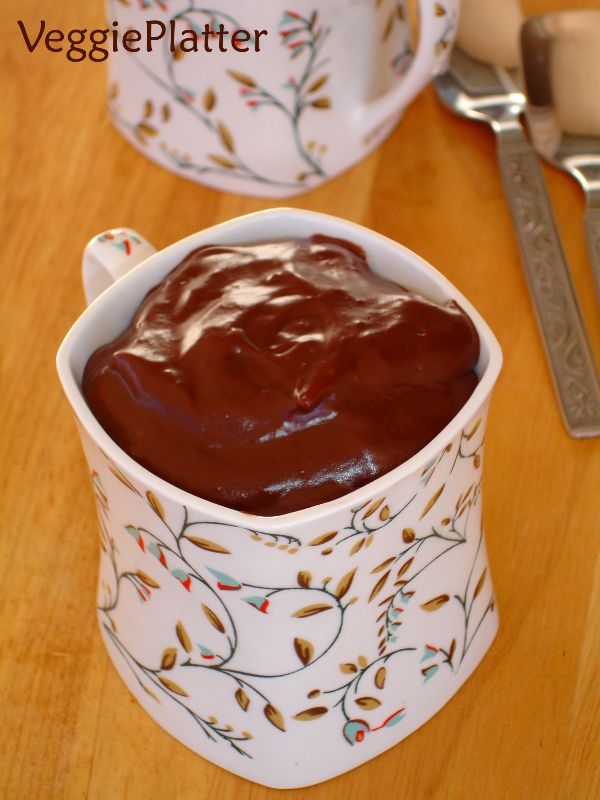
Whenever I ask my 11 year old to make a list for our weekly grocery shopping, the two things instantly that come to her mind are chocolate pudding and macaroni & cheese. They are so appealing to her that she never gets tired of them. If given a choice, she can survive on them alone. Chocolate pudding is her most favorite evening snack and so obviously, none of our grocery shopping goes by without buying cartons of chocolate pudding.
While she enjoys those store bought puddings, I keep worrying looking at the long list of chemicals added in the form of preservatives to the simple pudding. And so I was thinking of trying it at home from a long time now. Recently when I was browsing for condensed milk recipes, I came across this recipe at allrecipes and was impressed by the positive reviews the recipe got. The recipe is very simple even for a novice cook and can be prepared in a jiffy. I consider it a hit as my daughter was happy with this pudding. Try it if you are looking for a quick one to satisfy your sweet tooth. 

Ingredients: (4 servings)
1/2 cup sugar
1/3 cup cocoa powder
3 Tbsp cornstarch
2 cups milk (at room temperature or warm)
1 tsp vanilla essence

Method:
* Mix sugar, cocoa and cornstarch in a microwave safe bowl.
* Gradually add milk to the bowl and whisk so that no dry lumps are present.
* Microwave the mixture for 3 minutes on HIGH. Remove and stir the mixture. Again at one minute intervals, cook for about 2 minutes or until shiny and thick.
* Stir in the vanilla and butter.
* If serving cold, place a piece of plastic wrap directly on the surface of the pudding to prevent a skin from forming and chill. (I skipped this step as my daughter likes to eat the pudding at room temperature.)

Note:
* I halved the recipe to get 2 servings and it was done under less than 4 minutes.

This goes to BM#24 under the theme of "Cooking with Appliances". Check here to find out what others are cooking during the marathon.

Comments
 

Wednesday, December 19, 2012

Eggless Vanilla Cupcakes with Chocolate filling


I was planning to make a pictorial post of marble chocolate cupcakes today as I was expecting sunshine based on weather report. However Sun god had other plans and was not even peeking in our neck of the woods. It has been the same for the past few days. My mood was no different than the grey, gloomy weather outside my window and so decided to go the easy way, throw in a chocolate surprise inside the vanilla cupcakes instead of those marbled ones.

Ingredients: (Yield 6 cupcakes)
1/2 cup yogurt / curd
5-6 Tbsp sugar
1/2 tsp baking soda
3/4 tsp baking powder
1/4 cup melted butter / oil
1 tsp vanilla essence
3/4 cup all purpose flour / maida
6 one oz  semi sweet baking chocolate squares


Method:
1. Combine yogurt, sugar, baking soda and baking powder in a bowl and let it sit for about 4 - 5 minutes. It will turn frothy by the time.
2. Meanwhile, preheat the oven to 200 deg C / 390 deg F. Sift the flour. Grease the muffin pan or use paper liners.
3. Add vanilla, butter / oil and flour to the yogurt mixture in step 1 and mix well.
4. Fill 1/4th of each of the muffin cup with the batter, place the chocolate square at the center and again spoon batter over it so that each muffin cup is filled only up to 3/4th thereby leaving space for the cupcakes to raise.
5. Bake for 10 minutes and then lower the temperature to 180 deg C / 350 deg F. Bake for another 15 - 20 minutes or until a toothpick inserted at the center comes out clean. (If it comes out with gooey chocolate, it is fine.)

Note:
1. Even fatfree yogurt will do but should be at room temperature.
2. I used 1/2 oz chocolate squares and realized that I could have gone with 1 oz and that's what has been listed in the ingredients.
3. The chocolate inside was gooey when eaten warm. If the chocolate inside hardens for any reason, just warm the cupcakes in the microwave before serving.
4. I have used Nita Mehta's Vanilla cake recipe for the cupcakes.


Check what other marathoners of BM#23 are cooking, here.

Comments

Tuesday, December 18, 2012

Eggless Carrot - Chocolate Chip Muffins

 
I had blogged many recipes earlier with carrot and even hosted an event with the same theme. When I chose to go with carrot theme again during this marathon, I prepared a list of carrot recipes that either I haven't posted or tried yet. My son had suggested a few that included carrot -chocolate cupcakes. I had never tried that combo before and said yes. However I did not do it because I posted two other baked recipes during the carrot week. I went ahead and prepared them this week as I am doing chocolate based muffins. They turned out delicious with a soft texture. 
 
Ingredients: (Yield 7 muffins)
3/4 cup + 2 Tbsp all purpose flour
3/4 tsp baking soda
1/4 tsp salt
 6 Tbsp sugar
5 Tbsp melted butter
1/4 cup milk
1 banana, mashed
1 tsp vanilla extract
1 cup grated carrot
6 Tbsp semisweet chocolate morsels 


Method:
1. Preheat the oven to 375 deg F.
2. Sift together flour, baking soda and salt in a bowl.
3. Mix butter, sugar, vanilla, milk and mashed banana in another bowl.
4. Now add the dry ingredients to the wet ingredients and mix just until combined.
5. Toss carrots, chocolate morsels to the mixture and gently combine.
6. Grease the muffin pan or use paper liners. Spoon the muffin batter into each cup, filling only 2/3rd of the cup.
7. Bake for 35 - 40 minutes or until a tooth pick inserted at the centre comes out clean.

Check what other marathoners of BM#23 are cooking, here.

Comments

Monday, December 17, 2012

Eggless Double Chocolate Banana Muffins


Owing to my daughter's affinity towards brownies, I went ahead and signed up for chocolate based muffins / cupcakes theme during this blogging marathon. I hadn't got any opportunity to bake chocolate muffins / cupcakes until now though I have made choco cakes. I had earlier bookmarked a recipe from Eggless Cooking and this was a perfect opportunity to try them out. This recipe is fool proof and yields very moist, yummy and flavor filled muffins.
 
I had baked two other kinds of muffins on the same day and so I halved the original recipe. It took ten minutes more baking than the original recipe mentioned. I usually eat a tiny portion of a muffin / cupcake to just test the texture and taste because of the calories while my daughter rarely eats them. This time however we both were after these fluffy muffins and so this recipe is a keeper for me. :)
 
Ingredients: (Yield 6 muffins)
2 Tbsp milk + 1/2 tsp apple cider vinegar
3/4 cup all purpose flour
2 Tbsp cocoa powder
3/4 tsp baking soda
1/4 tsp baking powder
1/4 tsp salt
1/2 cup semisweet chocolate  morsels
1 tsp vanilla extract
2/3 cup mashed bananas
6 Tbsp sugar
2 - 3 Tbsp melted butter 


Preparation:
1. Mix together milk and vinegar and set aside until it curdles.
2. Line a muffin pan with paper liners or grease them.
3. Preheat the oven to 350 deg F or 180 deg C.

Method:
1. Sift together the flour, cocoa, baking powder, baking soda and salt.
2. Combine the mashed banana, milk - vinegar mixture, vanilla extract, butter and sugar in another bowl.
3. Add the wet mixture to the dry ingredients in the step 1. Mix well until just combined. Stir in the chocolate chips.
4. Divide the batter among the muffin cups, filling only about 3/4th of each cup.
5. Bake for 20 - 25 minutes (I had to bake for about 10 minutes more.) or until a toothpick inserted at the center comes out clean.

Check what other marathoners of BM#23 are cooking, here.

Comments