HOME        |        ABOUT        |        COPYRIGHT        |        CONTACT        |         RECIPE INDEX        |         INDIAN THAALIS        |         MILLET RECIPES        |        EVENTS' ROUNDUP        

Showing posts with label Semolina. Show all posts

Thursday, July 6, 2023

Nan Khatai

Probably nan khatai are the first cookies I ever baked in my kitchen and so, they are special to me. Over the years I have tried various versions, liking them all even without realizing they had Parsi connection. This time around I tried this semolina-almond version which yield crispy, crumbly delicious nan khatai that are quite addictive. For the uninitiated, nan khatai are shortbread biscuits that have been popular in the Indian sub continent for centuries. They are believed to be originated in Surat, a city in western India during 16th century. The word nan khatai is said to have derived from a Persian word 'naan' meaning bread and an Afghani word 'khatai' meaning biscuit.
 
According to the ebook Eat, Pray and Live, some of the Parsi cooks who worked for the Dutch in Surat had learnt to bake soft bread by fermenting the dough with toddy, which is supposedly the beginning of the legacy of Parsi bakeries in Surat. Parsis were inspired by the eggless Scottish shortbread, to create nan khatai, one of Surat's famous confections.The Surat bakers realized that the recipe was suitable for Gujarati vegetarians who did not eat eggs and adapted to suit the local populace by adding nuts and cardamom. Here is another interesting read about how nan khatai came to existence.

Ingredients: (Yield 18 - 20 cookies)
1 cup all purpose flour
1/2 cup semolina (I replaced half of it with ground almonds.)
2 tbsp. ground almonds (Optional)
1/4 tsp. ground cardamom
A pinch of baking powder
1/2 cup sugar
1/2 cup unsalted butter, at room temperature
2 tbsp. slivered almonds for garnish

Method:
* Sift together flour, semolina, cardamom and baking powder into a mixing bowl. Add ground almonds to the same bowl if using and mix to combine,
* Cream butter and sugar in another bowl until light and fluffy. Add the flour mixture in small increments and blend until a dough is formed. If for any reason, the dough turns out hard / dry, moisten it with little milk. (I didn't need any milk.)
* Preheat the oven to 350 deg F / 180 deg C. Grease or line a large baking sheet with parchment paper.
* Divide the cookie dough into 18 - 20 portions and roll each portion into a smooth ball. Flatten them slightly with the palm of your hand and decorate with almond slivers. Gently press the almond pieces so that they stick to the cookie.
* Arrange them on the prepared baking sheet, spacing them an inch apart since they expand while baking.
* Place them in the preheated oven and bake for about 15 - 20 minutes or until they turn light golden in color. (I baked them for about 20 minutes, turned off the oven and left them in the oven for another 6 minutes or so.)
* Let them cool on a wire rack and store them in an airtight container.


Comments

Wednesday, January 5, 2022

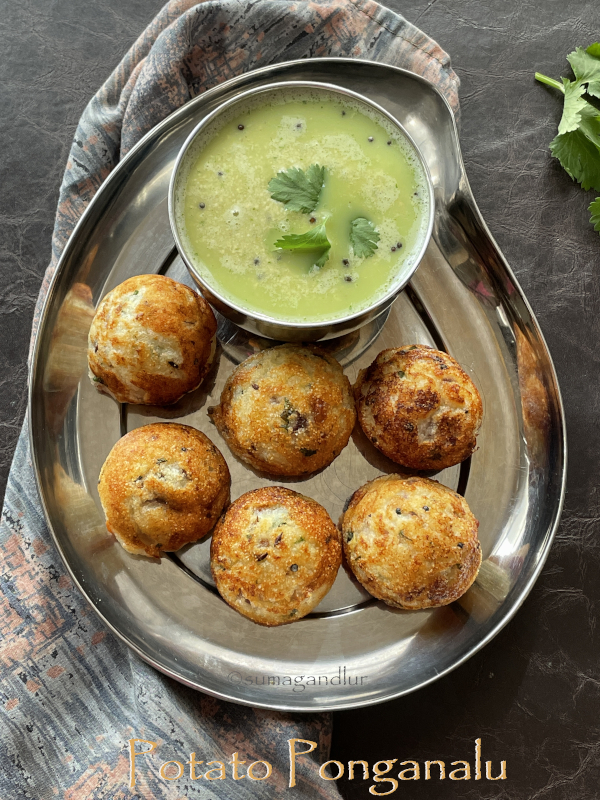
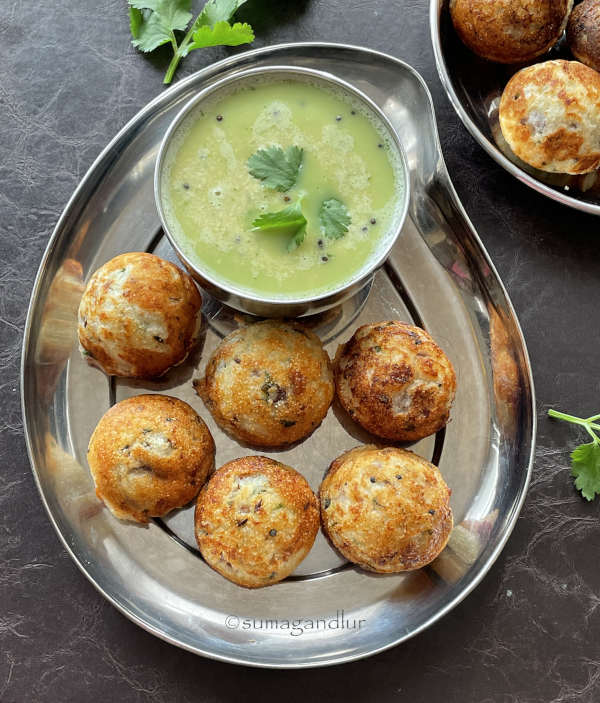
Potato Appe / Aloo Appe / Aloo Ponganalu

Appe / ponganalu / paniyaram / paddu are a breakfast or a snack item from the south Indian cuisine. They are prepared either using a fresh batter or using leftover batters used to make idli / dosas, the most popular breakfasts of the region. The batters are made with soaked rice and lentils that are ground and fermented, which usually needs advance planning.

There are a few instant versions as well like the one using semolina. Here is an interesting, instant kind that uses potato. I had bookmarked it from a weekly magazine a while ago because of the usage of potato in an appe recipe though I was equally skeptical because of the same reason. 

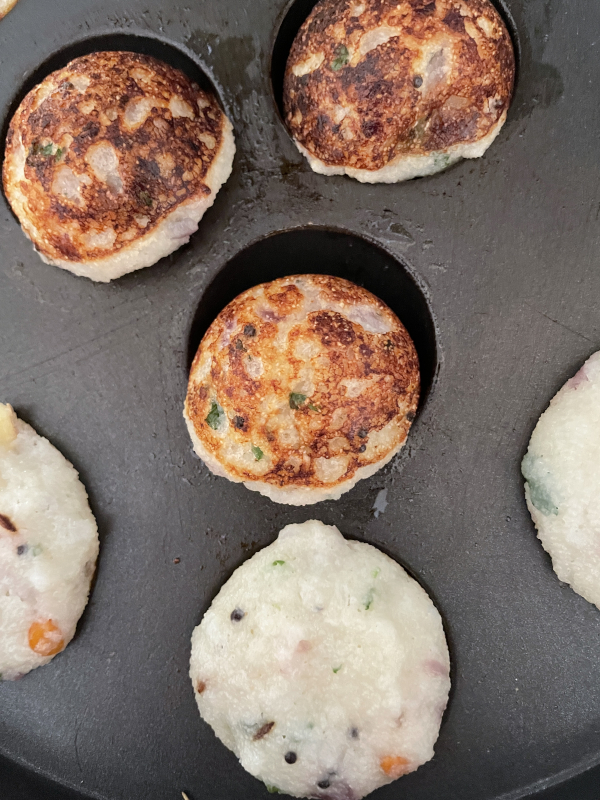
I kept wondering until the last minute of  preparation whether the mixture is going to stick to the pan and whether I should use the batter to prepare something else. There was no need to worry as they rise well and can be easily flipped if one waits patiently to let the bottom sides cook. They appear fragile at the beginning stages of cooking compared to the ones made with fermented batter. And they taste fabulous, served warm with a chutney on side.
 
Ingredients for tempering:
2 tsp. oil
1 tsp. each - Bengal gram (split chickpeas), mustard seeds, & cumin seeds 
1 tbsp. minced curry leaves
Ingredients for appe: (Yield - 18 - 20)
1 tbsp. flattened rice / poha 
1/2 cup semolina
2 tbsp. rice flour 
1 large sized potato / 1/2 cup mashed potato 
Salt to taste
1 green chili, finely minced
1 onion, peeled & finely chopped
1 tsp. finely grated ginger
A handful of cilantro, finely minced 
1/2 to 3/4 cup milk (Skim milk will do.)
1/4 tsp. baking soda or Eno's fruit salt
Oil to make appe

Prep work:
* Peel a large potato, cut into chunks and boil in water. Let it cool down and mash it finely.
* Wash and soak the flattened rice / poha in water for 5 to 10 minutes. Drain the water.
* Chop onion, ginger, chili, curry leaves and cilantro. 
* Heat 2 tsp. oil in a small pan. Add Bengal gram, mustard seeds, and cumin seeds to the oil. When Bengal gram starts turning reddish, add the minced curry leaves.

Directions:
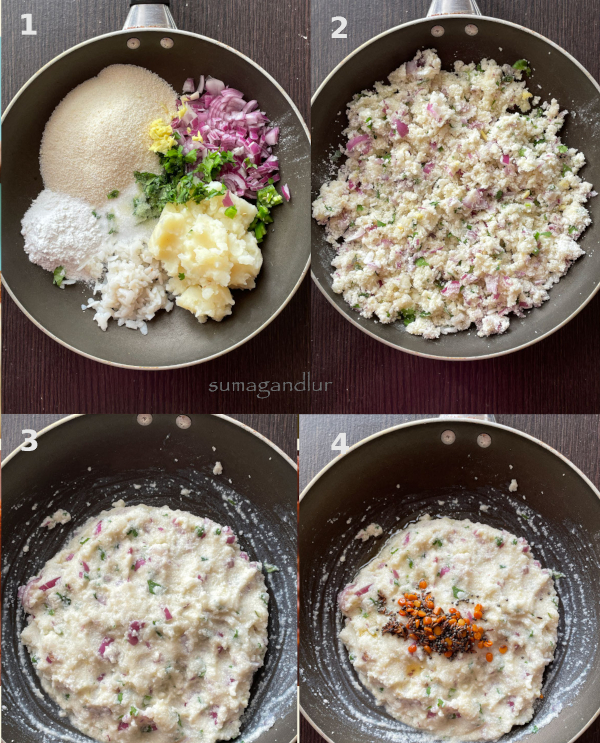
1. Add semolina, rice flour, poha and mashed potato to a bowl. Next add minced onion, cilantro, ginger, chili, and salt to the bowl.
2. Mix all the ingredients well to combine. Make sure that there are no potato lumps in the mixture.
3. Pour 1/2 cup milk to the mixture and stir well to combine. Cover and let the mixture sit for about 15 - 30 minutes. 
4. Add the tempering / tadka to the semolina mixture. Add extra milk if needed at this point and stir well. (I soaked the mixture for about 30 minutes and added extra 1/4 cup milk.)
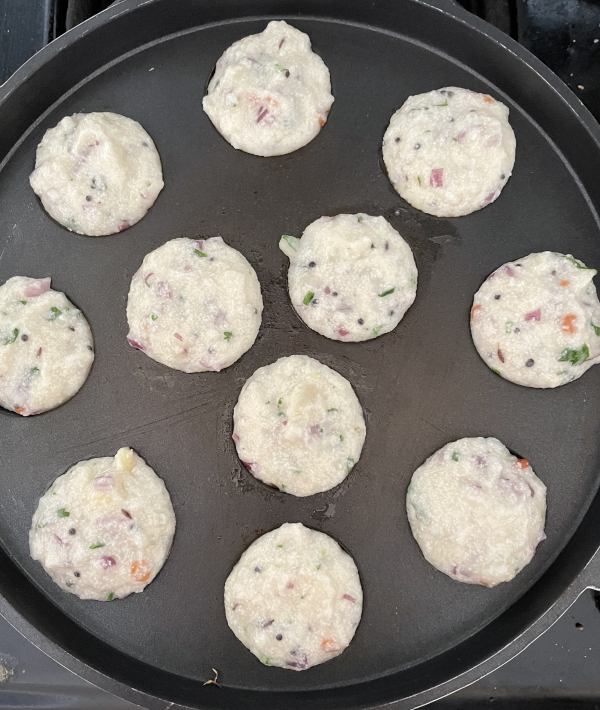
5. Heat the ponganalu / appe skillet and add a few drops of oil in each mold. 
6. Add baking soda or fruit salt to the mixture and mix well vigorously. (I added about a little more than 1/4 tsp. Eno's fruit salt, sprinkled a tbsp. water over it and mixed well.)
7. Fill the molds with batter, cover the skillet with a lid and cook on low medium heat until the batter doesn't appear raw on the surface. Or use a skewer and gently lift to check the bottom to notice if any golden brown spots formed.
8. If golden brown spots are formed, add a drop or two of oil on the surface of each of the ponganalu and flip them using a flat spoon/skewer. 

9. Cook until the other side lightly browns as well. (The appe would be slightly fragile compared to the regular appe because of the addition of potato. Be careful while flipping them and wait until the bottom sides of the appe are cooked well.)
10. Remove them and repeat the process with the remaining batter. Serve them warm with a chutney of your choice.  

This is going to be my contribution to this week's Blogging marathon. Check the page link to see what other marathoners are cooking.

Tuesday, January 4, 2022

Batata Kaap ~ Shallow Fried, Crispy Potatoes

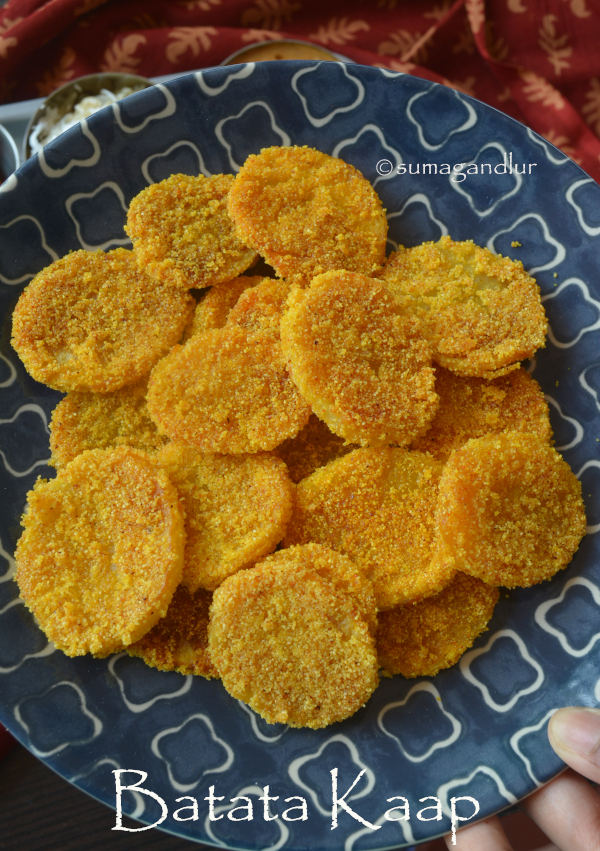
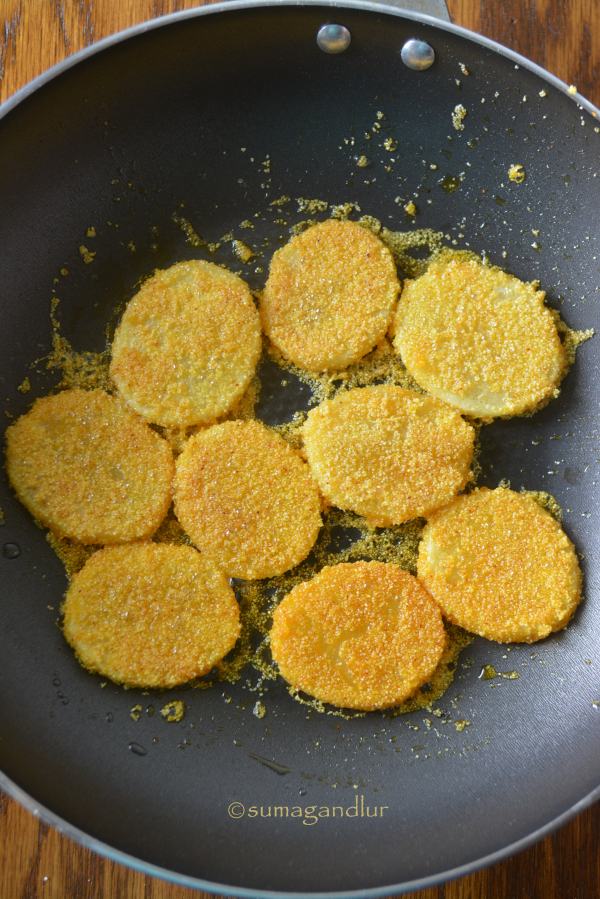
Batata kaap, from Konkan cuisine are semolina coated potato slices that are shallow fried to golden brown. The preparation is a simple and easy one and all one need are some potatoes, semolina and basic spices. They make a delicious, crisp side dish to rice and are a common preparation in Konkani households and I had made it as part of the Goan vegetarian meal. 

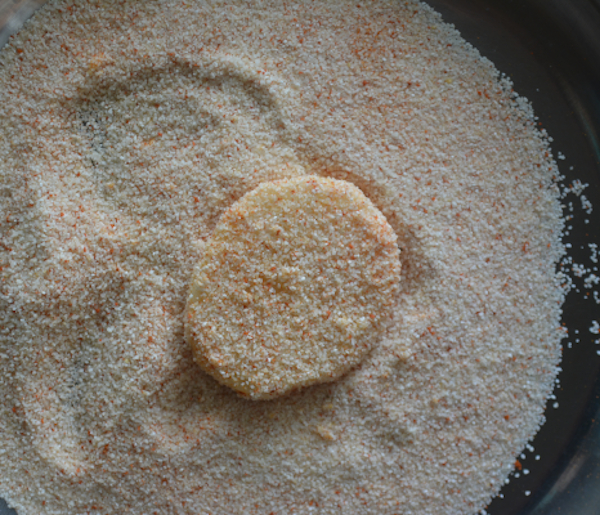
The potatoes are thinly sliced, coated with spices and dipped in semolina. Or semolina and spices are mixed and then the potato slices are dipped in as I have done in this recipe. Rice flour is used in place of semolina in some areas. They are then shallow fried in a pan until the potatoes inside turn soft and the outsides turn crisp, pretty inviting. They are served as a side dish to rice.
Ingredients:
4 potatoes
1/3 cup semolina
1/8 tsp. turmeric powder
Salt to taste
Chili powder to taste
Oil as needed

Directions:
* Peel and slice the potatoes into discs of uniform thickness, about 1/8 inch. Place them in a bowl of water to avoid discoloration.
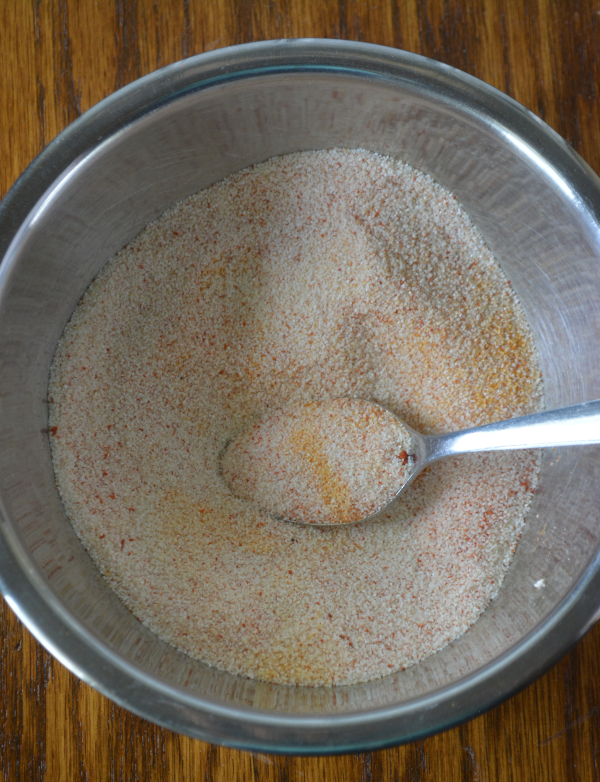
* Combine semolina, salt, turmeric and chili powder in a wide plate. 
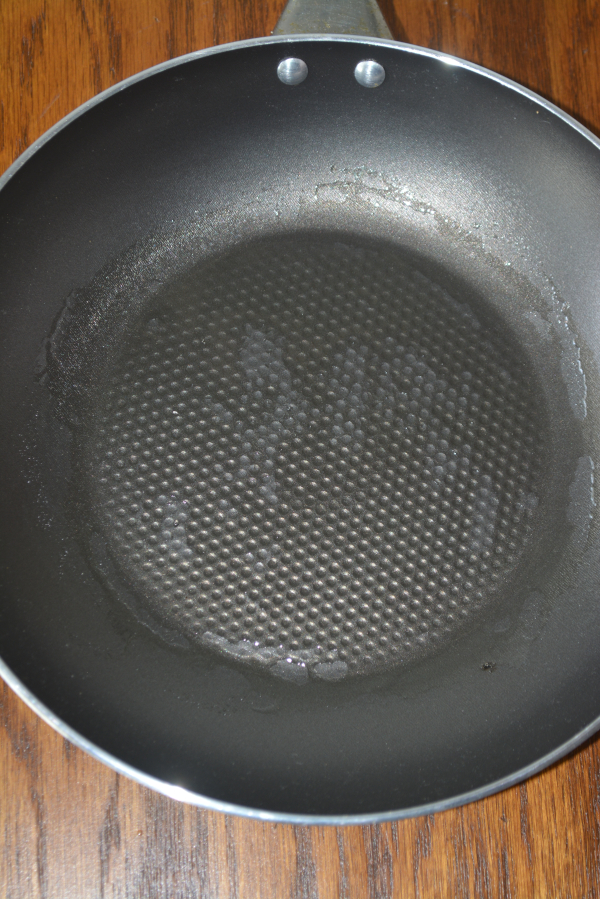
* Heat a non stick pan and brush a tsp. oil so that the whole surface of the pan is coated with oil.
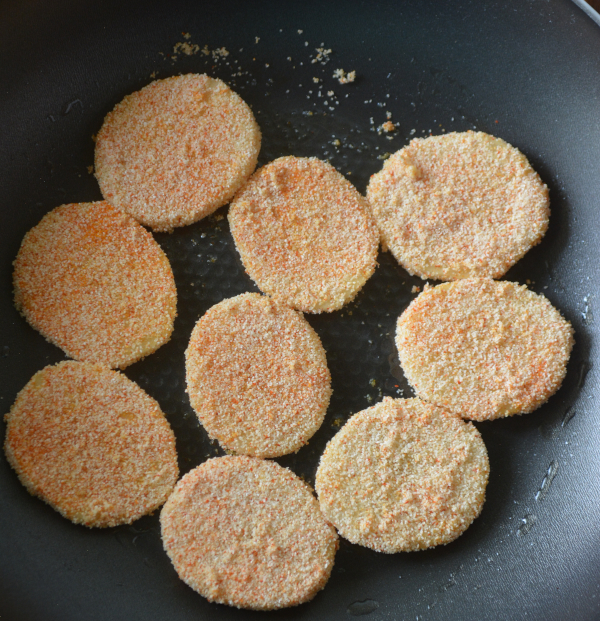
* Pat the potato slices with a napkin so that they are still damp. Dip them in the semolina mixture so that they are coated well on both sides. 
* Place the semolina dipped potato slices without overcrowding.
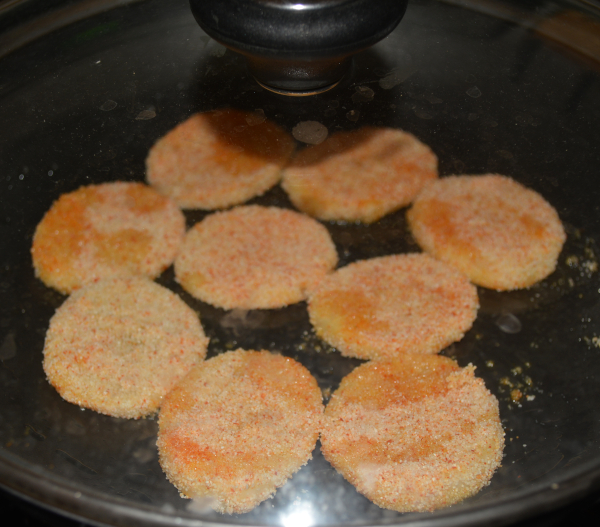
* Cover and cook on low medium flame until the bottom sides turn crisp. Add a tsp. of oil if needed.
* Flip the potato slices, add 1 or 2 tsp. oil and cook until the other sides turn crisp too. (The potatoes need to cook as well while shallow frying and so, don't cook on high heat setting.)
* Remove and repeat the procedure with the remaining potato slices.
This post is an entry for Blogging Marathon and check the link to find out what other marathoners are cooking.

Tuesday, August 24, 2021

Ragi - Rave Idli / Finger Millet - Semolina Idli / Ragi - Rava Idli

Rave idli aka semolina idli was created by MTR during second world war when rice was in short supply. This idli was a variation to the standard idli recipe which of course needed rice. Semolina idlis are a quick version idlis which need no grinding or fermenting and a popular one at restaurants and homes across the south Indian state of Karnataka. 

A few years ago, MTR came up with a spin off of this version called ragi - rava idli / semolina and finger millet idlis. The addition of finger millet flour to semolina idlis obviously make it healthier and guilt-free. This is my attempt to recreate that version at home. I have used semolina and finger millet flour in equal proportions here though semolina quantity can be increased if one is skeptical about finger millet. We are used to finger millet and so we found the idlis delicious. 

These idlis are not gluten-free or vegan as most of the idli recipes I posted in the series so far. They are intsant version idlis and need no grinding or fermenting. However both semolina and finger millet flour are soaked in yogurt for at least 30 minutes. Grated carrot, peas, or coconut can be added to make them more nutritious and tasty. Or one can even stick to the basic version. I found that these idlis need to be steamed longer compared to the standard version. These idlis make a healthy breakfast / brunch item and is diabetic friendly. It makes a wholesome dish when served with side dishes like vegetable saagu, sambhar or chutney.

Ingredients: (Yield - 18 idli)
1 tbsp. oil
1 tbsp. cashews
1/2 tsp. mustard seeds
1/2 tsp. skinned black gram / urad dal
1 sprig of curry leaves
1 cup semolina / rava 
1 cup finger millet flour / ragi flour
Salt to taste 
1 cup yogurt
1/2 cup grated carrot
2 tbsp. minced cilantro
3/4 cup water + extra only if needed 
1/4 tsp. Eno's fruit salt
Directions:
* Heat oil in a pan and toast cashews until golden brown. Remove them with a slotted spoon and keep them aside. To the same pan, add mustard, and black gram. Sauté until the black gram turns golden brown and add curry leaves. Toast for few seconds and add semolina. On medium flame, toast semolina until it starts to change color slightly and start to smell the aroma of it. Turn off the stove and let the mixture cool down. This step can be done in advance and the toasted semolina can be stored in a container.
2. Add finger millet flour / ragi flour and salt to the semolina bowl.
3. Add salt, yogurt, carrot and cilantro to the semolina - flour mixture and mix well. Add water as needed to prepare a thick, pourable consistency batter. Cover and allow it to rest for about 30 minutes.
4. Check the consistency of the batter after the resting period. Add extra water only if the mixture appears dry. 
* Heat about 2 cups of water in a idli cooker base or a idli cooker or a steamer on medium heat. 
5. Add 1/4 tsp. of Eno's fruit salt to the batter and sprinkle a tsp. of water over it. (or add a pinch of baking soda instead of fruit salt.) Gently stir the batter with a ladle until the mixture turns frothy.
6. Grease the idli moulds with ghee / oil. Place a toasted cashew at the center of each mould. (Or cashews can be added directly to the batter.) Fill the moulds with batter.
* Place the idli stand in the prepared cooker / steamer and close the lid. Don't use the valve for the lid if using a pressure cooker.
7. Steam the idlis on low heat setting until done. (The idlis should not stick when touched with moist fingers. It takes longer to steam these idlis compared to the standard rice - urad dal version.) Check the water level in the steamer base and add extra if needed.
* Wait for about 10 minutes and then remove the idlis by running a spoon around the edges.
* Drizzle melted ghee over the idlis and serve them with a chutney and /or sambhar. Mine were served with roasted gram chutney and sambhar.
* Refrigerate any left over idlis and use in a day or two. Or they can be cooled down immediately after preparation and frozen to use later. Just nuke them in a microwave, covered and enjoy hot, piping idlis when needed. 

Saturday, June 12, 2021

Lauki Idli / Sorekayi Idli / Sorakaya Idli / Bottle Gourd Idli

I had two kind of idlis on my mind for alphabet 'L' and in fact, I had already cooked one of those 'L' idlis, about an year ago. Lauki idlis / bottle gourd idlis was not on that list and to be honest, the idea did not even occur to me. The suggestion came from my husband at the last minute. Bottle gourd is one of those low calorie vegetables and I try to sneak in our diet as much as possible and so, I thought why not? A quick google search showed me that there are enough creative minds who had already experimented with the idea. 

I would have thought of a different batter if I had time but I had to keep it quick since these were made for today's breakfast with no advance preparation. I used an instant batter made with semolina aka rava idli batter for these idlis. And so there is no soaking, grinding or fermenting the batter. If one has toasted semolina on hand or a MTR rava idli packet, 😀 the idli preparation becomes a breeze. One can do the toasting semolina part in the recipe in advance and keep it handy. If one has never tried idli making, rava idli is an easy and instant version to try. 
The semolina is toasted with a seasoning and soaked in yogurt for about 20 -30 minutes and the batter is ready to go. I usually add grated carrot and peas to the rava idli batter to make it nutritious and today, bottle gourd went in instead. They turned out good and one would not even notice the difference between regular rava idlis and these. They make a great meal anytime of the day though these are considered a breakfast dish. We enjoyed them today with a chutney made with fried gram sans coconut. Vegetable saagu would be a delicious accompaniment to these idlis.
Ingredients: (Yield - 14 idli)
2 tbsp. oil
1 to 2 tbsp. cashews 
1 tsp. split chickpeas / Bengal gram / chana dal
1 tsp. skinned black gram / urad dal
1/2 tsp. mustard seeds
1 tsp. cumin seeds
1 inch ginger piece, finely chopped / grated
1 or 2 green chili, finely chopped
1 sprig of curry leaves
1 & 1/2 cups semolina (medium coarse)
3/4 cup peeled & grated bottle gourd
1/2 cup yogurt
3/4 cup water
1 tsp. salt or to taste
2 tbsp. minced cilantro
1/2 tsp. Eno's fruit salt

Directions:
1. Heat oil in  a pan and add cashews. Toast them until golden brown, by turning them once. Transfer them into a small bowl with a slotted spoon.
* Add Bengal gram, skinned black gram, mustard and cumin seeds to the same oil. When the lentils start to turn reddish brown, add ginger, green chillies and curry leaves. Sauté for about a minute. 
2. Next add semolina to the pan and toast on medium flame, continuously stirring until you start to smell the aroma and it starts to slightly change the color.
* Turn off the stove and transfer the mixture into a bowl and let it come to room temperature. (This can be done in advance and the mixture can be stored in air tight container for weeks.)
3. Add grated bottle gourd, salt and minced cilantro to the semolina bowl.
4. Next add yogurt and water to the bowl and mix well. Cover and keep it aside for about 30 minutes.
5. Stir the mixture once and if the mixture appears too thick, add some water. 
* Grease the idli moulds with oil / ghee. Place a cashew at the center of each idli mould. (Or the cashews can be added to the batter.)
* Heat about 2 cups of water in a idli cooker base or a idli cooker or a steamer on medium heat.
6. Add Eno's fruit salt to the semolina bowl just before making idlis and sprinkle a tsp. of water over it and mix well. 
* Ladle the batter into the idli moulds.
* Place the idli stand in the prepared cooker / steamer and close the lid. Don't use the valve for the lid if using a pressure cooker.
* Steam the idlis on low heat setting for about 20 - 25 minutes or until done. (The idlis should not stick when touched with moist fingers or a toothpick / knife inserted in the center should come out clean.) Check the water level in the steamer base and add extra if needed.
* Wait for about 10 minutes and then remove the idlis by running a spoon around the edges.
* Drizzle melted ghee over the idlis and serve them with a chutney / saagu.
* Refrigerate the left over idlis and use in a day or two. Or they can be cooled down immediately after preparation and frozen to use later. Nuke them covered in a microwave, and enjoy hot, piping idlis when needed. 

Saturday, October 17, 2020

Navaratri Naivedyam ~ Milk Rava Kesari

Semolina halwa is a delicious sweet dish prepared across India. It is popular enough to be a festive treat or a part of religious offerings and quick enough to whip up as a treat to satiate one's sweet tooth or to serve as a part of the breakfast meal. In fact, rava kesari is one of the naivedyams offered to Goddess on the sixth day of Dasara / Navratri. 
It is one of the easiest dishes to try if venturing into Indian sweet making. It is called sooji ka halwa / sheera in the north while the south Indian twist to this dish is the addition of orange food color where it is called rava kesari or kesari bhath, kesari referring to the orange color. 

Semolina is toasted in a generous amount of ghee and then cooked in water and sugar usually. My version today is made with milk which makes it richer. For a vegan version, milk can be replaced by water and the raisins and cashews can be toasted in a little oil or can be directly added to the boiling water, without toasting. The orange food color is optional as well. I have made a small portion here but the recipe can be easily doubled or mulitiplied. 

Ingredients:
2 tbsp. ghee (Add more if preferred)
1 tsp. each, raisins and cashews
1/4 cup semolina
1/2 cup + 2 tbsp. milk
1/8 tsp. ground cardamom
Few drops of orange food color
1/4 cup sugar (Add 1 tbsp. more if sweeter version preferred.)
Directions:
* Pour milk into a pan and bring it to a boil on low flame, stirring occasionally. Add cardamom and food color if using to the hot milk and stir.
* Meanwhile, heat ghee in a pan and add cashews and raisins. Toast until cashews turn golden brown and raisins are plump. Remove the raisins and cashews with a slotted spoon onto a plate and keep them aside.
* Add semolina to the same ghee pan. Toast on medium flame continuously stirring until it starts to change color slightly and the aroma starts coming, about 3 - 4 minutes. 
*  Lower the heat setting to minimum and add the toasted semolina to the milk pan, continuously stirring the mixture while doing so to avoid any lumps from forming. Cover and cook until semolina is done.
* Next stir in sugar and cook until all the sugar is absorbed by the mixture. Add the toasted cashews and raisins to it and mix well.
* Serve it warm.

Monday, August 10, 2020

A - Z Karnataka Recipe Series ~ S for Sajjige Rotti

So far in my 'A - Z' Karnataka Recipe Series,
Akki Halbai
Biscuit Roti
Congress Kadalekayi
Davanagere Benne Dose
Ellu Pajji
Field Beans / Avarekalu Payasa
Girmit
Hitakida Avarekalu Huli
Iyengar Bakery Style Masala Toast
Jolada Vade
Kumbalakayi Idli
Limbe Hannina Gojju
Mysore Pak
Nuchinunde
Oodhalina Bisibele Bhath
Welcome back on this culinary journey across the state of Karnataka. My first choice for today's letter was sakkare achchu, the sugar figurines which are associated with the harvest festival in the region, Sankranthi. I was planning to visit India this summer and this achchu making was on the cards for the marathon. Achu making requires expertise and patience and I was planning to reacquaint with the process along with my mother who has stopped making them in the recent years. Unfortunately, the trip and the achchu did not happen for the obvious reasons. Going by the chaos happening around right now, this should be of least concern, I know.😟

I chose to go with something made with sajjige aka semolina and so here are some sajjige rotti if one is looking for some filling, tasty and healthy breakfast ideas. A rotti conjures up an image of thick and sometimes crisp flat breads which are a very popular breakfast choice in Karnataka. They can be made with rice flour and finger millet aka ragi flour which are the most common ones served for breakfast. Then there is jola/sorghum based flour ones which are a routine lunch item in North Karnataka homes. 

Today's semolina rotti aka rave or sajjige rotti is slightly different than those and can can be made in two ways. One is where a firm dough is prepared like the akki masaale rotti or the ragi ones and patted on the griddle and toasted. Or a thick batter is prepared with a similar consistency to idli batter and are prepared as thick dosas. However they do not have any resemblance to another popular version of  semolina pancakes in south India called the rava dosa either in texture or taste. They take a little longer to cook than the regular dosas and make an instant, no ferment dosas though the semolina needs to be soaked in yogurt for a short time. I make dosas sometimes adding turmeric as well and so there are both yellow and brown colored rottis pictured here.

Some other 'S' Dishes of the region:
* Sabbakki payasa - Tapioca pearl kheer
* Sajjappa - A festive dish with a sweet filling of coconut and semolina.
* Shaavige payasa - Vermicelli kheer
* Sukkinunde - Stuffed and fried sweet dumplings
* Shenga holige - Peanut poli
* Saasive - A raita prepared with a paste of coconut and mustard seeds with a tempering of spices. 
* Shenga hindi - North Karnataka style peanut powder
* Saaru - Rasam
* Saarina pudi - Rasam powder
* 'Sandige' aka sun-dried vadi 
* Sandige huli - A gravy made with steamed lentil dumplings
* The 'Set dose' which is served as a stack of three thick, spongy dosas served with vegetable saagu and coconut chutney. 
* Shaavige bhath / uppittu - Vermicelli upma
* The savory and sweet versions of 'Surnoli', dose / pancake from the Konkan region. 
* Southekayi rotti - Flat breads made with rice flour and cucumber
* Susla / Sushila - A puffed rice based snack from North Karnataka.
* Dishes made with the following vegetables would also fall under 'S' category. 

'S' kitchen ingredients / produce in Kannada:
* Sabsige soppu  aka dill leaves which is a commonly used greens in the region. 
* Soppu in general means greens. 
* Seeme badanekayi - chayote / chow chow
* Southekayi - cucumber. 
* Sorekayi - bottle gourd 
* Shunti - ginger
* Suvarna gadde - elephant yam / suran
* Sapota hannu - chikoo fruit
* Sebu or sebina hannu - apple
* Seebe hannu - guava
* Seethaphala - custard apple
* Saame - little millet
* Sakkare - sugar
* Sabbakki - sago, tapioca pearls
* Sajje - pearl millet / bajra
* Sasive / Sasive kaalu - mustard seeds
* Sihi - sweet
* Siri dhanya - millets
* Shavige - vermicelli
Ingredients: (Yield 8 dosas)
1 cup semolina
3/4 cup yogurt
3/4 cup water
Salt to taste
1 tsp. cumin seeds
2 pinches of asafoetida powder
2 pinches of turmeric powder (optional)
2 sprigs of curry leaves, finely chopped
A handful cilantro leaves, finely chopped
2 green chilies, finely chopped
1 tsp. ginger finely chopped
A handful of fresh / frozen grated coconut
Ghee / oil to make dosas

Directions:
* Combine semolina and salt in a bowl. Add yogurt and water to it and mix well. Leave it aside for at least 15 to 30 minutes.
* If using frozen coconut, thaw it in the microwave before adding it to the batter.
 * Add the remaining ingredients except the ghee / oil to semolina bowl and mix well.
* Heat a tawa / shallow pan on medium pan. Sprinkle a little water on the pan to check whether the pan is ready to make rotti. It is ready if the water sizzles and evaporates immediately. If not, heat the pan some more but don't bring it to a smoking point. 
* Pour a ladleful of batter at the center. Spread it as thin as possible. The traditional way is to spread the batter thickly using fingertips.  A ladle can be used instead to be on a safer side though these can not be spread as thinly as the regular dosa.

* Pour a 1/2 tsp. oil / ghee around the edges and cook until the batter appears dry on the surface, around 2 minutes and flip. Cook the other side as well for about a minute and remove the dosa with a spatula.
* Repeat the rotti making with the remaining batter and serve warm with a chutney.


Comments

Sunday, July 12, 2020

A - Z Karnataka Recipe Series ~ R for Rave Vangi Bhath

So far in my 'A - Z' Karnataka Recipe Series,
A - Akki Halbai
B - Biscuit Roti
C - Congress Kadalekayi
D - Davanagere Benne Dose
E - Ellu Pajji
F - Field Beans / Avarekalu Payasa
G - Girmit
H - Hitakida Avarekalu Huli
I - Iyengar Bakery Style Masala Toast
J - Jolada Vade
K - Kumbalakayi Idli
L - Limbe Hannina Gojju
M - Mysore Pak
N - Nuchinunde
O - Oodhalina Bisibele Bhath
P - Panchakajjaya
Q - Quinoa Oralu Chitranna

'R' dishes from Karnataka:

'R' stands for rotti in Kannada which happens to be a very popular,  unleavened flat bread from Karnataka. There are variations depending upon the kind of flour used to make these rottis. The rice flour based ones that are made in three different ways are called akki rottis. The finger millet flour and semolina versions would be ragi rotti and sajjige rotti respectively. Sorghum flour based ones are called jolada rotti which are a staple meal in North Karnataka homes. There is also a fiery red chili chutney from that region called Ranjaka.

'R' is for ragi too which happens to be finger millet which is an important cereal grain of the state. The ground millet is traditionally used to cook various dishes like rotti, dose, idli, halbai and so on. And  most importantly, it is used in the preparation of ragi mudde which is a staple lunch and dinner item for many households across the state, especially in the southern parts. No ragi muddhe equals to no meal in these homes. Hurihittu is the popped grain that has been ground and stored to make ragi malt and laddus. 

'R' also stands for rave in Kannada. Rave, pronounced ra-way is semolina that is used in various dishes like uppittu, rave dose, rave idli, rave rotti, rave ganji / payasa, rave laadu, halbai and so on. Rave idli and rotti originated in the state though the rest are cooked through out south India.

R for rave vangi bhath:
My 'R' dish today is an authentic and tasty breakfast dish from the state called rave vangi bhath that can even double up as a comforting lunch box item. Vangi bhath powder adds spice to this version of vegetable upma. It is somewhat a cross between a uppittu recipe and vangi bhath and try it in case if you are looking to elevate the ordinary upma recipe. The bhath usually contains vegetables and is wholesome though it can be prepared without them as well making it a quick fix dish. Usually eggplants and capsicum are a part of the dish and usage of onions is entirely optional and I don't use them. Semolina can be replaced by vermicelli or a combination of semolina and vermicelli can be used as well in the recipe. In that case, the water quantity needs to be adjusted since vermicelli gets cooked in less quantity of water than semolina. 

Ingredients:
1 cup semolina 
2 small eggplants 
1/2 small sized capsicum
1 tomato
2 tbsp. oil
1 tsp. split chickpeas (chana dal)
1 tsp. skinned black gram (urad dal)
1 tsp. mustard seeds
2 tbsp. cashews
1 sprig of curry leaves
1/8 tsp. turmeric powder
A handful of fresh / frozen peas
About 1.5 to 2 tbsp. vangi bhath powder
Salt to taste

Prep work:
1. Roast semolina on medium flame, continuously stirring until it starts to give off the toasted aroma and some of the grains start to change the shade to slightly brown at the bottom, about 4 -5 minutes. Remove from the stove and let it cool. 
2. Either home made or store bought vangi bhath powder can be used in the recipe. The home made version can be found here and it can be prepared in advance and stored for weeks.. 
3. Chop the stalks of eggplants and slight them lenthwise into thin strips. Discard the stem and the seeds from capsicum and chop finely. Also chop the tomato finely and keep aside. (I used about 3/4 cup of each vegetable for 2 cups semolina. One can use about 1 to 1.5 cups vegetables for 1 cup semolina.)


Directions:
* Heat oil on medium flame in a big sized pan / pot and add split chick peas, skinned black gram, mustard seeds and cashews. 

* Stir and when the split chick peas and skinned black gram start to turn reddish / slightly brown, add curry leaves, chopped vegetables, and turmeric. 

* Saute on medium flame, stirring intermittently until vegetables are about to be done, exactly about 5 minutes. There is no need to cook them until done since they are going to get further cooked in water.

* Add 3 cups of water, peas, vangi bhath powder to taste and salt. Bring the water to a boil. (One can taste test the water and check whether the spice and salt levels are as per taste. The water should taste slightly saltier and spicy. If it is not spicy enough then a little chili powder can be used if preferred rather than adding vangi bhath powder. Adding too much of vangi bhath powder makes the flavor too strong instead of making it spicier.)

* Lower the heat setting once the water starts to boil. Pour the semolina into the pan in a steady, quick stream using the non dominant hand while continuously stirring with your dominant hand, to avoid forming lumps. In case, any lumps are formed then immediately break them with the back of the spatula.
 
* Cover and cook on low flame until semolina is cooked, about 4 to 5 minutes. Garnish with cilantro if needed and serve immediately.

Comments