HOME        |        ABOUT        |        COPYRIGHT        |        CONTACT        |         RECIPE INDEX        |         INDIAN THAALIS        |         MILLET RECIPES        |        EVENTS' ROUNDUP        

Showing posts with label Idli Rava. Show all posts

Thursday, November 11, 2021

A - Z Idli series ~ Z for Zucchini Idli

Here is the final post of the idli series that I have been posting since February. The final 'Z' post would have been tricky if not for the vegetable zucchini and a traditional, cucumber idli recipe from the south Indian state of Karnataka. It was easy to substitute zucchini for cucumber in the recipe since they are similar in texture and ooze water when grated. These idlis are one way to incorporate zucchini in Indian cooking.

So far in this series,
The preparation of zucchini idlis is quite simple since all one needs to do is just mix the ingredients, let it sit for a while and use the mixture to make idlis. These are instant variety idlis that are are made with idli rava or cream of rice. Grated zucchini and coconut are stirred into the rava, which together would lend enough moisture for the mixture to hold the shape to prepare idlis. The usual steps of soaking the ingredients, grinding them or fermenting the batter is not needed here which makes it a fuss-free option. These idlis are of course gluten-free and lacto-vegetarian. These idlis are a great way to ease into idli making if one is intimidated about the preparation of the standard rice and black gram version. They taste great when served with coconut chutney.

Ingredients: (Yield - 6 idlis)
3/4 cup idli rava / cream of rice
Salt to taste
3/4 cup grated zucchini
1/2 cup grated fresh coconut
1 green chili finely minced
1 or 2 tbsp. chopped cilantro
1/4 cup yogurt
1/4 cup water

Directions:
1. Add idli rava and salt to a bowl and mix to combine.
2. Next add grated zucchini and shredded coconut to the bowl.
3. Stir the ingredients well with a spoon to combine.
4. Add green chili, cilantro, yogurt and water to to the bowl.
5. Stir the mixture well and cover the bowl. Let it rest for an hour.
* Check the consistency of the batter after the resting period. The mixture should look thick but if you squeeze it, some water should come out of it.  If the mixture appears too thick, 1 or 2 tbsp. of water can be added.
6. Grease the idli plates and fill the molds with batter and press them with fingers to shape them. 
* Heat water in a idli cooker / pressure cooker / steamer base on medium heat.
* Place the idli stand in the steamer and close the lid. Don't use the pressure valve if using pressure cooker.
7. On low medium flame, steam for about 20 minutes or until when the surface of the idlis don't stick when touched with moist fingers. 
* Turn off the stove and let it sit for about 10 minutes.
8. Run a sharp spoon around the edges of idlis and remove the idlis.
* Serve them warm with ghee if desired and coconut chutney.

Tuesday, August 17, 2021

Poha Idli / Avalakki Idli / Flatenned Rice Idli


So far in this series -
D for Dal Idli
J for Jowar Idli
L for Lauki Idli
O for Oats Idli
Here are some super soft and quick version idlis made with flattened rice and cream of rice aka idli rava. These idlis need no advance planning as the batter needs a minimal amount of grinding and does not need fermentation as the standard version idlis. In fact, these idlis can be prepared in less than an hour, including the prep work and steaming the idlis. These idlis are obviously gluten free and vegan and can be served with a side dish of your choice - chutney / sambhar / podi. 
These idlis tend to be softer than the standard version because of the flattened rice used in the recipe. Thick or thin flattened rice / poha can be used in this recipe. My mother uses poha, idli rava and yogurt in the same proportion while making these idlis but I use more idli rava compared to the poha quantity being used. Poha needs to be soaked in yogurt until it softens and then ground finely. Idli rava is then mixed to it and soaked for a short period of time. A pinch of cooking soda or Eno's fruit salt is added just before steaming idlis as the batter is not fermented in this case. However don't go overboard using fruit salt since the idlis get ruined. They tend to spread and turn out crumbly. 1/8 to 1/4 tsp. fruit salt would be enough. 
Ingredients: (Yield 10 idlis)
1/2 cup thick variety flattened rice / poha
1 cup yogurt
3/4 cup idli rava
Salt to taste
Water as needed (I added about 1/2 cup.)
1/4 tsp. Eno's fruit salt
Oil / ghee to grease the idli plates
Directions:
1. Add flattened rice / poha in yogurt to a mixing bowl and mix well. (I added 1/2 cup yogurt for soaking poha and 1/2 cup yogurt while grinding.) 
2. Cover and leave the mixture until it softens. (The thick variety poha I get locally softens very quickly. Thin variety poha can be substituted if the thick variety poha available takes longer to soak.)
3. Add the mixture to a blender and grind the mixture finely. Then add idli rava and salt to the ground poha. 
4. Pulse the mixture a few times just to combine. There is no need to finely grind the mixture.
5. Transfer the mixture to the bowl and add water if needed to bring to a thick, pouring idli batter consistency. Let the mixture sit for about 20 minutes. 
* Heat about 2 cups of water in a idli cooker base or a idli cooker or a steamer on medium heat. 
6. Add 1/4 tsp. of Eno's fruit salt and sprinkle a tsp. of water over it. (or add a pinch of baking soda instead of fruit salt.) Gently stir the batter with a ladle until the mixture turns frothy.
7. Grease the idli moulds with ghee / oil and fill them with batter.
* Place the idli stand in the prepared cooker / steamer and close the lid. Don't use the valve for the lid if using a pressure cooker.
8. Steam the idlis on low heat setting for about 20 - 25 minutes or until done. (The idlis should not stick when touched with moist fingers.) Check the water level in the steamer base and add extra if needed.
* Wait for about 10 minutes and then remove the idlis by running a spoon around the edges.
* Drizzle melted ghee over the idlis and serve them with a chutney and /or sambhar. Mine were served with tomato - cilantro chutney.
* Refrigerate any left over idlis and use in a day or two. Or they can be cooled down immediately after preparation and frozen to use later. Just nuke them in a microwave, covered and enjoy hot, piping idlis when needed.

Thursday, June 10, 2021

Jowar Flour Idli / Jonna Pindi Idli / Sorghum Flour Idli

Sorghum, a millet is an important cereal crop grown in the world, for ages. This grain which is called jowar in Hindi, jonnalu in Telugu, jola in Kannada and cholam in Tamil is a traditional staple in south and western parts of India. Sorghum is gluten-free, nutritious, rich in protein and iron, making it a great alternative to rice. It is also a complex carbohydrate, meaning it takes longer to digest thus helping manage blood sugar spikes after meals, making it suitable for diabetics.

I have been trying to incorporate millets in our diet as much as possible in the recent years. These idlis which are made with this healthy grain is one such experiment. The standard, traditional version of idlis are made with urad dal / skinned black gram and rice or cream of rice. I have been making idlis replacing a portion of rice with jowar flour to make them healthier. 
I use rice / rice rava and sorghum flours in equal proportions or sometimes slightly more sorghum flour than rice in the recipe. I am guessing that replacing the entire rice with sorghum flour will interfere with the texture of the idlis. I don't have access to sorghum grain, either in whole or cracked form and so I haven't experimented much with the proportions or replaced the rice entirely with sorghum. Maybe using sorghum grain works if rice needs to be completely eliminated. I will update the recipe when I can get hold of some sorghum grain.

Using rice rava / idli rice and sorghum flour in equal proportions will yield soft, fluffy idlis and one would not find these idlis any different from the regular version. They make a healthy, gluten free and guilt free meal for anytime of the day. Serve them warm with chutney and sambhar. Here is a version made with idli rice and sorghum flour and check the recipe to know the consistency of the idli batter.
Ingredients: 
3/4 cup sorghum flour / jowar flour 
3/4 cup cream of rice / idli rava
1/2 cup skinned black gram / urad dal
1 & 3/4 tsp. salt
Water to grind the batter (I used a little more than a cup.)
Directions:
* Rinse black gram / urad dal thoroughly twice with water and soak in water in a container for about 3 hours. Similarly rinse cream of rice / idli rava with water and soak in water in another bowl. 
* Drain the water from both black gram and cream of rice containers. Squeeze out the water from the idli rava as much as possible.
* Add black gram, salt and water (as needed) to a blender and grind finely. (Skip adding salt while grinding if living in a hot climate. Add salt to the fermented batter before making idlis.)
* When the black gram is ground, add cream of rice / idli rava and run the blender for a couple of minutes to blend. Next add the sorghum flour and again run the blender to combine. Add extra water if needed. The final batter should be of thick, pouring consistency.
* Transfer the batter to a container and cover it. Leave it in a warm place to ferment overnight. 
 If living in a cold place, leave the batter container in the oven with the light on. Don't turn on the oven. The batter may take 8 - 10 hours to ferment in a warm place. It may take longer to ferment in cold climate, may be up to 16 - 18 hours.
* Heat water in a idli cooker / pressure cooker / steamer base on medium heat.
* Grease the idli plates and fill the moulds with the batter. Place the idli stand in the steamer and close the lid. Don't use the pressure valve if using pressure cooker.
* On low medium flame, steam for about 20 - 25 minutes or until when the surface of the idlis don't stick when touched with moist fingers. Turn off the stove and let sit for about 10 minutes.
* Run a sharp spoon around the edges of idlis and remove the idlis.
* Serve them warm for breakfast along with coconut chutney and/or sambhar.

Monday, May 18, 2020

A - Z Karnataka Recipe Series ~ K for Kumbalakayi Idli


So far in my 'A - Z' Karnataka recipe series,
A - Akki Halbai
B - Biscuit Roti
C - Congress Kadalekayi
D - Davanagere Benne Dose
E - Ellu Pajji
F - Field Beans / Avarekalu Payasa
G - Girmit
H - Hitakida Avarekalu Huli
I - Iyengar Bakery Style Masala Toast
J - Jolada Vade

There are plenty of Indian pantry staples and fresh produce that start with 'K' sounding Kannada names. I chose to go with a recipe featuring 'kumbala kayi' aka pumpkin for my 'K' recipe. Kumbala kayi or pumpkin idli to be precise, which happens to be a traditional dish from the state. These are gluten-free idlis which are an instant version. It doesn't involve any grinding and fermenting process making it an easy and fuss free preparation.

Idli rava and grated pumpkin are the main ingredients used in the preparation here. One can keep it basic or make it a spicier version with the addition of other ingredients like coconut, chillies and cilantro. There is also a version prepared using jaggery that is obviously sweeter. These make a tasty and quick alternative to regular idlis and pair well with coconut or peanut chutney.

Ingredients: (Yield - 7 idli)
1 cup peeled and grated pumpkin
1/2 cup rice rava / idli rava
Salt to taste
1/2 cup water
A handful of grated fresh coconut
1 green chillie, finely chopped
2 tbsp. minced cilantro


Directions:
* Combine idli rava, grated pumpkin, salt and water in a mixing bowl and leave aside for about an hour.
* Add coconut, chillies and cilantro to the rava mixture. If one doesn't prefer to see chillies in the idlis then coconut and chilies can be coarsely ground and added to the mix.
 
 * Mix it well. Add a tbsp. or two of water if the mixture appears dry. However the mixture need not be of pouring consistency. 

* Heat water in a steamer / base of the idli stand or the base of a pressure cooker. 
* Grease idli plates and pour the mixture into the moulds.

* Place the idli stand in a steamer / pressure cooker filled with water. Close the lid and steam for about 20 minutes or until a tooth pick inserted at the center comes out clean. If using a pressure cooker, don't put the pressure valve on.
* Serve pumpkin idlis warm with coconut chutney / sambhar.
 
Comments

Friday, April 17, 2020

Horse Gram Dosas / Ulava Dosalu

South Indian breakfast dishes are preferred over bread / cereal any given day in our home and I therefore keep rotating them. However idlis and dosas, which everyone seem to like mostly contain rice and I am trying to make them a tad healthier. Over the recent years, I have started to substitute a healthy ingredient for a portion of the rice in those recipes. Today's recipe is such one though a traditional one to make idlis and I make dosas with it as well. 

Horse gram, though chiefly is horse fodder as the name suggests is beneficial to humans as well as it is rich in iron. It is being used in Indian cuisine from a long time though not used as extensively as the other beans. Here is one way to include these in the diet if interested. One cannot miss the distinct flavor of horse gram, when tasting the dishes made with this bean. If one is bothered about it, serve these dosas with a coconut chutney / sambhar instead of dry spice powders which masks the flavor.

Ingredients:
1/2 cup horse gram / kulthi
1/2 cup skinned black gram / urad dal
1/2 cup idli rava
Salt to taste 
Any neutral flavored oil to make dosas 

Directions:
* Rinse horse gram and black gram with water thoroughly and drain. Soak them together in water for at least 3 hours, such that water level is at least two or three inches higher than the ingredients during the soaking period. 
* Similarly rinse idli rava and soak separately, covered in enough water.
* After the soaking period, drain the water completely from beans and rava containers. Add all the soaked and drained ingredients to a blender and grind into a thick, smooth batter adding salt and enough water. The batter should not be too runny. 
* Pour the batter into a container, with some extra space to allow the fermented batter to rise. Cover the container and leave it in a warm place overnight or for at least 8 hours or more depending upon the local weather to ferment. 
* Heat a tawa / flat non stick griddle when ready to make dosas. Stir the fermented batter once with a ladle. Pour a ladleful (about 1/4 cup) of batter at the center of the griddle and quickly spread it thinly with the back of the ladle. Pour 1/4 to 1/2 tsp. oil around the edges (I use very less oil.) 
* Cook until the bottom side is done and the surface no longer looks wet. Flip it with a spatula and cook the other side as well for few seconds. Transfer the cooked dosa onto a plate and repeat the dosa making process with the remaining batter. 
* Serve them warm with coconut chutney or any other spicy chutney.

Comments

Saturday, November 19, 2011

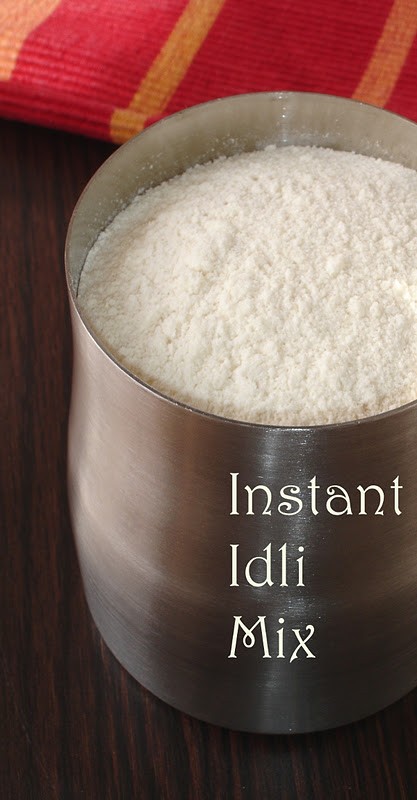
Homemade Instant Idli Mix


For fourth day of blogging Marathon # 10, here is a homemade instant mix for idlis. To be honest, I don't prefer to use store brought instant mixes especially for idlis since I know how to make amazing idlis from scratch. (No bragging there, I do make awesome idlis being a south Indian. :)) However I assure you that this homemade recipe works though I would not call it a substitute for regular fermented batter idlis. It is a very convenient one for novice cooks, bachelors and other busy bodies. The idlis come out good and are pretty decent ones compared to commercial brands.

Ingredients:
Urad dal flour - 1 measure
Idli rava - 2 measures
Salt to taste
Baking soda, as needed

Method:
Mix everything and store it in a jar.
When you plan to make idlis, add water to the mix and prepare a slightly thick batter (regular idli batter consistency.) Leave it to rest for 5 minutes and then prepare idlis using the batter as usual.


Check what other marathoners are cooking, here.

Comments

Wednesday, April 14, 2010

Leftovers' Magic - Masala Idly / Idli


 Masala idlies served with peanut chutney

Smart, frugal people always find ways to save and believe in the motto 'reduce, reuse and recycle'. Indian kitchens believe in the same concept, where nothing goes waste. Even leftovers are put to good use instead of trashing them. Plenty of delicacies are created from leftovers that have their own identity, flavor, fervor and sometimes even more appeal than the original dish.
In South Indian kitchens, leftover dosa / idli batters are a common ocurrence. While leftover dosa batter can be used to prepare delicious utappams - the pancakes with veggies, idli batter can create wonders. One way to use up that leftover batter is to prepare these sunshine masala idlies. Add some healthy, flavorful ingredients to the leftover or even fresh batter, prepare idlies and you have magically transformed the regular ones to something colorful and cheerful.

To make 24 idlies, we need:
5 cups of idli batter
1 carrot, peeled & grated
A handful of green peas (I used frozen)
A handful of chanadal soaked in water for a couple of hours
1 Tbsp cashew nuts (optional)
1 Tbsp finely minced cilantro
1 Tbsp finely minced curry leaves
1 tsp cumin seeds
1 tsp peeled & grated, fresh ginger
1 tsp 1 -2 green chilies finely minced (skip if serving kids)
1/2 tsp turmeric powder

Making idlies:
Add all the ingredients to idli batter and mix well. Pour the batter into greased idli moulds and steam them in a idli/pressure cooker.
For a detailed version of how to make idli batter / idlies, check here.

Monday, March 22, 2010

Sprouted Ragi Idly

I gladly admit that an error led to this enjoyable experience and I am more than ready to repeat such mistakes in the future.


Following a recipe of M's SIL, I had sprouted some ragi. I sprouted ragi longer than intended and could not use it in her recipe and also was not in a mood to use it in a salad because of the size of the sprouts.
Trashing them seemed like a sin since I carried ragi all the way from India during my previous visit. Again a talk with her led to the idea of using them in dosa/idly batter and here I am with sprouted ragi idlies.
They were no different from the regular idlies and were very soft, fluffy and yummy. Drown them in a bowl of sambhar or chutney, you have melt in your mouth beauties.

Ingredients needed to make around 25 - 28 idlies:
1 cup uraddal
1 cup ragi sprouts
1 cup idly rava
1 Tbsp salt

Preparing Batter:

  • Wash separately uraddal and idly rava with two exchanges of water. Then soak them separately, for a minimum of 3 - 4 hours.
  • Grind uraddal and ragi sprouts individually into smooth batters using a grinder/mixer/blender. Use only as much water as needed. Do not add more water and make the batter runny. Runny batters ruin idly preparation. It is important not to mix the uraddal and ragi while grinding since ragi does not grind properly with uraddal.
  • Drain the water from the idly rava completely. Using your hand, squeeze out any water left in the rava. There is no need to grind the rava.
  • Then combine the ground batters of uraddal & ragi sprouts and rava. Add salt and mix well.
  • Place the batter container in a warm place, overnight to ferment.
Making Idlies:
  • Next morning, pour the fermented batter into greased idly mounds. Place the idly stand and steam in an idly cooker or a pressure cooker with out the whistle / weight on. (I know some novice cooks doing this. :)). Cook for five minutes on high and when the steam begins to escape, lower the heat and cook for about 10-15 minutes.
  • Drizzle a tsp of ghee over the idlies and serve with chutney / sambhar.

                Ragi idlies served with sambhar and chutney.

Tips from my kitchen:
  • Ragi can be substituted for ragi sprouts. If using ragi, wash and soak it in water and grind separately.
  •  Idly rice can be substituted for idly rava. Idly rice also needs to be soaked separately. It can be ground into a smooth batter  together with uraddal.
  • For batters to ferment well, put the batter in the oven, with the light on. If that doesn't work, preheat the conventional oven and turn it off. Then place the batter container, with the light on. I always had well fermented batters even during Chicago winters.
  • Here is a way to check whether the idlies are done. Carefully remove the lid. Wet your fingertips and touch the idlis. If they don't stick, the idlies are done. Do this with out getting into the way of the hot steam. :)
  • Use a container with enough room for the batter to rise. Put a large plate or aluminium foil sheet under the container to catch any drips after the fermentation. Yeah, it happens sometimes. The batter rises more than you expected and you may end up with a messy oven.
  • Idlies can be refrigerated or frozen. If frozen, you may need to thaw them. If you refrigerate them, you can put the idlies in a container and place it in a pressure cooker with out the weight on and steam for 5-10 minutes. They will be piping hot as the freshly made ones. Or sprinkle a few drops of water and place it in a microwave safe bowl covered, for 1 - 2 minutes depending upon the quantity.
This goes exclusively to my Jihva - Breakfasts,  Indira being the creator of the event.

Post a comment

Tuesday, March 20, 2007

Idli Upma

The delicious idli upma is a combination of two ultimate, south Indian breakfasts, the idlis and the upma. The leftover idlis from the breakfast are cleverly utilised to make an evening snack. Depending upon the time and energy levels, this upma can be prepared simple by just adding some seasoning or more nutritious by adding vegetables, nuts, etc. When we were kids, we used to like this upma more compared to idlis. :-)
I for Idli upma - My entry for Nupur's A - Z vegetable event.


Six left over idlis can yield a good, hefty snack for two people.
Ingredients required :
Idlis - 6
Vegetables of your choice, chopped - 1/2 cup (I added onion, carrot & capsicum)
Oil - As needed to fry the vegetables
Salt - As needed (Remember that idlis are already salt added)
Green chillies, finely chopped - 2 or 3
Ginger, finely chopped - 1/2 tsp
Mustard seeds - 1 tsp
Chanadal - 1 tsp
Curry leaves - A few
A few cashews (optional)
Turmeric powder - 1/2 tsp

Method:
Crumble the idlis with your hands into small bits and keep it aside.
Heat oil in a pan and add mustard seeds, chanadal and ginger. When mustard seeds start to splutter and chanadal turn red, add chillies, cashews, curry leaves and turmeric powder. Fry for a few seconds and add the vegetables if using.
Lower the heat and cook the vegetables till they turn tender with stirring in between. Then add crumbled bits of upma, salt and stir once again. Let it cook for a couple of minutes. Keep stirring in between to avoid sticking. Remove and serve hot with some pickle or chutney.
You can squeeze some lemon juice before serving, if you wish.

Post a comment

Wednesday, January 24, 2007

Idlis and Tricolor Idlis

When Pooja announced tricolor theme, it got me into thinking. Rice and coconut were the only white things which were popping before my eyes. Today, I was preparing idlis for breakfast. Suddenly, the rava idlis with carrot toppings I used to eat at Kamath Hotel in Bangalore flashed before my eyes. They used to be my favorite and I thought why not serve the regular white idlis with green peas and orange carrot which represent the colors of our National flag. So, here they are for the entry to Pooja's theme of the week, orange, white & green.
The usual soft, fluffy, melt in your mouth idlis just got a makeover and the recipe follows here. Note that idli rava is different from rava idli mixes. Rava idli mix is used to prepare rava idlis.


Ingredients required to make idlis:
Urad dal - 1 cup
Idli rava - 2 cups
Salt - Accordingly
Ingredients required to make tricolored idlis:
Idli batter
A small carrot grated
A small cup of green peas

Preparation of idlis:
Wash urad dal and idli rava seperately with water to remove any impurities. Soak urad dal and idli rava in water seperately for atleast 3 hours. Throw away all the water used to soak.
Grind urad dal very smoothly with as little water as possible in a blender.
Then squeeze out any water present in the rava using your hands and add it to the ground urad dal and mix well. Alternatively, (after squeezing out the water from the rava) you can add the rava to uraddal in the blender and grind for a couple minutes more so that the rava and uraddal are mixed well.
Collect the batter in a big vessel and add salt. Allow it to ferment in a warm place for 8 - 10 hours. I usually soak the dal and rava around 9-10am, grind them at 3 pm and leave the batter container in a warm oven till next morning.

If idli batter is fermented properly, you see a raise in the level of the batter. So, always add the batter to a container which can hold more than the ground batter.
(Next day morning,) Add 2-3 cups of water to idli cooker / pressure cooker.   Grease the idli moulds with ghee or oil. Fill them with fermented idli batter and put the idli stand in the idli cooker / pressure cooker. If using a pressure cooker, don't use the weight.
Steam cook on low - medium heat till they are done. It would usually take around 15 - 20 minutes.

 
Preparation of tricolor idlis:


Add grated carrots and peas to the greased idli moulds before adding the idli batter. Steam them as said above.


Serve idlis with chutney / sambhar.

Here are some helpful tips:
1. For batters to ferment well especially during winters, put the batter in the oven, with the light on. If that doesn't work, preheat the conventional oven and turn it off. Then place the batter container, with the light on. I always had well fermented batters even during winters.
2. Rice rava can be substituted for Idli rava. Dal & rava ratio can even be 1:3 instead of 1:2.
3. Here is a way to check whether the idlies are done. Carefully remove the lid. Wet your fingertips and touch the idlis. If they don't stick, the idlies are done. Do this with out getting into the way of the hot steam. :)
4. Use a container with enough room for the batter to rise. Put a large plate or aluminium foil sheet under the container to catch any drips after the fermentation. Yeah, it happens sometimes. The batter rises more than you expected and you may end up with a messy oven.
5. Idlies can be refrigerated or frozen. If frozen, you may need to thaw them. If you refrigerate them, you can put the idlies in a container and place it in a pressure cooker with out the weight on and steam for 5-10 minutes. They will be piping hot as the freshly made ones. Or sprinkle a few drops of water and place it in a microwave safe bowl covered, for 1 - 2 minutes depending upon the quantity.

Post a Comment