HOME        |        ABOUT        |        COPYRIGHT        |        CONTACT        |         RECIPE INDEX        |         INDIAN THAALIS        |         MILLET RECIPES        |        EVENTS' ROUNDUP        

Showing posts with label Easy Desserts. Show all posts

Wednesday, January 12, 2022

15th Blogging Anniversary ~ Gajar Ka Halwa / Carrot Halwa Without Grating

Time sure flies by. The idea of an online recipe journal gave birth to this blog, 15 years ago. I would never have believed then that I would either be actively blogging after over a decade or I would still retain my enthusiasm and energy towards it. This virtual kitchen has helped me along the way in nurturing my love for cooking, exploring new cuisines and developing new friendships. I would like to take this opportunity to thank my readers who invest their time in going through my blog and drop an encouraging line.  

Here is some yummy halwa to celebrate the occasion. Carrot halwa which is called gajar ka halwa in Hindi and gajrela in Punjab is a popular sweet dish from the Indian sub continent, with it's origins in northern parts of India. This popular dessert is prepared especially during winter months as the red carrots which are the most preferred variety to prepare this halwa are available during the time. 
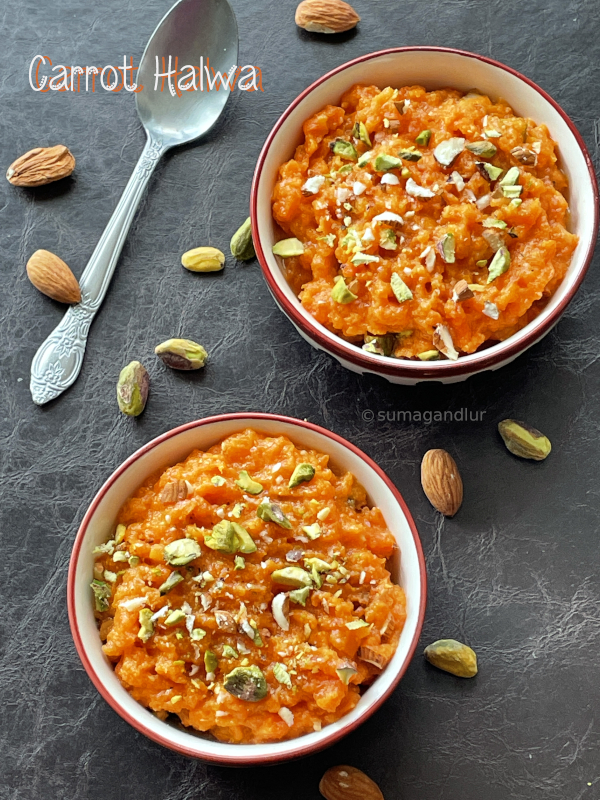
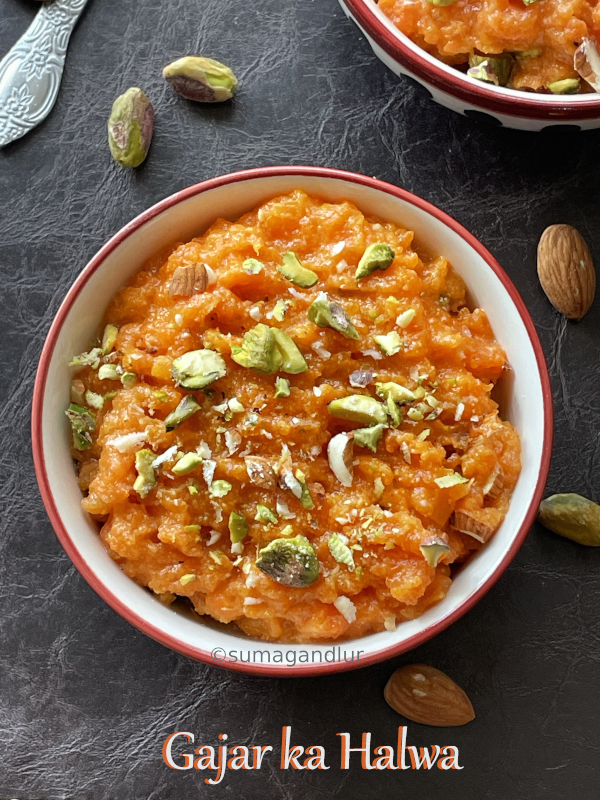
Carrot halwa tastes super delicious, even though it is made with only basic ingredients like carrots, milk, sugar, ghee and flavored with cardamom. Red carrots are preferable for the preparation if available but halwa is prepared with orange ones mostly as red carrots are not available everywhere. Forget about calories and use full fat milk for this halwa preparation. The grated carrots are simmered in milk until the milk is completely reduced, which takes time and patience if preparing in large quantities. There are versions made with khoya (milk solids), condensed milk etc. which are richer. Here are some versions I posted previously.
I have come across versions which involved no grating carrots and decided to try a small portion this time. The carrots are cut into chunks instead of grating and sautéed in ghee and then pressure cooked and slightly mashed in this method. I did not miss the taste but surely missed the texture of the grated carrots which I am more used to but this method definitely saves the time and work.
Ingredients: 2 - 3 servings
1 pound carrots / 2 cups, peeled carrots cut into chunks
1 cup full fat milk
2 to 3 tbsp. ghee
1/2 cup sugar (I used about 2 tbsp. less sugar)
1/8 tsp. ground cardamom 

Directions:
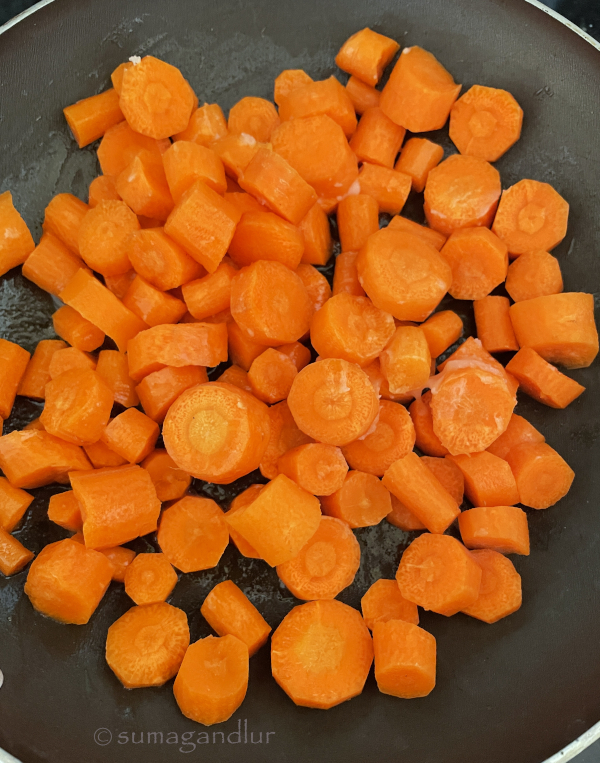
* Heat ghee in a pan, preferably a non-stick one. Add carrot chunks to it and sauté for a couple of minutes.
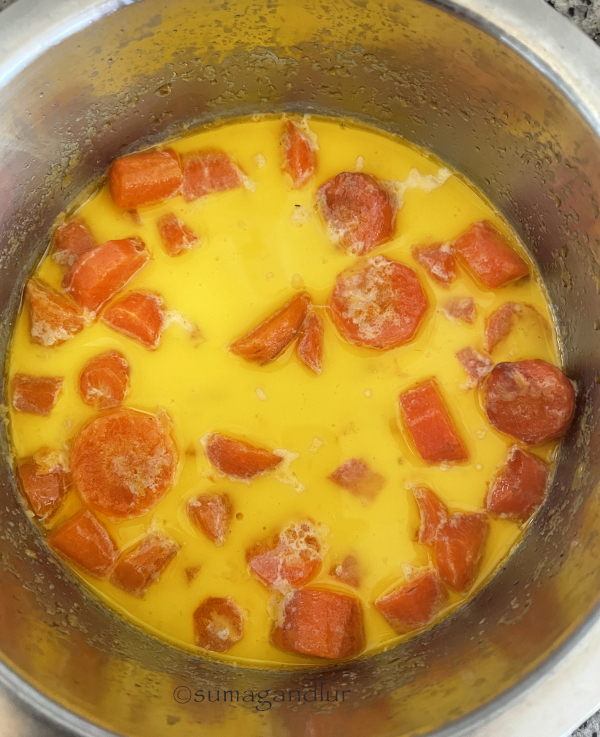
* Add the sautéed carrot chunks and milk to a steel vessel and pressure cook for 3 whistles.
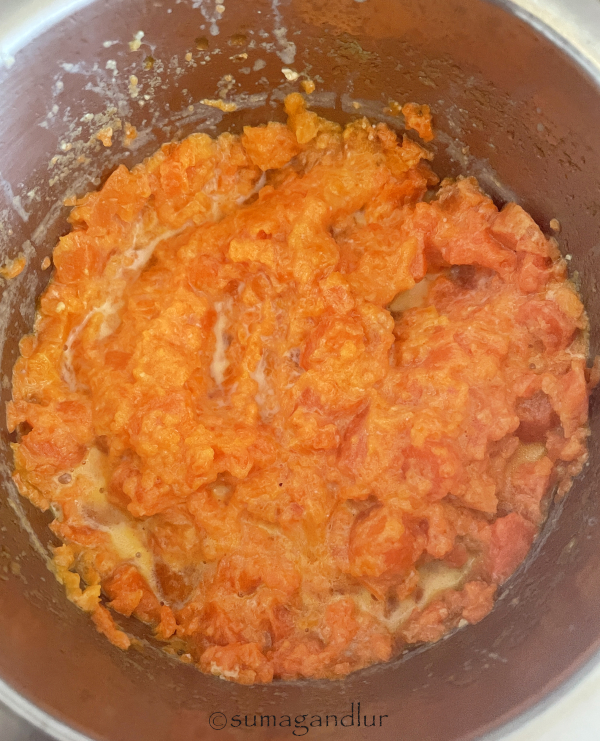
* When the valve pressure is gone, remove the carrots and mash them with a masher or back of a wooden spoon.
* Add the mashed carrots along with the milk back to the pan and cook, stirring now and then. Mash if any big chunks of carrots are seen. 
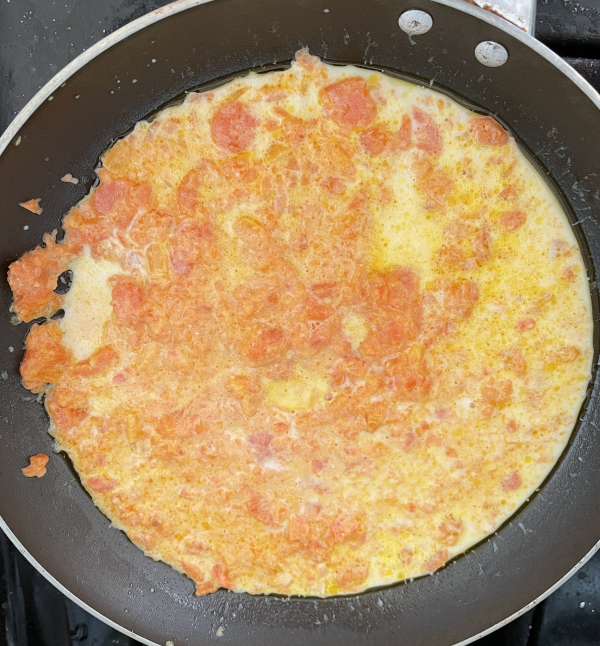
* The mixture begins to thicken as the milk  starts to reduce in quantity.
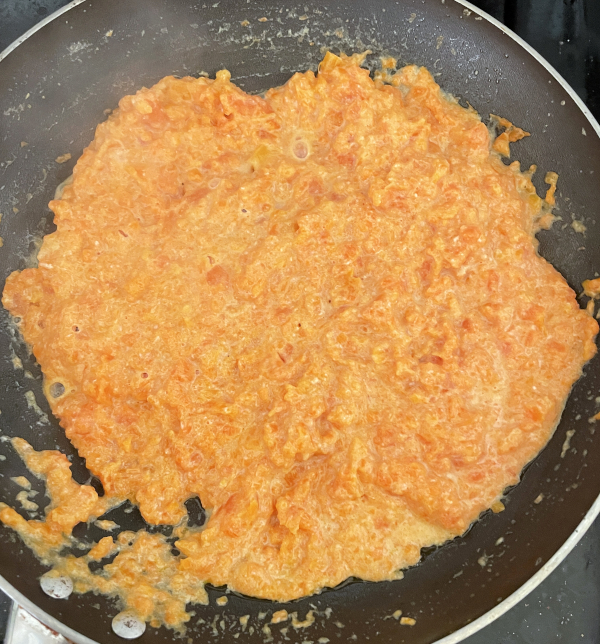
* Add sugar and cardamom when carrot-milk mixture begins one big mass or only a lit bit of milk is left in the pan.
* Keep cooking as the mixture again becomes loose because of the addition of sugar. Cook until the mixture slightly thickens and turn off the stove. 
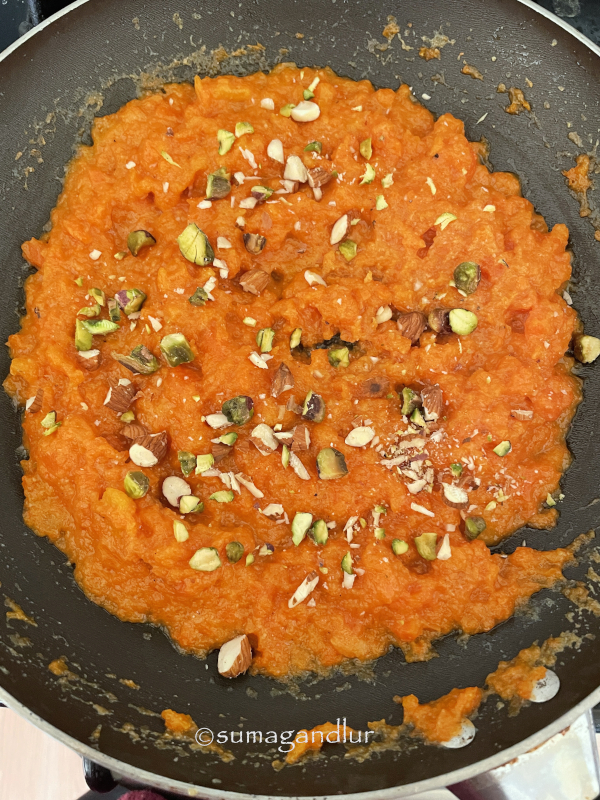
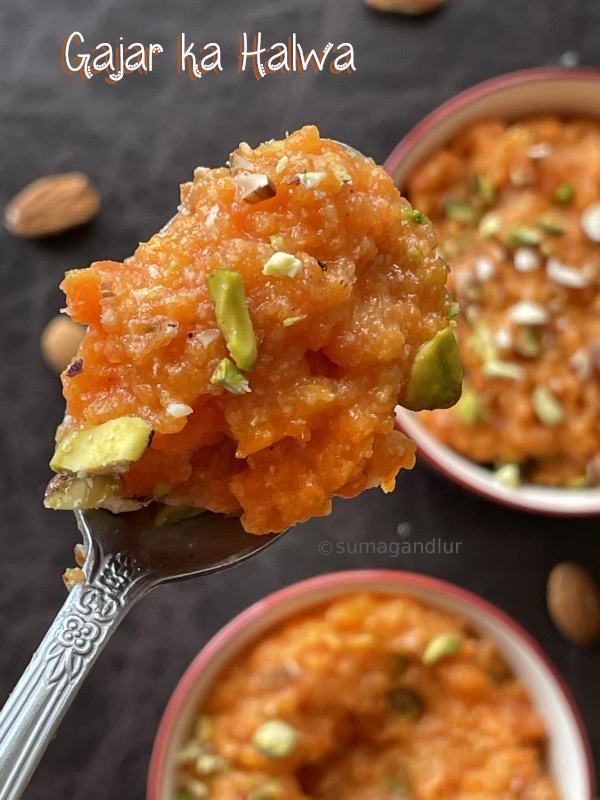
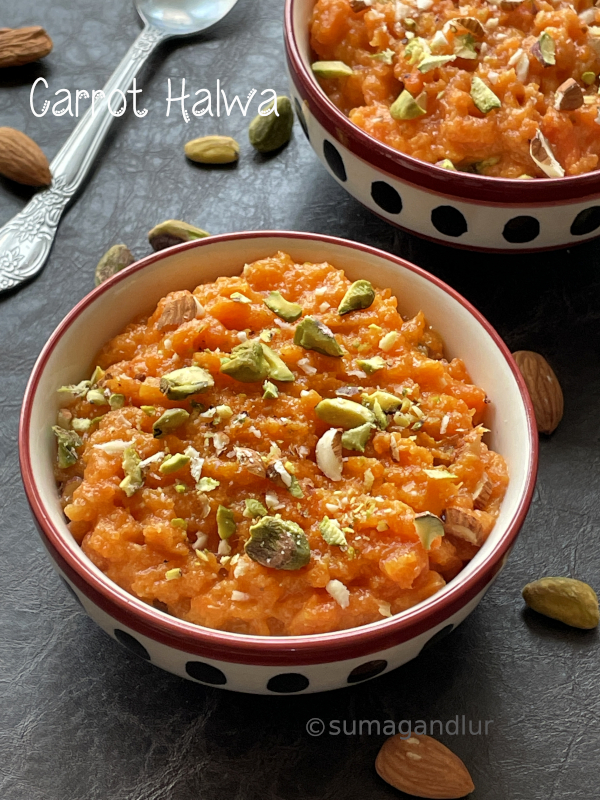
* Garnish with nuts. Halwa can be served either chilled or warm. 

This is going to be my contribution to this week's Blogging marathon, with the theme 'Winter Produce'. Check the page link to see what other marathoners are cooking.


Saturday, December 12, 2020

Burfi - Bread Pudding

 
This pudding was randomly mentioned in an online article that I read sometime ago. There was no mention of the quantities of ingredients or any specific recipe though the idea of using burfis in the pudding stuck with me for years now. Burfis are Indian variety sweets that are usually nuts or flour based and are usually square shaped. This pudding can be prepared using any leftover burfi or mithais you have on hand. I used chickpea flour based burfi / besan burfi here. 
This pudding is a great way to recycle those burfis / mithais you have lying around untouched after any festival / celebration. All you need to prepare this really tasty and fuss free pudding are some left over burfis, bread slices and milk. Here is how I prepared this quick and easy dessert.

Ingredients: (Yield 2 servings)
3 burfi pieces
1 & 1/2 bread slices
1.5 cups milk
Nuts / Dry fruits to garnish

Method:
* Pulse the burfis and bread slices into a coarse mixture in a food processor. Do not grind them fine.
* Heat the milk in a sauce pan and bring it to a boil. Add the burfi - bread mixture and nuts to the milk and cook for a minute.
* Turn off the stove and bring the cooked pudding to room temperature. Chill it before serving.

Comments   

Tuesday, September 1, 2020

A Goan Vegetarian Meal ~ Mangane


Let's move on to the western region of India today, Goa to be specific whose cuisine originated from the Saraswat cuisine. The cuisine belongs to Saraswat brahmins of the Konkan belt which includes the present day districts of Karnataka like Udupi, Uttara and Dakshina Kannada and Goa. The Konkan cuisine is a part of present day Goa, Karnataka and Maharasthrian cuisines since the Konkanis are spread through out the region. Most of the Saraswat brahmins eat fish / sea food similar to Bengali brahmins. 

And also of course the cuisine is influenced by the Portuguese who colonized it for over four centuries. In fact, Portuguese were the ones who introduced items like potatoes, tomatoes, guavas, cashews, pineapples, chili peppers to Goa which consequently  have become an integral part of Indian cooking. The modern Indian cooking would be at loss with out peppers and potatoes for sure. And also there are Catholics whose cuisine is a fusion of both the above mentioned cuisines. 

Use of kokum, a souring agent is a distinct feature of the Konkani cuisine. And of course there is coconut which is widely used in the coastal state where coconut oil is the cooking medium. Most of the Saraswat brahmins eat sea food and they follow a strict vegetarian diet on religious festivals and on certain days, particularly on Mondays. During those days, they have 'shivrak' food when they don't eat even onion or garlic. 

I built my menu around that 'shivrak' aka satvik concept and made a meal without onion and garlic. I made a simple Goan thaali a few months ago including cabbage foogath, a curry usually made with onions. Last week, I added a few dishes more and made another  Goan thaali without adding onion to the curry. Curry made with ridge gourd and the one made with radish and radish leaves seem to be the popular choices on the vegetarian days. I did not have both in my refrigerator and so settled for foogath sans onion instead.  I didn't have kokum or else I would have made some solkadi. The crisply fried potato slices with a semolina coating called batata kapa make a great side dish for any meal and have become recent favorite of ours. Mangane is the Goan version chana dal - sago kheer which is yummy and appears in festive meals and other occasions in Goa. Nevros / Neuroes, the Goan karanji was added to the platter as I had made them for Ganesh chaturthi recently. Yogurt which is a mandatory part in south Indian cuisine is not part of a Goan meal.

My simple vegetarian Goan thaali had these items and I am giving below the recipe for the kheer called mangane.

Plain Rice
Mango Pickle 
Cucumber slices
Cabbage foogath - A lightly seasoned cabbage curry (without onion)
Chanya ros - Dried yellow peas curry in a coconut base. 
Toi - Lightly seasoned lentils
Tomato Saar - Spicy tomato broth
Batata Kapa - Shallow fried potato slices with a semolina / rava coating
Mangane - Split chickpeas and tapioca pearls kheer cooked in coconut milk (Chanadal - Sago payasam)
Nevro / Neuroes - A crescent shaped fried dessert with a sweet coocnut filling

Chana dal payasam aka split chickpeas pudding is a personal favorite of mine and it used to be the most common payasam cooked in my dear mother in law's kitchen on festival days. The traditional dish is made through out south India, cooked either in a base of dairy or coconut milk with the addition of jaggery. It is called madgane (pronounced mud-ga-ne) in Konkani language. The Goan version is called mangane and has an interesting addition of tapioca pearls aka sago to it. 

I have made this kheer two times so far. I pressure cooked chanadal and sago together the first time I made this and then rinsed it with water. Whenever I make sago kheer, I rinse the cooked pearls in a colander thoroughly until all the starch is washed away. However I could feel the subtle sliminess clinging to chana dal while eating even though I could not see it visually and hated that feeling. (It may be just me.) I have now realized that cooking chana dal and sago individually and combining at the end would result in a perfect textured kheer. They are cooked together usually but I am picky that way. 😉 For a vegan version, skip the ghee and add the cashews directly to the kheer when jaggery is added.

Ingredients:
1/2 cup chana dal / split chickpeas
1/4 cup sago / tapioca pearls
1/2 cup jaggery
1/4 tsp. cardamom 
1.5 to 2 cups coconut milk (adjust as needed)
1 tbsp. ghee
2 - 3 tbsp. cashew pieces

Directions:
* Rinse and soak chana dal in a bowl of water for about an hour or two. Similarly rinse and soak sago in another bowl of water for about an hour. Drain the water after the soaking period.
* Pressure cook chana dal adding a cup of water. Pressure cook sago adding about 3/4 to 1 cup of water. They can be cooked in two different stackable containers at the same time in a pressure cooker but don't combine them if you are like me.
* The chana dal should be well cooked but still holding shape. Don't drain the chana dal and save if any water present.
* Once the valve pressure is gone, transfer the cooked sago to a colander and rinse with fresh water until all the starch is removed. 
* Transfer the cooked chana dal, sago and jaggery to a non stick or heavy bottomed pan and cook on medium flame until the jaggery melts, stirring in between. The water saved after cooking the dal can be added as well if the mixture appears dry.
*  Add the coconut milk and cook for about 5 minutes on low heat setting. Add cardamom, stir well and turn off the stove. 
* Toast cashews in ghee until golden brown and add it to kheer. Stir and serve it warm.

Notes:
1. The chana dal can be cooked in thin coconut milk (the milk extracted while grinding the coconut the second and third times) instead of water. 
2. The sago can be cooked in stove top in a sauce pan adding enough water instead of a cooker. 
3. Pressure cooker method is the fastest way to cook chana dal but if following the open pot method, soak chana dal overnight or for more than a couple of hours to quicken the cooking process.

Wednesday, February 19, 2020

Riz B Haleeb ~ Lebanese Rice Pudding


Rice based puddings are common all over the globe and have been cooked for ages. Rice getting cooked in a mixture of milk and sugar remains the basic theme. The additional ingredients like eggs or the slight regional variations in terms of thickeners or flavoring agents keep each one of them distinct, giving them a local flair. Today's rice pudding called 'riz b haleeb' comes from Lebanon, which literally means rice in milk. The addition of orange blossom water is what that makes this pudding Lebanese. Riz b haleeb is a yummy pudding with faint undertones of orange blossom water.
Orange blossom water is water distilled with the essence of fresh flowers from bitter orange trees. In fact it is what that prompted me to try this pudding as I had plenty of orange blossom water lying in my refrigerator. The flavor of orange blossom water in this pudding is somewhat subtle without overpowering the dessert. It is a thick, creamy dessert that is delicious and can be prepared with minimal efforts. I would recommend this dessert to rice pudding / kheer lovers.

Ingredients:
1/4 cup rice
2 cups milk
Sugar to taste
1 tbsp. corn flour
1 tsp. orange blossom water
Pistachios to garnish

Directions:
* Rinse rice with water and drain.
* Add rice and milk to a thick bottomed pot and cook on medium flame, stirring intermittently. Leave a ladle in the pot so that the milk doesn't boil over. 
* Cook until the rice softens, about 20 minutes or so. Add sugar and stir until it melts. 
* Mix corn flour with little water / milk (that is at room temperature), without any lumps.
* Next add orange blossom water and corn flour to the rice pot. Keep stirring for about five minutes or until the pudding becomes thicker. (One can add or minus the corn flour quantity depending upon the required consistency of the kheer.)
* Divide the mixture between serving cups and chill.
* Garnish with pistachios before serving.

Tuesday, February 18, 2020

Keskul / Turkish Almond Pudding

I came across this one while exploring traditional pudding versions prepared around the globe. Sutlac, muhallebi and keskul are dairy based puddings from Turkey. My version today is a quick and easy rice - almond flour based pudding called keskul and is prepared along the lines of a phirni. This version is the easiest one I came across and some versions even had eggs. This is a delicious, creamy dessert with bites of coconut and nuts that provides an interesting crunch to it. I added more ground almonds than recommended and prepared it with a thicker consistency. More milk can be added if one prefers to keep it thinner.

The original recipe had an interesting anecdote, connecting 'keskul' to Ottoman empire. A keskul is a bowl prepared with a coconut shell. Sultan's people would go around disguised as beggars, collecting money in keskul bowls. The money collected would give them an indication of the people's status. And the money then used to get distributed among the poor. 

Ingredients: (Yield - 2 small servings)
1.5 cup milk
2 tbsp. rice flour
1.5 tbsp. almond flour (I used about 3 tbsp. ground almonds)
2 tbsp. coconut flakes
Sugar to taste 

Directions:
* Whisk about 1/2 cup milk with rice flour until there are no lumps or pass the mixture through a fine sieve.
* Add this mixture, remaining milk, almond flour, coconut and sugar in a thick bottomed pot or a non stick one. Cook on low medium flame until the mixture thickens, continuously stirring. I blindly cooked the mixture for about 15 minutes in a non stick pot, stirring the mixture intermittently. Leave a ladle inside the pot to avoid the mixture from boiling over while cooking.
* Chill the pudding and distribute between bowls. Garnish with chopped almonds / pisatchios / raisins before serving.

Thursday, July 18, 2019

The One Minute Chocolate Mug Cake

The other day I picked a mug cake online and decided to go with it based on good reviews the recipe had garnered. There were a couple of comments expressing their disappointment as well and I chose to ignore them thinking that how can one go wrong with a mug cake. Apparently one can and if I had to comment now, I would have ended up in the latter category. The mug cake was bitter to the core and rubbery and I had to trash the entire stuff. And besides, I had baked it in a bowl to suit my 'one bowl dishes' theme. 😞

And then I came across this small sized eggless treat which is just enough to satisfy one's sweet tooth without going overboard. This cake can be made in two minutes from scratch. It took a minute to bake in my oven but the time may vary (a few seconds extra) since microwave powers vary.  The cake is not overtly sweet which was perfect for me but one can add more sugar or throw in some chocolate chips if they prefer it sweeter. The original cake had peanut butter but I used Nutella. One can instead use almond butter / jam / caramel sauce and so on. Don't skip the Nutella or whatever you choose to add since it keeps the cake moist. Use non dairy milk if going the vegan way. The cake was moist with perfect texture and tasted good. My daughter threw in some sprinkles in her mug cake.

Ingredients:
2 tbsp. all purpose flour
1 tbsp. cocoa powder
2 tsp. sugar
1/4 tsp. baking powder
A pinch of salt
1 tbsp. oil
2 tbsp. milk
1 tbsp. Nutella 

Directions:
* Stir together the flour, cocoa powder, sugar, baking powder and salt in a small bowl or directly in a small sized mug, making sure that there aren't any lumps.
* Stir in the milk and oil until the mixture is combined well. Go to next step if using a microwave safe bowl or else transfer the mixture to a mug.
* Drop a tablespoon of peanut butter / jam / Nutella at the center and push it down into the batter.
* Microwave for one minute on high. Remove and enjoy warm.
bmlogo

This post is an entry for Blogging Marathon #102 under 'One Bowl Dishes' theme. Check what other marathoners are cooking, clicking at the link.

Comments

Friday, January 11, 2019

Caakiri ~ African Pudding

Caakiri is a pudding from Western Africa prepared using a grain and a local version of fermented milk. The word 'caakiri' refers to the grain from which the dish is made and as well as the finished pudding. It also goes by other regional names of chakery, chakrey, thiacry, and tiakri. The preparation is similar to a rice pudding though it do not contain eggs. This can be eaten both as a snack or a dessert, though it is on the sweeter side. 

It was traditionally made using local African grains such as fonio which happens to be a super grain like quinoa, millet, maize or even black eyed peas. The modern version uses couscous though I used millet here. If using couscous, cook according to package directions. It is speculated that the modern version sweetened caakiri might have it's origins in a similar unsweetened dish that once might have been served as a main course. It might have evolved into the modern version with the passage of time and the easy, increased available ingredients like sugar. The dairy combination used here is a substitute for the African version fermented milk used to prepare the caakiri. I got the info and recipe of caakiri from the congocookbook. I have tried few recipes from this site before and the site offers a wide variety of everyday African recipes that are traditional and rustic. 

Ingredients:
1 cup of millet
A pinch of salt (optional)
1/2 cup evaporated milk
1 cup plain / flavored yogurt (I used Greek yogurt.)
1/2 cup sour cream
3 - 4 tbsp. sugar (adjust the quantity as needed.)
Any preferred flavoring (like vanilla, nutmeg, cardamom, cinnamon or any others.)
Optional garnishes - Raisins / Crushed pineapple / Mint

Method:
* Wash millet in two exchanges of water and drain. Pressure cook millet adding 2 cups of water and a pinch of salt for 3 whistles. If not using pressure cooker, add millet, salt and 3 cups of water to a sauce pan. Bring the mixture to a boil and reduce the heat to the lowest setting. Cover and cook until all the water evaporates, about 17 to 20 minutes. Let cool a little and fluff with a fork. 
* Combine evaporated milk, yogurt, sour cream together in a bowl. Next add millet and mix well. Add sugar according to taste and mix well. Add flavoring of your choice.
* Scoop caakiri into serving bowls and garnish with raisins / crushed pineapple / mint. 

This goes to Blogging Marathon under 'Recipes from Southern Hemisphere' Theme.

bmlogo
Comments

Wednesday, December 26, 2018

Honey Blondies

I remembered that I have a hoard of cooking magazines stowed away when almost I am on my last leg of this bakeathon journey.  I used to subscribe them until a year ago and they could have been a great resource for recipes this month, I realized late. Better late than never. These blondies come from Martha Stewart's Living magazine; published a few years ago. These were supposedly created to improvise the buttery flavored blondies with the addition of sweet, floral taste of honey. Any flavored honey can be used in the recipe and in lieu of it, even maple syrup works as I have learnt. Bittersweet chocolate takes the place of traditional semisweet chips here, to add an interesting factor. 1/2 cup of any toasted and chopped nuts can be stirred in along with the chocolate.

Ingredients:
1/2 cup / 1 stick unsalted butter + extra for pan
1 and 1/4 cup all purpose flour + extra for pan
1/3 cup honey 
3/4 cup packed light brown sugar
1 flax egg
2 tsp. pure vanilla extract
1 tsp. coarse salt
4 oz. bittersweet chocolate, cut into chunks

Directions:
* Combine 1 tbsp. ground flaxmeal with 3 tbsp. water in a bowl and keep aside for about 5 minutes. 
* Melt butter and honey in a sauce pan and stir in brown sugar. Let it dissolve and turn off the stove. Transfer the mixture to the flax egg bowl. Add vanilla, flour and salt as well. Stir until just combined and let the mixture cool for about 30 minutes. Stir in chocolate chunks.
* Ten minutes before the cooling period ends, preheat the oven to 350 deg F. Butter an 8 inch square baking pan. Line with parchment, leaving an overhang on two sides. Then butter the parchment and flour pan, tapping out excess.
(I used an 7x5x1.5 inch glass baking dish for half the recipe and did not line it with a parchment. I just greased and floured the pan.)
* Pour batter into the prepared pan and and spread batter evenly with a greased knife if needed.
* Bake until browned on edges and set, about 28 minutes.
* Remove the pan and let cool completely on a wire rack. Lift blondies out of pan using the overhang, if parchment was used. Remove parchment and cut into squares. I cut blondies into squares directly in my glass pan after cooling.


This cake goes to Bakeathon and Blogging Marathon #95 under the theme 'Bookmarked recipes' events.
Bakeathonbmlogo

Comments

Wednesday, December 12, 2018

Blackberry Cobbler


Call me weird but I don't like to eat berries unless they are in some form of a baked dish. Strawberries are an exception though. My share of sweet blackberries were lying in the refrigerator and a one minute online search landed me at 'Food Network' site which featured this baked berry dessert recipe. It captivated my attention immediately as it is an easy breezy kind of recipe besides being made with the every day ingredients found in most of the kitchens.
 
This is not a biscuit based cobbler but the batter based one, perfect for lazy bodies like me. It is a great recipe to try when looking for ways to enjoy the summer's berry bounty. All it takes is a few minutes to mix the batter, dump the berries and stick it in the oven. In case if you don't have berries on hand, other fruits such as peaches, apples and others will work fine. This is a no fuss dessert made with minimal efforts and great results. One ends up with a beautiful cake like consistency at the bottom and slightly crispy top with fruit embedded in between. A perfect dessert to prepare on a lazy day. I had to scale down the recipe since I didn't have the required amount of berries on hand. 

Prep time: 5 to 10 minutes
Baking time: 1 hour
Ingredients:
1 cup self raising flour or 1 cup all purpose flour + 1.5 tsp. baking powder + 1/2 tsp. salt
1 cup + 1/4 cup + 2 tbsp. sugar (divided)
1 cup milk (Non-dairy milk can be substituted.)
1/2 stick or 1/4 cup butter, melted + extra for greasing the pan
2 cups fresh blackberries (Frozen ones can be substituted.)

Directions:
* Preheat the oven to 350 deg F. Grease a 3 quart baking dish with butter.
* Rinse the berries and pat them dry.
* Whisk self rising flour, 1 cup sugar and milk in a mixing bowl. Add melted butter next and whisk to combine.
* Pour the batter into the baking dish and sprinkle the berries uniformly over the top of the batter. Sprinkle about 1/4 cup sugar over the berries.
* Bake until bubbly and golden brown, about an hour. Sprinkle the remaining 2 tbsp. sugar when 10 minutes of the baking time remains.
* Serve with ice cream or whipped cream.

It goes to Bakeathon  and Blogging Marathon #95 under the theme 'Meal Time Dishes' events.
Bakeathonbmlogo


Comments

Wednesday, December 5, 2018

Oat - Beet - Carrot Brownies

The beet - spinach brownie from Jessica Seinfeld's 'Deceptively Delicious' cookbook has been doing rounds over the internet for years now and I have been eyeing them for quite sometime. These brownies are made with a healthy twist without compromising the texture or the flavor. They are made with oat flour sneaking in veggies for added nutrition. One can never notice or taste the vegetable flavors in the brownies. The final brownies are moist with slightly dense texture. My daughter was surprised to see the red puree while mixing and asked me whether beets were being added. She licked the spoon and the residue batter from the mixing bowl and told me that the batter tasted yummy. Without any prompts, she told me that the brownies are so good that she could not find any difference between the regular and the beet version ones and she couldn't even taste or smell the beets / carrots.
I substituted carrot for spinach since I wasn't feeling that adventurous. However only beet or carrot puree can be used in the recipe. I replaced the egg whites with apple sauce after seeing Madhuram's recipe. However you can just replace it with some more beet or carrot puree instead. I peeled, chopped,  pressure cooked beets and carrots and then pureed them in a food processor. I prepared my own apple sauce as well. I just peeled, chopped and microwaved an apple and pureed it. I ground oats finely and sieved it to get oat flour. All purpose flour can be substituted instead of oat flour. Skip salt and baking powder from the recipe if using self raising flour instead. I used dark chocolate and so my brownies were not overtly sweet and they were good served with ice cream.

Ingredients:
3 oz. semi sweet or sweet chocolate (I used dark from Ghiradelli.)
2 tbsp. butter / margarine spread / oil
2 tsp. vanilla essence
1/2 cup cooked beetroot puree
1/2 cup cooked carrot puree
1/4 cup unsweetened apple sauce
1/2 cup firmly packed brown sugar
1/4 cup cocoa powder
3/4 cup oat flour 
3/4 tsp. baking powder
1/2 tsp. salt
1/2 cup coarsely chopped walnuts

Directions:
* Preheat the oven to 350 deg F. Grease a 8 inch square pan.
* Melt the chocolate in a microwave oven in a medium sized microwave safe mixing bowl, taking care to check at 30 second intervals so that it doesn't burn.
* Add butter if using to the same bowl and mix. The butter will melt because of the hot chocolate. Add vanilla essence, vegetable and apple purees, sugar and cocoa powder to the bowl and whisk well.
* Next stir in the oat flour, baking powder, salt and walnuts.
* Pour the prepared batter into the prepared oven and bake it for about 35 to 40 minutes. It should spring back when touched. Mine was done in about 35 minutes. (And it doesn't raise much. It came only up to half of my 8 inch square pan.)
* Let it cool on a wire rack and then cut into squares.

It goes to Bakeathon  and BM - 'Kids' Delight' event hosted by Vidyha this month with 'Vegetables sneaked in' theme.
Bakeathonbmlogo

Comments

Sunday, June 3, 2018

Paal Payasam ~ South Indian Milk Pudding


The past month for us marked two birthdays, visits from extended family members and a bout of illness that affected every one at home. After that unplanned month break, I am back in business with a traditional sweet dish from the southern parts of India. Payasam, the south Indian term and kheer, the north Indian name basically refer to the same dish - an eggless sweetened milk pudding cooked on stove top adding either a grain or lentil or vegetable and so on. Milk is the star ingredient in today's payasam where only a tiny quantity of rice is added, similar to the case of a kheer preparation. Usually milk and water are cooked until the quantity is reduced to half here, allowing a slow caramelization that lends the payasam a light cream colored hue. 

To be honest, I have never seen my mother or grand mothers preparing this since this seems to be a typical preparation from Tamil nadu and Kerala. Our go to dish when it comes to traditional payasams in Andhra happens to be paramannam. I am not sure how many modern kitchens still prepare it but it also happens to be a rice based payasam. 
I just went through recipes from online when I tried it for the first time, that were basically the same. One either cooks in a pot that happens to be the traditional aka tedious process or use a pressure cooker which cuts down the cooking time considerably. The short cut method however doesn't compromise in the taste department and so I usually go with it.
Ingredients:
4 cups milk / 1 litre milk
1 tsp. ghee
2 to 3 Tbsp. rice
1/4 cup + 2 tbsp. sugar (or according to taste)
2 cardamom pods
1 tbsp. cashews 


Method:
* Heat the ghee in a small saute pan and fry the cashews if using, to golden brown. Transfer the cashews onto a plate with a slotted spoon. 
* Add rice to the same ghee and fry rice for a couple of minutes on a slow flame. Next pulse the rice a couple of times just to break the grains. There is no need to coarsely grind the rice. 
* Grease inside bottom of the cooker with little ghee and add the broken rice grains and milk to it. Drop a small spoon into the milk to prevent the milk from spilling over while pressure cooked. 
(I usually drop a spoon even when I am boiling the milk in a pot or leave a ladle in the pan to avoid the milk from boiling over.)
* Cook the milk on lowest setting of heat for one whistle. When the pressure subsides, remove the lid and continue to cook on low flame until the milk turns thick and creamy or until the milk coats the back of the ladle.
* Next add the sugar and ground cardamom seeds and continue to cook until the sugar dissolves. Turn off the stove and add the toasted cashews. 
* Serve warm or cold.
bmlogo
This goes to Blogging marathon # 89, under the 'Indian Sweets - Payasams' theme. Check out the page here to read what other marathoners are cooking.

Comments