HOME        |        ABOUT        |        COPYRIGHT        |        CONTACT        |         RECIPE INDEX        |         INDIAN THAALIS        |         MILLET RECIPES        |        EVENTS' ROUNDUP        

Showing posts with label Easy Indian Sweets. Show all posts

Wednesday, January 12, 2022

15th Blogging Anniversary ~ Gajar Ka Halwa / Carrot Halwa Without Grating
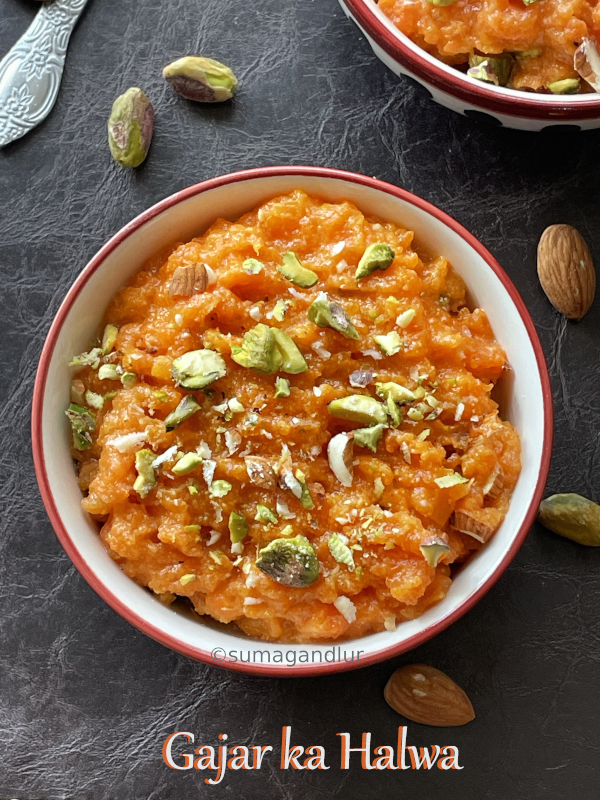
Time sure flies by. The idea of an online recipe journal gave birth to this blog, 15 years ago. I would never have believed then that I would either be actively blogging after over a decade or I would still retain my enthusiasm and energy towards it. This virtual kitchen has helped me along the way in nurturing my love for cooking, exploring new cuisines and developing new friendships. I would like to take this opportunity to thank my readers who invest their time in going through my blog and drop an encouraging line.  
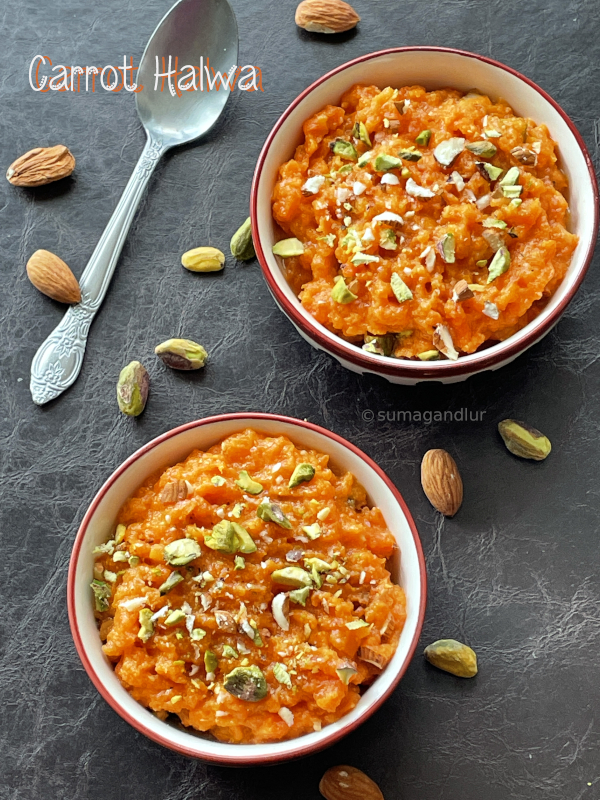
Here is some yummy halwa to celebrate the occasion. Carrot halwa which is called gajar ka halwa in Hindi and gajrela in Punjab is a popular sweet dish from the Indian sub continent, with it's origins in northern parts of India. This popular dessert is prepared especially during winter months as the red carrots which are the most preferred variety to prepare this halwa are available during the time. 
Carrot halwa tastes super delicious, even though it is made with only basic ingredients like carrots, milk, sugar, ghee and flavored with cardamom. Red carrots are preferable for the preparation if available but halwa is prepared with orange ones mostly as red carrots are not available everywhere. Forget about calories and use full fat milk for this halwa preparation. The grated carrots are simmered in milk until the milk is completely reduced, which takes time and patience if preparing in large quantities. There are versions made with khoya (milk solids), condensed milk etc. which are richer. Here are some versions I posted previously.
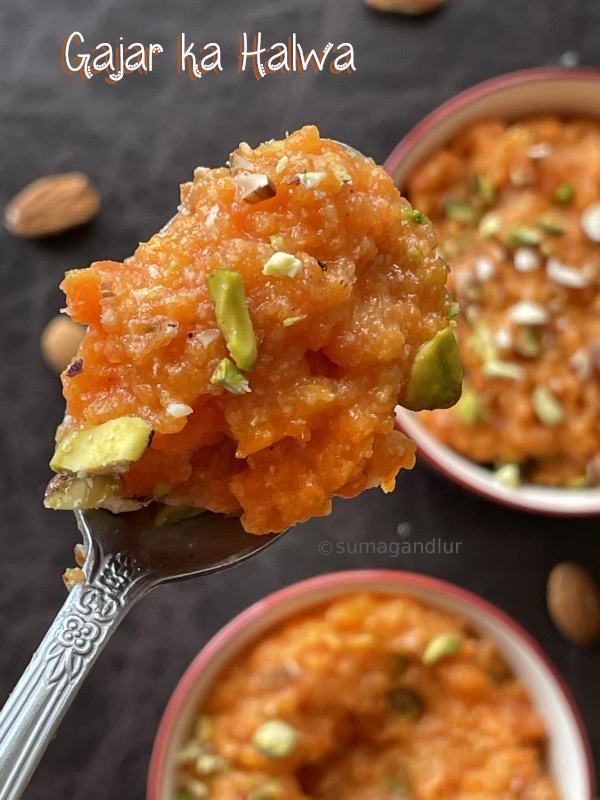
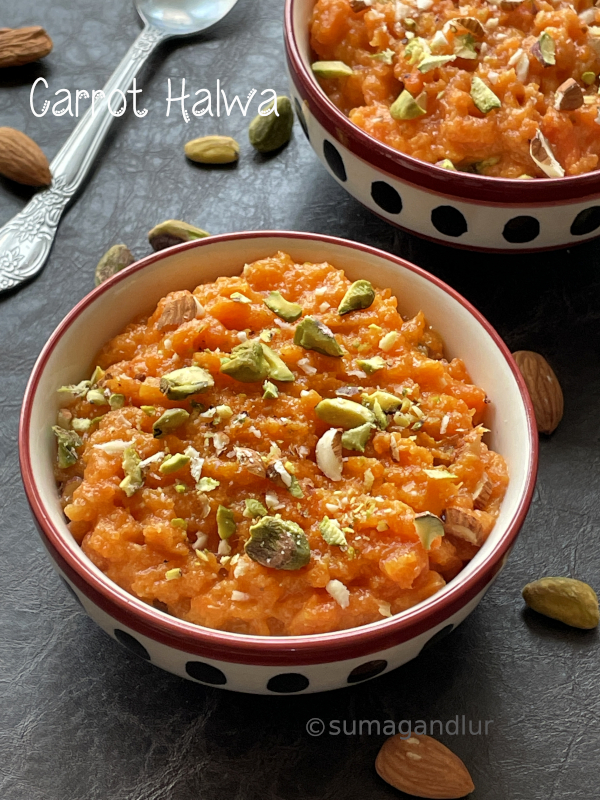
I have come across versions which involved no grating carrots and decided to try a small portion this time. The carrots are cut into chunks instead of grating and sautéed in ghee and then pressure cooked and slightly mashed in this method. I did not miss the taste but surely missed the texture of the grated carrots which I am more used to but this method definitely saves the time and work.
Ingredients: 2 - 3 servings
1 pound carrots / 2 cups, peeled carrots cut into chunks
1 cup full fat milk
2 to 3 tbsp. ghee
1/2 cup sugar (I used about 2 tbsp. less sugar)
1/8 tsp. ground cardamom 

Directions:
* Heat ghee in a pan, preferably a non-stick one. Add carrot chunks to it and sauté for a couple of minutes.
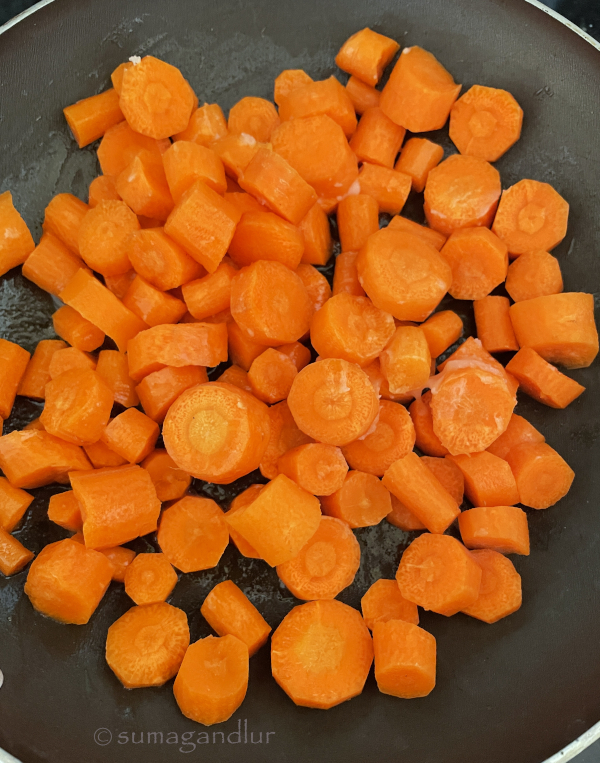
* Add the sautéed carrot chunks and milk to a steel vessel and pressure cook for 3 whistles.
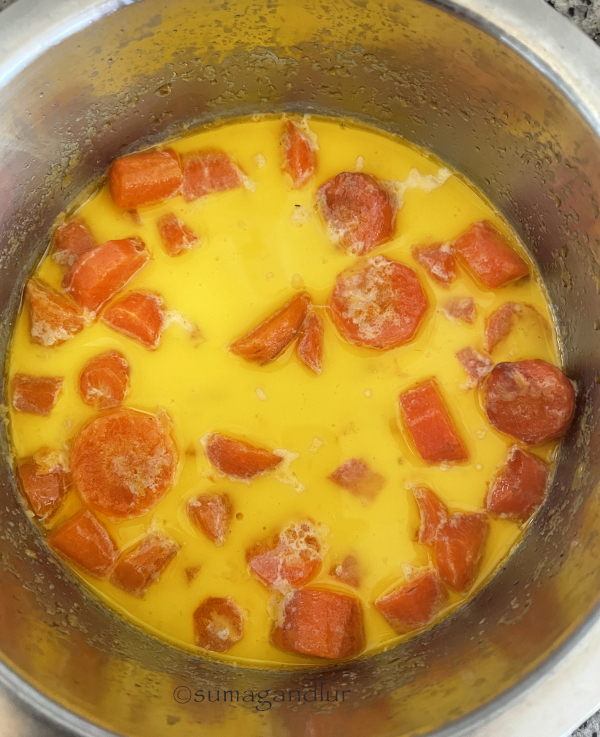
* When the valve pressure is gone, remove the carrots and mash them with a masher or back of a wooden spoon.
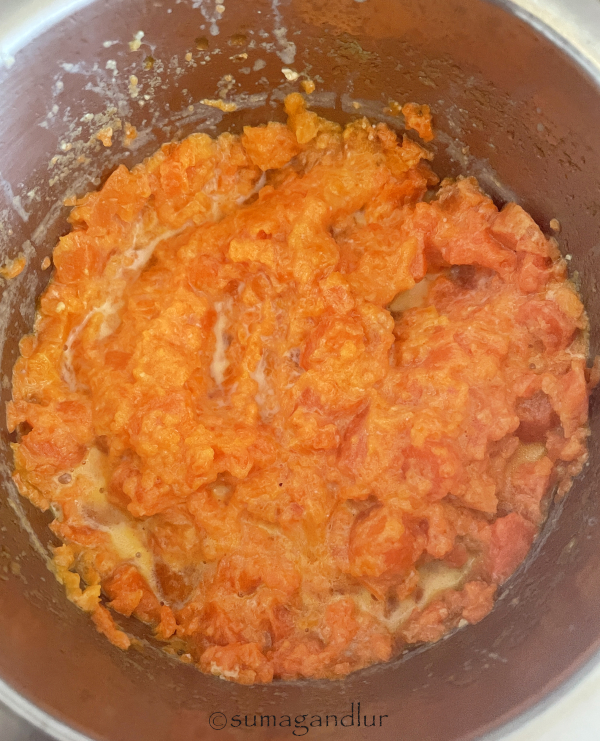
* Add the mashed carrots along with the milk back to the pan and cook, stirring now and then. Mash if any big chunks of carrots are seen. 
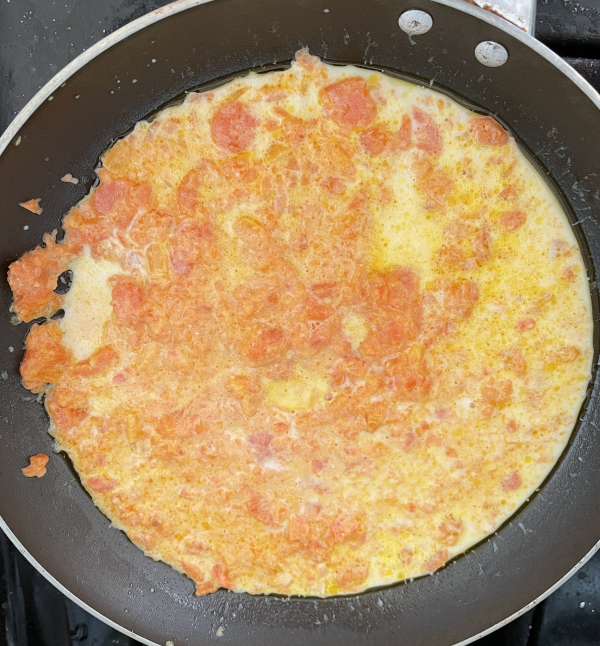
* The mixture begins to thicken as the milk  starts to reduce in quantity.
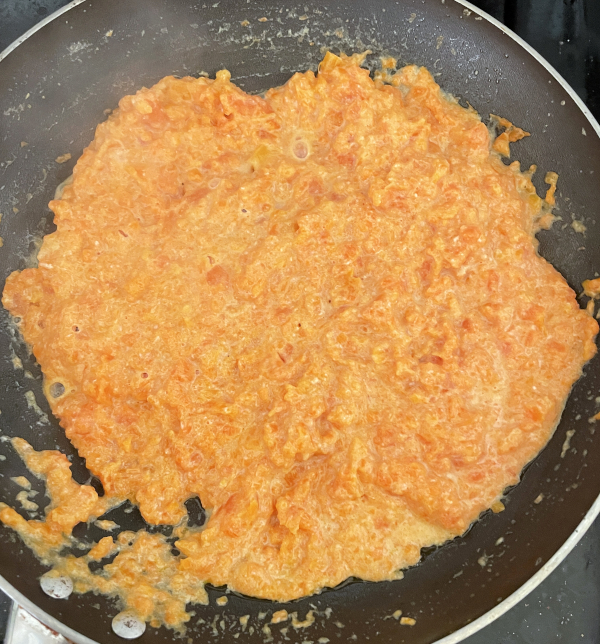
* Add sugar and cardamom when carrot-milk mixture begins one big mass or only a lit bit of milk is left in the pan.
* Keep cooking as the mixture again becomes loose because of the addition of sugar. Cook until the mixture slightly thickens and turn off the stove. 
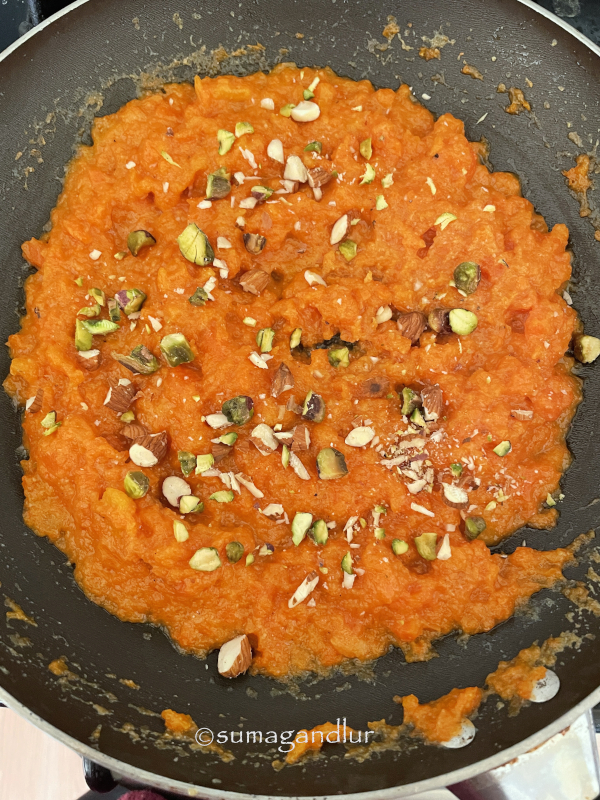
* Garnish with nuts. Halwa can be served either chilled or warm. 

This is going to be my contribution to this week's Blogging marathon, with the theme 'Winter Produce'. Check the page link to see what other marathoners are cooking.


Monday, October 19, 2020

Proso Millet - Moong Kheer

 
Here is a millet based sweet recipe keeping the 'Navaratri' theme in mind. It is a delicious and easy kheer / payasam prepared with proso millet and moong. I  initially pressure cooked the millet and moong in water to save time and then further cooked it in milk and sugar. The millet and moong can also be cooked in a sauce pan on low heat until the mixture  reaches a soft and creamy consistency. It can be cooked in milk without the addition of water to make it more richer. Jaggery can be substituted instead of sugar in the kheer. This yummy kheer is fit to offer as a naivedyam on festive days or enjoy as a simple dessert.
Ingredients:
1/2 cup proso millet

1/4 cup yellow moong
1 & 1/2 cups of milk
3/4 cup sugar or to taste
1/8 tsp. cardamom powder
1 tbsp. ghee
1 tbsp. cashews
1 tbsp. raisins

Directions:
* Rinse proso millet and moong and pressure cook adding 1 and 1/2 cups water, for 3 whistles.
* Transfer the cooked moong - millet mixture to a pan, preferably a non-stick one. Add milk and cook until a desired consistency is reached or for about 10 - 15 minutes, frequently stirring. Add sugar and cardamom and cook further until the sugar is dissolved. Turn off the stove.
* Heat ghee in a small pan and add cashews and raisins. Toast until the cashews turn golden brown  and raisins turn plump. Remove from the heat and add them to the kheer.
* Serve the kheer warm or chilled.

Wednesday, September 4, 2019

Coconut Burfi / Kobbari Burfi / Kobbari Mithai / Kaayi Burfi

So far in this series,
Malaadu / Hurigadale Unde
Dry Gulab Jamun

I have a big weakness for Indian sweets and I also happen to love coconut. And so here is coconut burfi, which my mother considers to be my most favorite sweets of all. It doesn't mean that I have no other favorites but among the lot that my mother prepares, I seemed to like it more while growing up. My sister grudgingly would remind her to prepare her favorite burfi too, whenever my mother prepared coconut one. Carrot burfi was and still is her favorite and my mother tells me that whenever she makes coconut burfi nowadays, my sister seems to remind her that she has got the wrong daughter 😉 and she needs to wait until my visit.  

I get to taste coconut burfi whenever I visit home in the recent years. In spite of reminders that I can cook almost anything I want these days, my mother wouldn't let us go without preparing each one of our favorite dishes. And coming to myself, I think I am making these burfis for the second time in my 20 plus married years. I kinda use coconut very sparingly and rarely make any coconut based dishes in my home, considering my husband's affinity towards coconut.😞 
South Indian style coconut burfi preparation doesn't need any fancy ingredients. It basically uses three ingredients - fresh coconut, sugar and cardamom. And a small amount of water if you have to consider it as well. The only skills needed for this burfi preparation are grating and stirring. If grating coconut is not for you, then use a good quality frozen section shredded coconut like I did. Just take care that the coconut is smelling and tasting good.  
All the ingredients are added to a thick pan and are cooked, stirring continuously until the mixture starts to leave the sides of the pan and a thick mass is formed. In case one fails to set the mixture, they can be rolled into small balls / laddus and can be enjoyed. Just wait to roll into balls until they are warm enough to handle with bare hands. It tastes the same albeit in a different shape. It makes a great treat for for Indian festivals like Diwali.


This burfi always has a place among the assortment of sweets my mother prepares for 'Varalakshmi Vratham'. My mother sticks to this basic recipe but some happen to add milk, condensed milk, cream or khoya to the preparation. Some add nuts or safforn to garnish. One of my aunt adds chickpea flour as well to the coconut mixture at the end and the resulting burfi comes across as a cross between coconut burfi and mysore pak and it tastes awesome as well. 
Cook time: 40 minutes
Ingredients:
2.5 cups / 300 gm / 11 oz shredded fresh coconut (I used frozen coconut.)
1 cup sugar
1/2 cup water
2 cardamom pods / 1/4 tsp. ground cardamom

Directions:
* Grease a round or square shaped plate, with one inch depth and keep it aside.
* Scrape the coconut if using a coconut or use shredded coconut from the freezer section. Thaw the frozen coconut if necessary. If needs to be thawed quickly, transfer the coconut to a microwave safe bowl and heat it for a couple of minutes.

* Add sugar and (just enough) water to cover it in a non stick or a thick bottomed pan / pot. Add coconut and mix well and start cooking the mixture on medium flame, stirring frequently.

* The mixture becomes loose initially and goes on becoming thicker as it is being cooked. Add the ground cardamom and mix well, about 15 minutes into cooking.

* Lower the heat and continue cooking, stirring frequently. 
 * When the mixture starts leaving the pan and comes together, it is an indication that the burfi is cooked. One can specially notice it when not using a non stick pan to cook the burfi. I used a non stick pan and it took me almost 40 to 45 minutes to make the burfi.
* If not sure whether the coconut mixture has cooked or not to burfi stage, put a small spoon sized portion of the mixture on a greased plate and check after a couple of minutes. If it is done, the coconut mixture sets by hardening slightly. If has not set, it means that coconut mixture needs further cooking.
* Transfer the cooked mixture onto the greased plate and spread it  evenly using a greased spatula. (I did not take pictures for this step.)
* While the mixture is still slightly warm, score lightly with a knife vertical lines, spacing them 1.5 to 2 inches apart. And horizontal lines in a similar fashion.
* When the mixture has cooled completely, again run the knife along the lines and cut them into pieces. Store them in  airtight container.
* The coconut burfis stay fresh for a few days even left on the counter. Refrigerate for storing them longer.


Check out the Blogging Marathon page for the other Blogging Marathoners doing BM#104.
You are invited to the Inlinkz link party!
Click here to enter

Comments

Tuesday, September 3, 2019

Dry Gulab Jamun


So far in the series,
Malaadu / Hurigadale Unde

Gulab jamun needs no introduction if one is even remotely acquainted with the Indian cuisine since it happens to be one of the popular sweets among the Indian diaspora. The dumplings made with khoya / milk powder are deep fried and then soaked in rose flavored sugar syrup, ending up being a delectable treat. It is hard to stop with just one, when these soft pillowy balls are melting in one's mouth. The chances of encountering gulab jamuns or gajar ka halwa / carrot halwa in Indian restautants' buffets is higher here locally in US.
I don't rely on instant mixes much but there a few exceptions which work well for me. A gulab jamun mix, for instance falls under that category and that is what I have used here. My husband loves gulab jamun and so these instant mix packets come home without any prompts. If you are a south Indian and especially if you are not into blogging / cooking shows, chances are more that you would dump an instant packet of gulab jamun mix like the one pictured below into your shopping cart than khoya / milk powder. 
Thanks to the instant mix,  gulab jamun was considered one of the easiest sweets to learn along with kesari bhath aka the orange hued semolina halwa, while we were growing up. We used to have a brand called 'orkay' in the Bangalore region when I was a kid. I saw one instant mix packet lying in my pantry recently and so thought of preparing kala jamun but ended up making dry version jamuns instead for this marathon. The instant mixes are made with dry milk powder and one can use their favorite gulab jamun recipe instead in this recipe.
 
'Gulab' means rose and this treat derives it's name from the flavoring used in it's preparation, the gulab jal aka rose water. The funny thing is that south Indians rarely add gulab jal and do away with cardamom which is the predominant flavoring agent used in the region. Gulab jamuns are prepared the usual way here but after a small period of soaking, they are removed from the syrup and rolled in sugar or desiccated coconut to make them extra special. Kala Jamuns can be used as well to make dry jamuns but I prefer the regular ones. The dry or sukha jamuns taste super yum too and are not really dry in that sense. They are called so since they are not swimming in the sugar syrup as the regular gulab jamuns. These can be made ahead and so, they make a great treat for birthdays, parties and festivals like Diwali which is coming up soon.

Ingredients for dry gulab jamun: (Yield about 15 jamuns)
For jamun balls:
1 instant gulab jamun mix (100 grams)
2.5 to 3 tbsp. water
Oil to deep fry
For sugar syrup:
1 cup sugar
1 cup water
1 tsp. rosewater
1/4 tsp. ground cardamom
For coating:
Desiccated coconut or sugar

Directions:
* Dump the contents of the pack into a bowl and break any lumps present by rubbing between your fingers.
* Add water in small increments and prepare the dough according to the package directions. Don't try to knead the dough, cover the bowl and keep it aside for 10 to 15 minutes. (I forgot to take the picture of the final dough ball.) If the dough appears wet, add a tiny amount of all purpose flour to fix it. One can even add milk to prepare the dough but there is no need since the instant mix is made with milk powder.

* Meanwhile add sugar and water to a cooking pan and heat it. 

* Stir in between until the sugar melts. At this stage, 1/4 tsp. lime juice can be added to prevent sugar from crystallizing. I usually don't since I never had the experience of  my sugar getting crystallized. 

* Continue to cook until the sugar solutions looks slightly thicker and sticky. The color of the syrup changes to honey hued. There is no need to form a syrup with any consistency. If not sure, just blindly cook the sugar mixture on low for about 12 to 15 minutes after the sugar has melted. Add rose water and ground cardamom to the sugar syrup and turn off the stove.

* If the dough appears too dry after the resting period, add 1/4 to 1/2 tsp. water and work the dough. Make 15 to 20 balls out of the dough prepared earlier by gently rubbing between your palms. Take care the balls are made without cracks. The jamuns tend to open up at those cracks while frying if the dough balls have cracks. 
* Heat oil in a pan for deep frying but don't bring it to a smoking hot point. Put a tiny pinch of dough ball into the oil to test whether the oil is hot enough for frying. If the dough ball comes to the surface immediately, the oil is ready. If the dough ball stays under, the oil needs to be heated a little more. Gently slide the dough balls one after another from the sides of the pan taking care not to get burnt. Keep gently rolling the balls and ladling some hot oil over the balls. Fry them on low-medium heat until they turn golden brown through out. If cooked on high flame, they quickly brown outside but the center portions remain uncooked. 
* Gently lift them through a slotted spoon, draining as much oil as possible and immediately drop them in the warm / hot sugar syrup prepared. Soak them for about an hour or two, ladling syrup over the tops in between or gently rolling them using the handle of the pan so that all sides are soaked in the syrup uniformly. Stop at this step if you need to make gulab jamuns. 
* Strain the gulab jamuns once they cool down and gently roll them in desiccated coconut or sugar. 

Notes:
1. I usually fry this much quantity of jamuns at the same time in a wide pan but they can be fried in batches if preparing in large quantity or using a small pan. The first fried batch should be added to the hot syrup immediately.
2. One can use their gulab jamun recipe instead of using the instant mix.
3. The leftover sugar syrup can be used in one's coffee / tea / milkshake or other sweet preparations like kheer, halwa or shahi tukdas.
4. I have coarsely pulsed the coconut in my food processor but if preferred, it can be done finely too.
5. The package directions doesn't mention to rest the dough but I do it anyway out of habit. 


Check out the Blogging Marathon page for the other Blogging Marathoners doing BM#104.
You are invited to the Inlinkz link party!
Click here to enter

Comments

Tuesday, February 26, 2019

Jowar Flour Laddu / Sorghum Flour - Nut Laddus

When I recently was discussing about travel food with my daughter, she gave me a list of foods that she would prefer to eat on a trip. It occurred to me that those are our family favorites I pack when we take long road trips and I realized with surprise that unknowingly I have created a tradition of our own. My kids one day probably would get nostalgic about our trips and reminisce about how their mom would stuff any vacant space in the car with food and other paraphernalia while dad is watching with dismay. 😇. 

Anyway while we were at it, the girl requested me to make some laddus. My daughter is not big on desserts but prefers a few selected ones like these peanut laddus for instance. I carry a load of homemade spicy snacks, energy bars and other sweets to munch on, especially if we are going to be on the road for a week or two and those laddus are a must for her. She got these energy balls to try this time which we all enjoyed. These laddus are loaded with healthy ingredients like jowar flour, raisins, a medley of nuts and jaggery which all contribute equally to make these laddus delicious and rich. The laddus do not need any ghee and the moisture from the ingredients used is enough to shape them. The laddus are firm though they look moist in the images. Try these easy and quick laddus on a festival day or as a after school treat for little ones. 

Ingredients: (Yield 12 laddus)
3/4 cup jowar ka atta / sorghum flour / jonna pindi
1/2 cup mixed nuts - I used skinned peanuts, almonds, cashews and walnuts
1/2 cup grated, dry coconut
1/4 cup raisins
3/4 cup powdered jaggery
1/8 tsp. ground cardamom

Directions:
* Roast jowar flour stirring continuously, on low flame until you notice aroma, about 7 -8 minutes.
* Toast nuts on low flame for about a minute or so. (I just toasted them in a microwave.)
* Let the flour and nuts cool down.
* Pulse the nuts finely in a food processor until they start to clump if possible and transfer to a mixing bowl. Then add jowar flour, coconut and raisins to the food processor and grind them fine. Now add back the ground nuts, jaggery and cardamon to the food processor. Pulse a few times until all the ingredients are mixed thoroughly and finely ground.
* Transfer the mixture to a mixing bowl and make lemon sized balls from the mixture.
* Store them in an airtight container. Freeze them if wishing to save longer and thaw them before serving.

This post is an entry for Blogging Marathon #97 and BM - 'Kids' Delight' event hosted by Renu this month with 'Travel Food' theme.

bmlogo

Comments

Friday, October 12, 2018

Rajgira Sheera / Amaranth Flour Halwa

Coinciding with the Navratri season, here is one more dish associated with it and the fasting regimen. This halwa / sheera is prepared using amaranth flour / rajgira atta and seems to be a popular dessert fit for the season. Not a tricky one to prepare but patiently roasting the flour in ghee without burning it until it turns light brown is important. 
The halwa can be prepared with either milk or water. It is rich because of the ghee and milk used and therefore eaten in small quantities. I used jaggery instead of sugar and 1/4 cup of it makes it not an overtly sweet dish but one can increase the sweetener by a couple of tbsp. more if one prefers a sweeter halwa. The consistency of this halwa would be smoother compared to the sooji halwa since flour is the base here.

Ingredients
1/4 cup ghee (I used less.)
1/2 cup rajgire ka atta / amaranth flour
1 and 1/4 cup milk
4 - 6 tbsp. sugar (I used jaggery instead.)
2 pinches of ground cardamom
Nuts to garnish

Directions:
* Heat ghee in a pan and add amaranth flour to it. Start toasting until you notice the aroma and the mixture changes to light brown color, about 6 to 8 minutes.
* Meanwhile, heat milk and sugar in a microwave or in a pan and keep aside. No need to boil the milk.
* Add milk and cardamom to the toasted flour gradually in small increments from the sides of the pan, stirring continuously and quickly to avoid forming lumps. Cook on low flame covered until the mixture thickens and the ghee starts to release along the edges.
* Garnish with slivered almonds / any other nuts and serve warm.

Comments

Monday, June 4, 2018

Dry Fruits & Nuts Kheer

This dry fruits - nuts kheer is easy to prepare and sinfully rich and delicious. The milk is boiled along with ground nuts until it turns thick and creamy. One can use any dry fruits or nuts they have on hand. It takes some time to reduce the milk quantity but it's worth it. 
Ingredients: (Yield 2 servings)
1 & 3/4 cups full fat milk
1/4 cup assorted nuts (I used cashews, almonds and pistachios.)
1 tsp. ghee + 2 tbsp dry fruits (I used raisins and dried sweetened cranberries.)
2 cardamom pods
2 to 3 tbsp. sweetened condensed milk
Coarsely chopped nuts to garnish

Method:
* Heat the milk, preferably in a non stick pan. When it starts to boil, reduce the heat to lowest setting and continue to heat it for about 15 to 20 minutes, stirring in between.
* Meanwhile, toast the nuts in a saute pan on low flame for a couple of minutes and keep it aside to cool. Once cool, grind them fine. 
* Heat ghee in a small pan and add the raisins and cranberries. When they plump up, remove them with a slotted spoon onto a plate and keep aside.
* Crush the cardamom pods in a mortar and pestle and grind the seeds to a fine powder. Don't throw away the husks.
* Add the ground nuts, ground cardamom along with the husks and condensed milk to the milk pan. Continue to cook for another ten minutes, stirring occasionally. By the time, the milk reduces a bit in quantity and becomes thicker.
* Turn off the stove and add the toasted raisins and cranberries.
* Garnish with chopped nuts and serve it either warm or chilled.
bmlogo
This goes to Blogging marathon # 89, under the 'Indian Sweets - Payasams' theme. Check out the page here to read what other marathoners are cooking.


Comments