HOME        |        ABOUT        |        COPYRIGHT        |        CONTACT        |         RECIPE INDEX        |         INDIAN THAALIS        |         MILLET RECIPES        |        EVENTS' ROUNDUP        

Showing posts with label Sona Masuri Rice. Show all posts

Friday, April 5, 2019

A - Z Indian Biryani / Pulao / Khichdi Series ~ E for Ek Toap Na Dal Bhaat

Here is a one pot khichdi from the Gujarati kitchens. It is wholesome, nutritious and a filling meal as a khichdi should be but is somewhat a special one. It is easy and quick to prepare this as well. This is one of the dishes I cooked early on but I started to have second thoughts because I have another recipe in the line which involves stuffing and I was not impressed with the images I captured. It was a cloudy day in the middle of Midwest winter and there was not even a single image that looked crisp. I cooked another khichdi last week, in case I didn't want to go with it. However I changed my mind again today and decided to go with this Gujarati meal, I found on Tarla Dalal's website. 

Calling it a one pot rice - lentil khichdi would be misleading since it is not your everyday khichdi where you dump spices, rice, lentil and vegetables in one pot and cook. Vegetables used here are not chopped but stuffed and eggplants are an interesting addition too, considering that it is not commonly used in a khichdi preparation. The addition of vegetables, stuffed with a coconut - cilantro base is the highlight of this khichdi and it definitely elevates the simple khichdi to an entertaining meal. The onions I used were tiny and kind of disintegrated into the khichdi and so, it is hard to notice them in the images. 

This dal bhaat can be cooked under 30 minutes, if soaking toor dal is not involved. I have noticed that the same toor dal without any prior soaking can be cooked in 3 whistles in some cookers and some take longer even if they are newly bought cookers. If you own a cooker which can cook dal in 3 whistles, go ahead with the recipe without soaking dal. If not, soak dal for 1 to 2 hours before so that rice and dal gets cooked at the same time. Otherwise, the rice would be a mush and the dal may not be cooked enough. The stuffing can be changed to a personal favorite one as well instead of using the one mentioned in the recipe. I changed the stuffing slightly while cooking though I am posting the same one mentioned in the original recipe.

Ingredients: (Yield - 4 servings)
1 cup rice
1/3 cup pigeon peas / toor dal
2 1/2 cups water (I used 1.5 + 2/3 cup, It is perfect if you prefer a dry version khichdi like shown in the image.)
2 tbsp. ghee
1 tsp. cumin seeds
a pinch of asafoetida
1/8 tsp. turmeric powder
Salt to taste
1/4 cup frozen peas
4 baby potatoes
4 small variety brinjals / eggplants 
4 to 6 baby onions 

Ingredients for stuffing:
1 tbsp. coriander powder
1 tbsp. cumin powder
1 tbsp. sugar (I didn't use.)
1.5 tbsp. red chili powder
A pinch of asafoetida
Salt to taste
3/4 cup fresh coconut, grated
1/3 cup finely minced cilantro / coriander leaves

Directions:
* If the variety of toor dal being used is not going to pressure cook in 3 whistles or cook at the same time as rice, wash and soak the dal in water for 1 or 2 hours and drain the water. There is no need to soak the rice but wash and drain.
* Combine all ingredients mentioned under stuffing in a small bowl and mix well. 
* Peel the potatoes and onions. Make criss-cross slits on onions, potatoes and brinjals, taking care not to separate the 4 segments. (Keep the stalk of the brinjals intact and cut along the opposite end. Cut a + mark, not cutting all the way through.)
* Stuff the onions, potatoes and brinjals evenly with the stuffing prepared in the above step. Keep them aside.
* Heat ghee in a small (3 liter) pressure cooker and add cumin seeds. When they start to brown add asafoetida, turmeric powder, drained rice and toor dal. Saute them for about a minute, on medium flame. 
* Add green peas, salt and water and stir well. Next add the stuffed vegetables and gently stir the mixture once. Pressure cook on high flame for 3 whistles.
* When the valve pressure is gone, remove the lid.
* If preferred, add another tbsp. of ghee at this point and gently mix.
* Serve it with some plain yogurt / butter milk. 

So far in my Biryani / Pulao / Khichdi series,
A for Ambur Biryani
B for Basanti Pulao / Misthi Pulao
C for Corn - Fenugreek Greens Pulao
D for Donne Biryani


BMLogo
Check out the Blogging Marathon page for the other Blogging Marathoners doing BM#99.

Sunday, February 11, 2018

Green Apple Rice

When my husband brought dozens of apples along with a load of other fruits and asked whether I can use it in everyday cooking, this rice happened. I prepared it along the lines of a south Indian style green mango rice. It is simple and quick to prepare and quite yummy given that the apples chosen to prepare this are quite tart. One would not even notice that a fruit was used in the preparation.  If the apples are not that tart, you end up with a subtly sweet tasting rice which is not bad either in my opinion. If the apples are not tart enough, try compensating the flavor with the addition of lime / lemon juice.

Ingredients:
3/4 cup rice (I used sona masuri rice.)
3 medium sized Granny Smith apples (It should amount to about 1.5 cups when grated.)
2 tbsp. oil
2 tbsp. peanuts
1 tsp. split chickpeas / chana dal
1 tsp. black gram / urad dal
1/2 tsp. mustard seeds
4 dried red chillies, broke into bits
Few curry leaves
1/8 tsp. turmeric powder
2 pinches of asafoetida powder
Salt to taste (about 1.5 tsp.)
1 tbsp. chopped cilantro
2 tsp. lime juice (Only if needed.)

Method:
* Rinse the rice in two exchanges of water and drain. Pressure cook the rice adding 1.5 cups water. Spread the rice on a wide plate and allow it cool. Once cool, break any rice lumps if present. 
* Peel, core and grate the apples. Leave the grated apple in a colander. 
* Heat oil in a saute pan and add peanuts, split chickpeas, black gram , mustard seeds and red chillies. When the peanuts turn golden brown, add curry leaves, turmeric powder and asafoetida powder. Saute for about 10 seconds and add the grated apple along with salt. Cook for a minute or until any water from the apple present disappears.
* Now add rice and cilantro. Mix well and turn off the stove. Taste and add lemon juice if rice is not sour enough.
* Serve warm with lentil wafers or potato chips.
 bmlogo
This goes to Blogging marathon #85, under the theme 'Rice / Gravy Recipes'. Check out the page to read what other marathoners are cooking.

Comment

Saturday, February 10, 2018

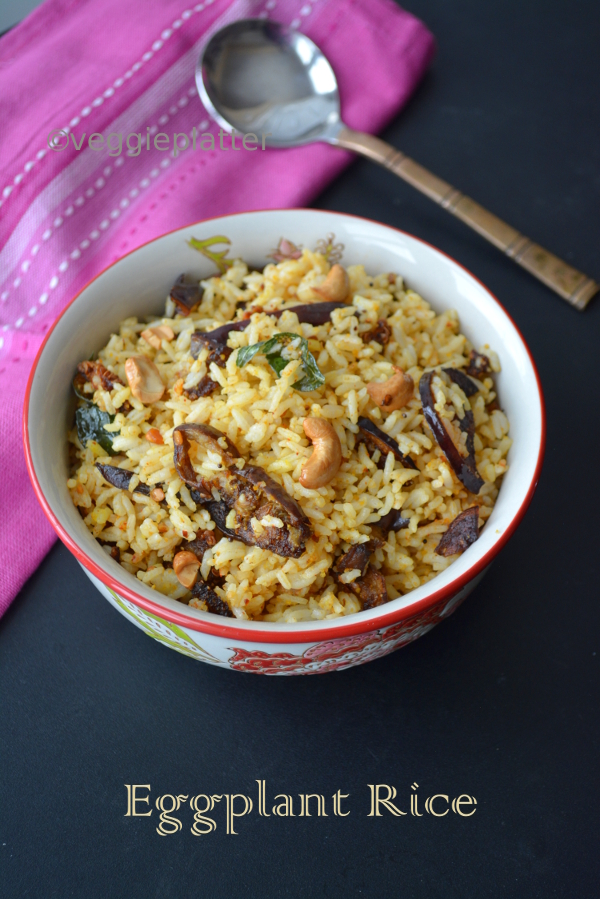
Eggplant Rice


Here is a delicious rice choice for eggplant lovers. Crisply fried eggplants paired with spicy lentil powder yield a great flavor to this rice. The spice powder can be prepared ahead and can be stored in an air tight container for months. I prefer to fry the eggplants but calorie conscious folks can cook eggplants with little oil though crispy eggplants taste better.
 
Ingredients for spice powder:
1 tbsp. chanadal
1.5 tsp. uraddal
1.5 tsp. coriander seeds
2 tbsp. shredded dry coconut (copra)
5 spicy variety dries red chillies

Ingredients for part 2:
1 cup rice (I used sona masuri rice.)
3 big sized round egg plants (I had about 3 cups eggplant slices.)
Oil to fry the eggplant slices (I used canola oil.)

Ingredients for part 3:
4 tsp. oil
1 tbsp. cashew halves
1 tsp. split roasted chickpeas / chana dal
1 tsp. split black gram / urad dal
1/2 tsp. mustard seeds
10 - 12 curry leaves
1/8 tsp. turmeric powder
1.5 tsp. salt
Red chili powder (if needed) 

Part 1: Preparing spice powder
Toast chanadal and uraddal individually in a saute pan until they turn reddish brown. Saute the coriander seeds till they turn slightly brownish and add the red chillies at the end. Let them cool and grind all the ingredients finely.

Part 2:
* Rinse rice with water and drain. Pressure cook adding 2 cups of water and let it cool.
* Cut off the eggplant stalks and cut them lengthwise into two. Slice them thinly.
* Heat oil in a pan and fry the eggplant slices in batches on medium flame until crisp and golden brown. Drain them on absorbent paper towels.

Part 3:
* Heat oil in a kadai or a big non stick pot. Add the cashews and toast them till they turn golden brown. Remove them with a slotted spoon and keep aside. Add split roasted chickpeas, split black gram
and mustard seeds to the same oil and sauté until roasted chickpeas turns reddish. Then add curry leaves and turmeric powder.
* Add 3 tbsp. spice powder, salt and fried eggplants to the pan and mix properly so that the eggplant slices are well coated.
* Then add the cooked rice and mix well. Taste and adjust the seasonings if needed. Garnish with the toasted cashews.  

This post goes to Blogging marathon #85 under the theme "Rice /  Gravy recipes". Check out the page to read what other marathoners are cooking.
 bmlogo

Comments

Monday, December 12, 2016

Lemon Rice / Nimmakaaya Pulihora / Nimbekaayi Chitranna

This lemon rice was a part of the south Indian festival thaali I posted last month. My mother used to prepare lemon rice only once or twice in a year on a festival day and so, even the simple lemon rice was a special one to us while growing up. Later on, I entered a family where lemon rice was 'The designated festival rice' and the younger generation's immediate option whenever there was leftover rice. My husband still thinks that the lemon rice and potato curry are the ultimate combo on a festive day. No wonder considering that the lemon rice is one of the popular rice dishes from south India and is a quick one to prepare.

The preparation of lemon rice is quite a simple one and it is the most fuss-free dish compared to the other traditional rice options out there. The sour and spicy flavors are well balanced in the dish where as the addition of curry leaves and asafoetida make the rice flavorful. Peanuts and dals add a nice crunch and a welcome texture to the dish. It takes about five minutes to prepare the lemon rice if the rice is handy and so, it is a suitable dish both for festive occasions or impromptu/lazy meals. I always held myself back from posting a recipe for lemon rice considering that it is a basic recipe, from a south Indian perspective. However my Gujarati neighbors who ate my lemon rice a few years ago always keep praising it and ask for the tips to master it. This recipe is for those who are not familiar with the rice preparation and novices.

Ingredients: (4 servings)
1 cup rice (I used sona masuri.)
1 - 2 tbsp. oil
2 tbsp. peanuts
1 tbsp. chana dal / split chickpeas
1 tsp. urad dal /skinned and split black lentil
1 tsp. mustard seeds
3 chopped green chillies or 5 - 6 dried red chillies, broken into pieces *
1 stalk of curry leaves
1/8 tsp. turmeric powder
a few pinches of asafoetida powder
Salt to taste
3 to 4 tbsp. lemon / lime juice (Adjust depending upon the sourness of the lemon juice.)
Minced cilantro to garnish (optional)
* A combo of both green and red chillies can be used too. The number of chillies in the recipe can be adjusted according to one's preferred spice levels.

Method:
* Wash the rice in two exchanges of water and drain completely. Pressure cook the rice adding 1 & 3/4 cups of water. (Add 2 cups of water if using a rice cooker.) When the rice is done, spread it on a wide plate and fluff the rice. Or let the rice sit for a while before using.
* Once the rice is ready, heat oil in a pan / kadai. Add peanuts, chana dal, urad dal and mustard seeds. When mustard seeds start to sizzle and pop and the dals start to turn reddish, add chillies and saute for few seconds. Next add curry leaves, turmeric and asafoetida. Stir once and turn off the stove.
* Add rice, salt and lemon / lime juice and mix well. Taste the rice and adjust the salt or the lemon juice if needed. 
* Let the rice sit for at least 15 - 30 minutes for the flavors to develop. 
* It can be served on it's own or serve some papad / chips along with it.

Notes:
1. Salt and lemon flavors tone down a bit after the resting period and so add those ingredients accordingly or taste the rice again after 30 minutes and adjust the quantities. 
2. In case if the lemon rice turns out too salty / too sour just add some more rice and mix well to combine.
3. Bottled lemon juice can be substituted for the fresh juice.

Comments

Thursday, September 15, 2016

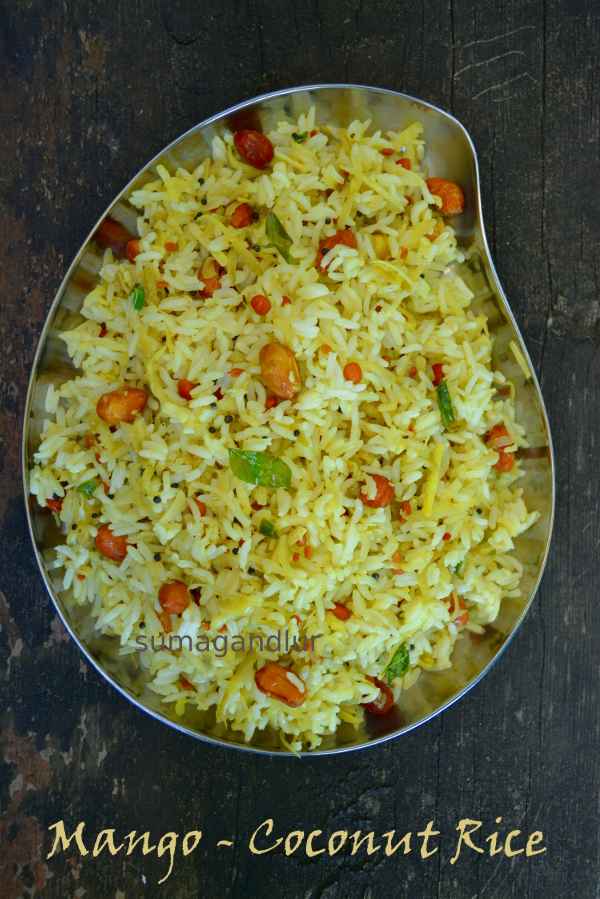
M for Mamidikaaya - Kobbari Pulihora / Green Mango - Coconut Rice


In spite of the heat and the inconvenience of power cuts, there are people like my mother who look forward to Indian summers which promise to bring an abundant supply of mangoes and jasmine flowers in the markets. Mango is an enticing fruit to many across the sub continent and both green and ripened ones are in high demand and supply for the few months they are available. The ripened mangoes are eaten as it is or used to whip up some delicious drinks and desserts while the green ones go into the preparation of variety of pickles/instant chutneys, stews or into a simple yet delicious rice dish like the one that is featured here today. 

A green mango pulihora is the main attraction of a Ugadi menu at my mother's place since it is the time when the green mangoes start appearing around the block each season. I have just followed my mother's recipe here, throwing in some fresh shredded coconut which adds a delicious flavor layer to the already tasty dish. If you are a coconut lover and tried this one, you would never probably going to skip the addition of coconut in this dish. There is a mango rice version where coconut and spices are ground and sauteed but I prefer to just add the plain coconut. This one makes a quick and easy to prepare rice dish for beginners that is fit to serve as a lunch box item or as a part of a festive meal.
Ingredients: (3 to 4 servings)
3 cups cooked rice *
3 to 4 tsp. oil
A handful of peanuts
1 tsp. split chickpeas / chana dal
1 tsp. black gram / urad dal
1 tsp. mustard seeds
2 dried red chillies, broken into bits
2 green chillies, sliced lengthwise / chopped fine
1 sprig of curry leaves
1/8 tsp. turmeric powder
2 pinches of asafoetida powder
Salt o taste
1 cup peeled and grated green mango
1/2 cup grated, fresh / frozen coconut (Thaw before if using frozen coconut.)
* Use south Indian style medium grain rice like sona masuri

Method:
* Spread the cooked rice on a wide plate, breaking any rice lumps if present with a spatula. Keep it aside for few minutes to cool.
* Heat oil in a wide pan and add peanuts, red chillies, split chick peas, black gram and mustard seeds in that order. When the peanuts turn golden brown, add green chillies, curry leaves and saute for few seconds.
* Next add turmeric, asafoetida, grated mango, coconut and salt. Saute for 3 to 4 minutes and then add the cooked rice. Mix well, breaking any rice lumps if present. Turn off the stove and serve the rice warm with fried papad or wadis or chips.

Recipes so far in A - Z Rice Dishes,
A for Achaari Chole Pulao
B for Bhuna Khichuri
C for Chintapandu Pulihora
D for Dindigul Thalapakatti Veg Biryani
E for Ellorai / Ellotharai  
F for Fodnicha Bhaat 
G for Gongura Pulihora 
H for Hare Moong ki Chaaswaali Khichdi 
I for Iyengar Style Kadambam 
J for Jodhpuri Vegetable Pulao 
K for Kaju - Karivepaku Annam 
L for Lilva Khichdi

Check out the Blogging Marathon page for the other Blogging Marathoners doing BM# 68.
An InLinkz Link-up

Thursday, September 8, 2016

A - Z Rice Dishes ~ G for Gongura Pulihora / Spicy & Tangy Sorrel Rice


There are traditional recipes that are carried through generations in families and there are spin-offs with little twists given to the older ones by creative minds. Today's dish gongura pulihora falls in the latter category. Chintapandu pulihora (tamarind rice), nimmakaaya pulihora (lemon rice), mamidi kaaya pulihora (green mango rice) and dabbakaaya pulihora (I guess the English name for the citrus fruit used in the preparation is pomelo) used to be the most commonly prepared pulihoras in Andhra. I have been noticing a wide variety of pulihoras these days on TV cook shows, that were unheard of until a few years back. That's how I ended up hearing about gongura pulihora a while ago though I didn't give a second thought about it until later when it started doing the rounds on several blogs. 

I happened to see this particular gongura pulihora recipe on Pavani's blog a few years ago and have tried it several times over the period though I did not get to post it until now. The pulihora is really delicious and makes a quick alternative to the tamarind rice. My recipe is on the spicier side and Pavani's would be perfect for those who do not prefer very spicy rice.
Ingredients to grind:
2 cups chopped gongura / sorrel leaves
2 tbsp. tamarind puree (I added 3 tbsp.)
3 red chillies

Ingredients for pulihora:
3.5 cups cooked rice (preferably sona masuri style medium grained rice)
2 to 3 tbsp. oil
2 tbsp. peanuts
1 tsp. split chick peas / chana dal
1 tsp. black gram / urad dal
1 tsp. mustard seeds
2 red chilies
1 green chili
Few curry leaves
A few pinches of asafoetida powder
1/8 tsp. turmeric powder
Salt to taste

Method: 
* Cook rice such that each granule stands apart. Don't cook the rice mushy. Spread it on a wide plate.
* Grind the ingredients under 'to grind' smoothly, adding few tsp. of water if needed.
 
* Heat oil in a wide pan or a kadai. Add peanuts, dals and mustard seeds. Fry until dals turn light brownish and add the chillies, asafoetida, turmeric and curry leaves. 
 
 * Now add the ground paste and salt to the pan and stir.
 
* Cook the mixture on low flame until the raw smell of gongura leaves, about 4 -5 minutes. 
 
* Turn off the stove and transfer this mixture to the rice plate or transfer the rice to the pan. Mix gently to combine. 

Recipes so far in A - Z Rice Dishes,
A for Achaari Chole Pulao
B for Bhuna Khichuri
C for Chintapandu Pulihora
D for Dindigul Thalapakatti Veg Biryani
E for Ellorai / Ellotharai  
F for Fodnicha Bhaat


Check out the Blogging Marathon page for the other Blogging Marathoners doing BM# 68.


Tuesday, September 6, 2016

Rice Dishes ~ E for Ellorai / Ellotharai (Sweet Version)

I accidentally came across this traditional sweet recipe from Tamil nadu a few months back while looking for some other recipe and it ended up being my 'E' dish for this event. I have tried and liked the spicy ellu sadam (sesame seeds' rice) before. And so decided to give this sweet version also a try as I tend to be a little bit more partial towards sweet dishes. I love sesame seed laddus very much but this dish turned out just 'okay' for me. I guess that this sweet version is more like an acquired taste. I may be wrong and people who are partial to this dish may not agree with me but the dish  tasted more like crumbled laddus mixed with rice. I prefer the spicy version over the sweet one but thought of documenting it on my blog since this happens to be a traditional dish.

Ingredients: (2 to 3 servings)
1 cup cooked rice (I used sona masuri rice.)
1 tbsp. ghee
2 tbsp. cashews
3 tbsp black sesame seeds
6 to 8 tbsp. jaggery powder *
1/4 tsp. ground cardamom
* The amount of jaggery used depends upon it's sweetness and the level of sweetness preferred in the final dish.

Method:
* Toast sesame seeds on low flame for 30 - 40 seconds and let cool.
* Grind sesame seeds, jaggery and cardamom to a fine powder.
* Heat ghee in a pan and toast cashews until golden brown. Turn off the stove. Add the cooked rice and mix well so that there are no rice lumps. Each grain should appear separate.
* Add the sesame powder to the above rice and mix well. 
Do not add the sesame powder to the pan before adding the rice since the jaggery would start melting if done so and the rice would be a wet mess.

Recipes so far in A - Z Rice Dishes,
A for Achaari Chole Pulao
B for Bhuna Khichuri
C for Chintapandu Pulihora
D for Dindigul Thalapakatti Veg Biryani

Check out the Blogging Marathon page for the other Blogging Marathoners doing BM# 68.

Tuesday, February 24, 2015

Mixed Vegetable Rice


The word 'Brunch' is a portmanteau of breakfast and lunch. The brunch aka the late morning / the early afternoon meal originated in England in 1800's. And as the name indicates, an array of breakfast and lunch dishes are served in a buffet style during a brunch session. I usually don't do brunches in my home as no one is ready to give up their early morning breakfast for various reasons and besides, I don't have the patience to come up with a feast in the name of a brunch on a weekend. I know you can cook one dish when you don't have company, serve it late and call it a brunch but some how an image of a wide range of colorful and yummy dishes comes to my mind whenever I think of brunch. And so I am talking about those kind of brunches and I don't do them on a normal weekend.
I  had to come up with some 'Weekend Brunch' ideas for this weeks' marathon and being a south Indian, chose to go with a 'rice' dish on the first day. Rice plays a major role in Indian cuisine and especially down south, every meal, including a festive one is built around rice. A rice dish would definitely be the star of the meal if an Indian style buffet is planned and here is one simple yet flavorful 'rice' idea for that kind. This can be a part of a wide range buffet or when served with just some yogurt rice will make a wholesome, filling meal. 
This rice uses a spice powder which adds flavor and aroma to the dish. It is simple to make and can be prepared ahead in large quantity and stored in an airtight container. This is a versatile powder and can be used to prepare rice dishes like these and also spice up gravy style vegetable subzis.

Ingredients for the spice powder:
1/4 cup chana dal / split chick peas
1 tbsp urad dal / skinned black gram
1 tsp dhaniya / coriander seeds
2 cloves
1 piece of one inch cinnamon stick
1 - 2 strands of dagad phool /stone flower / raathi puvvu
10 - 12 red dried red chillies (adjust the quantity as needed)
1 - 2 tbsp. grated dry coconut

Method:
* Dry toast chana dal and urad dal in a pan until they start to change the color. Add the rest of the ingredients in the above list and toast for about 40 - 60 seconds. Turn off the stove and let them cool.
* Grind the ingredients fine or into a slightly coarse powder.
* Store it in an airtight container and use it as needed.
 
Ingredients for the vegetable rice:
1 cup rice (I used sona masuri rice.)
2 - 3 cups mixed vegetables *
2 tbsp. oil
1 tsp chanadal / split chickpeas
1 tsp urad dal / split black gram
1 tsp mustard seeds
Few curry leaves
A handful of cashew halves / peanuts
2 -3 tbsp. spice powder from above
Salt to taste

* I used carrots and potatoes (peeled and cubed) and green beans that are stringed and cut into one inch pieces. Green peas and chayote can be used as well. Use your choice of vegetables that won't turn mushy after cooking.

Method:
* Pressure cook rice adding 2 cups of water. Or rice can be cooked using a rice cooker or in a sauce pan covered, on stove top.
* Heat oil in a pan and add chana dal, urad dal, mustard. Fry for few seconds and add cashews and curry leaves. 
* When the dals and cashews turn golden brown and mustard seeds start to pop, add the vegetables, turn down the heat, cover and cook until done. 
Alternately, vegetables can be steamed or cooked in a microwave, drained and added in the above step.
* Next add the spice powder, salt and mix. Finally add the rice and mix well to combine. Taste and adjust spice powder / salt if any needed.

This goes to Blogging Marathon #49, under the theme of "Weekend Brunch".

Comments

Monday, August 11, 2014

Sandwich Dhokla


I have become a fan of a Gujarati cook show that I watch on one of Indian TV channels here and I record the shows for future reference. It is a vegetarian show and most of the recipes are unique or the cooks give an interesting twist to a regular dish. I never miss a show and in the process had noted down a few dhokla recipes earlier. I somehow forgot that fact when looking for ideas for this "dhokla" based marathon week and realized too late that I had better choices. 
This soft and spongy sandwich dhokla comes from that show and the viewers of the show wanted to see how thinly sliced dhokla sandwich can be made with out the filling spreading all over. The chutney which is sandwiched between the two thin slices of dhokla is kept on the thicker side and for an even distribution, actually the chef used a rolling pin. 

I have seen over the web, sweet chutney / paneer slices used in sandwich dhokla recipes but the chef used only a green chutney for this mess-free sandwich dhokla recipe. The green chutney was prepared thick by grinding cilantro leaves, green chillies, salt and a small quantity of dalia and peanuts.The rice and urad dal for the batter are used in 2:1 ratio just like the idli batter.
Ingredients: (4 - 6 servings)
1 cup rice (I used sona masuri rice but idli rice / extra long grain kind can be used.)
1/2 cup urad dal / skinned black gram
1/4 - 1/2 tsp citric acid crystals
Salt to taste
1/4 tsp of baking soda + 1 to 1.5 tsp baking soda
1 tsp oil + 4 - 6 tsp oil 
(The second set of baking soda and oil quantities mentioned above depend upon the quantity of fermented batter.)
About 1 - 1.5 cup of thick green chutney
Ingredients for seasoning:
2 tbsp oil
1/2 tsp mustard seeds
1 tsp sesame seeds
1/4 tsp asafoetida powder1 tbsp minced cilantro
 
Method:
* Wash rice and urad dal in two exchanges of water and drain. Then soak the rice and dal in water for about 3 - 4 hours. Take care that the rice mixture is submerged in the water through out the soaking period. In short, soak the mixture in plenty of water. 
* Drain water used for soaking. Grind the mixture into a thick, slightly coarse batter, adding only as much water as needed. I ground my mixture in wet grinder.
* Add citric acid, salt, 1/4 tsp baking soda and 1 tsp oil to the ground batter and mix well.
* Leave it to ferment in a warm place overnight or for about 8- 10 hours. Please note that in Indian kind of tropical climate, fermentation may take less time, especially during summers.

* Keep your steamer / pressure cooker ready for steaming by pouring water in the base and turning on the heat. Grease a thali (stainless steel plate with high edges) / circular cake tin of about 6- 7 inches in diameter.
* In the morning, we add oil and baking soda to the fermented batter again but we do it in batches instead of dumping them at once to the entire quantity of fermented batter. We are going to steam dhokla in batches and we want the action of baking soda not lost in the waiting process. And so we are going to deal with a small quantity of fermented batter at a time. Transfer about a cup of fermented batter to a mixing bowl.

* Add about a tsp of oil and 1/4 baking soda to a small bowl and mix well.

* Add it to the 1 cup fermented batter. Mix quickly with a spoon and you will start noticing the effervescence.
* Pour the batter into the greased plate and shake the plate clockwise gently so that the batter is spread uniformly.
* Here we are looking for thin dhoklas but not the chunky ones and so the batter should be spread in a thin layer. It is spread so thinly that in the below picture, you can notice the bottom of the dish near that arrow mark.
 
* Put the plate in the steamer / cooker base and cover with the lid. Don't put the whistle on if using a pressure cooker.
* Steam on medium flame for about 15 - 20 minutes or until a knife / toothpick inserted at the center comes out clean.
* Cool the steamed dhokla slightly, gently run a knife around the edges and unmold it. Cut the disc into two equal halves.
* Spread thick coriander chutney evenly on one side of the half portion.
 
* Place the rough side of another dhokla piece on it. Gently roll using a rolling pin. 
 
I actually steamed 2 thin discs and so spread chutney on one and placed the other disc on it and cut into squares. I forgot to take the pictures when I made the thin discs and so again when I made a thick disc, i just took the pictures to give an idea.
* Cut the disc into square / diamond shaped pieces.
* Heat oil in a small pan and add mustard seeds and sesame seeds. When mustard seeds start to crackle, add asafoetida and turn off the stove.
* Pour this mixture over the dhokla evenly, garnish with minced cilantro and serve.

This is my entry for BM #43 under the theme "dhoklas".
Check here to know what other marathoners are cooking.

Comments 

Friday, October 4, 2013

Vangi Bhath


Coming from the rice belt of India, the possibility of any festivity / celebration sans a rice dish is practically a zero occurrence to us. Or to any south Indian for that matter. Traditionally, south Indian lunches and dinners meant vegetable and bean dishes served with hot, steamed rice. Till this day, millions of Indian households eat at least a meal of rice everyday though work, time constraints, health consciousness and globalization of food has changed the food patterns / habits of people.
And so naturally, I thought of going with a rice dish - one of the popular vegetarian rice dishes, vangi bhath. Considering the frequency and love with which vangi bhath is prepared in my husband's family, this post is long due. Though vangi bhath is said to be from the state of Karnataka, it is equally popular in the southern states as well. As the name suggests, eggplants are the star of this dish and a good quality vangi bhath powder is a must to turn it into a crowd pleaser.
The preparation of vangi bhath and the spice powder of course change regionally and here is our beloved version. Usually potato is not a part of vangi bhath and also the vegetables are not crisp fried. However I don't mind the frying part and extra calories since it makes the dish more yummier than sauteing eggplants that get mushier while mixing with rice.


Vangibhath powder:
This version of vangi bhath powder comes from a sister in law of mine and it absolutely perks up the dish. I am told by family and friends that I make a very good vangi bhath and the secret behind it is this powder. :) I usually double the ingredients, make extra powder in advance, preserve in an airtight container and refrigerate it.

Ingredients for the vangibhath powder:
1/4 cup chana dal 
1 Tbsp coriander seeds 
4 cloves
8 one inch cinnamon pieces
2 -3 Tbsp dry coconut / copra
10 dried red chillies (I used byadagi variety. If using hotter variety, reduce the chillies.)

Method:
* Dry toast the chanadal till it starts to turn reddish. Then add the coriander seeds, cloves, chillies and cinnamon and sauté for a few seconds.


* Remove from heat and cool them. Grind them along with the coconut to a fine powder.


Preparation of vangi bhath:

Ingredients:
1 cup sona masuri rice
3 violet colored baby eggplants - stalks removed and sliced thin lengthwise
1 big potato - peeled and sliced thin lengthwise
Oil to fry
3 tbsp vangi bhath powder (recipe above)
Salt to taste
For tadka:
2 - 3 tbsp oil, 1 tbsp chana dal, 1 tsp mustard seeds, few curry leaves and a handful of cashews

Method:
* Cook rice adding 2 cups of water in a pressure cooker or rice cooker and keep it aside. Let it cool a bit.
* Fry eggplant slices in hot oil on medium flame, until crisp and golden brown.


* Repeat the same with potato slices. Drain on absorbent paper towels and keep them aside.


* Heat oil in a kadai or a big non stick pot. Add the cashews and toast them till they turn golden brown. Remove them with a slotted spoon and keep aside. Add chanadal and mustard seeds to the same oil and sauté till the dal turns reddish. Then add curry leaves and the fried vegetables. 
* Add the vangibhath powder and salt to the pan and mix properly so that the vegetables are well coated.


* Then add the cooked rice and mix well. Taste and adjust the seasonings if needed. Garnish with the toasted cashews.