HOME        |        ABOUT        |        COPYRIGHT        |        CONTACT        |         RECIPE INDEX        |         INDIAN THAALIS        |         MILLET RECIPES        |        EVENTS' ROUNDUP        

Saturday, December 31, 2011

Green Peas Curry in Coconut Milk Sauce


Standing on the threshold of new year, this one is going to be my last post for the year 2011. This yummy, mild curry is intended for events hosted by some dear blogger buddies. :)

Ingredients: (Yield 2 -3 servings)
1- 2 Tbsp oil
1 tsp cumin seeds
2 onions, minced
1 tomato, chopped
1/4 tsp turmeric powder
1 cup frozen green peas
1/2 tsp chili powder
Salt to taste
1/2 cup coconut milk

Method:
Heat oil in a pan and add the cumin seeds. When they start to brown, add onion and saute until translucent. Then add the tomatoes and cook until mushy. Next add the frozen peas, salt, turmeric powder and chili powder. Mix well and cook for a couple of minutes. Slowly stir in the coconut milk and cook on low flame. Turn off the heat when it starts to boil.
Let it sit for a few minutes before serving since it thickens after cooking.
Serve this with rotis.

This is on it's way to
Cooking with Seeds - Peas, an event by Priya Suresh.
HLI - Peas, hosted by Veena, an event by Kalyani.
MLLA, hosted by Kiran, an event by Susan.

Comments

Thursday, December 29, 2011

Rava Idli / Semolina Idli


Usually the store bought mixes can never compete with homemade stuff in quality or taste. However MTR's rava idli mix is an exception and no homemade mix can beat this. It is obvious of course, since MTR is the creator of rava idli mix.
MTR is such an iconic brand that it hardly needs any introduction among its Indian customers. The abbreviation MTR stands for "Mavalli Tiffin Rooms", a famous restaurant in Bangalore. And for the non locals, the word MTR is synonymous with the delicious instant food mixes the company markets under the same brand name. I had read about the man behind this giant food empire once on a Kannada website and thought about sharing it here.


The person who was responsible for the growth and the tremendous success and popularity of MTR is late Mr. Yagnyanarayana Maiya. Born in a poor family as one of the 9 kids, he could not pursue education because of his family circumstances. He began cooking at weddings and other functions when no choice was left and thus began his career in the food industry.
In the meantime, two of his brothers who were also cooks started "Brahmin's coffee club" on Lalbagh road, Bangalore in 1924. It became quite popular in a short period of time but when one of his brothers passed away, Mr. Yagnanarayana stepped in, to fill in his place.

Besides being an expert cook, he was strictly disciplined and honest in his work. He had set standards for himself that his hotel would be not one among others but it would be the topmost. He gave utmost importance to hygeine and the taste of the food. To him, nothing was important than customers' happiness. He would diligently pick all the ingredients needed for cooking at his hotel.


During 1950,  his European tour to study the restaurants there, had further strengthened his beliefs in serving hygienic, high standard food to his customers. After his trip, he revamped his hotel,  changed the name to "Mavalli Tiffin Rooms" which became popular as MTR.
One of the interesting tidbits I read about him was he would never allow to use the rice batters ( like the idli batter) after 9 am since it starts to go sour at that time. He would throw away the batter in the gutter instead of serving his customers sour idlis.

Being a creative person, he came up with this rava idli mix during second world war when there was shortage of rice. Up until then people knew only about rice - urad dal idlis.


Ingredients: (Yield 16 idlis)
Semolina / Sooji / Rava - 1.5 cups
Salt to taste
2 - 3 Tbsp fresh/frozen green peas
2 - 3 Tbsp grated carrot
1 Tbsp minced cilantro
1 to1.5 tsp baking soda
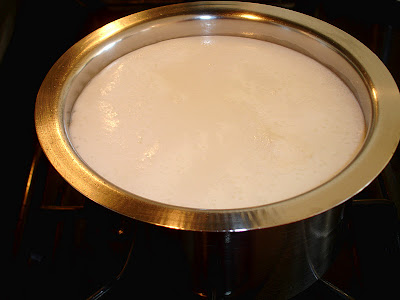
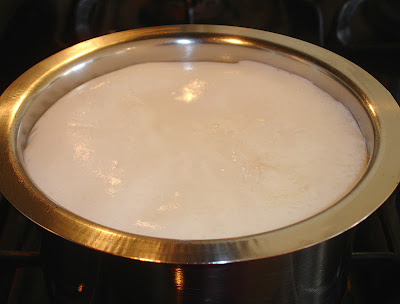
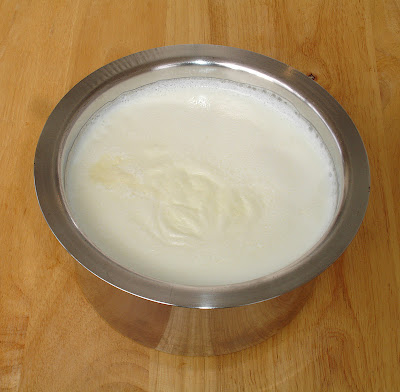
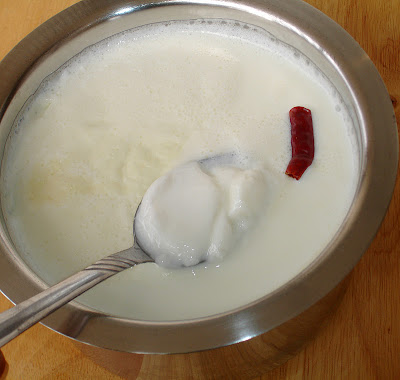
1 & 3/4 cups yogurt (Fatfree yogurt will do. Half the quantity of yogurt can be substituted with water but don't skip the yogurt. )
For tadka:
2 Tbsp oil
1 Tbsp chana dal / Bengal gram
 1 Tbsp urad dal / Black gram
1 Tbsp mustard seeds
2 Tbsp cashews
 1/2 tsp grated ginger
 Few minced curry leaves
1 - 2 finely minced green / red chillies (optional)


Method:
1. Heat oil in a pan and add the ginger. Fry until it turns golden brown and then add the other tadka ingredients.
2. When the dals turn reddish, add semolina and fry on medium flame until it starts to change color. Add salt and mix well. Let cool.
* If idlis are not prepared immediately, this mix can be stored for months in a closed container. Add baking soda while making the batter.
3. To the mixture that has come to room temperature, add yogurt (or yogurt + water) and baking soda and mix well. Leave the mixture to rest for about 5 - 10 minutes. Then add the grated carrot, peas and cilantro to the batter and combine well.


4. Grease the idli plates and pour the batter into idli moulds. Steam them until done.
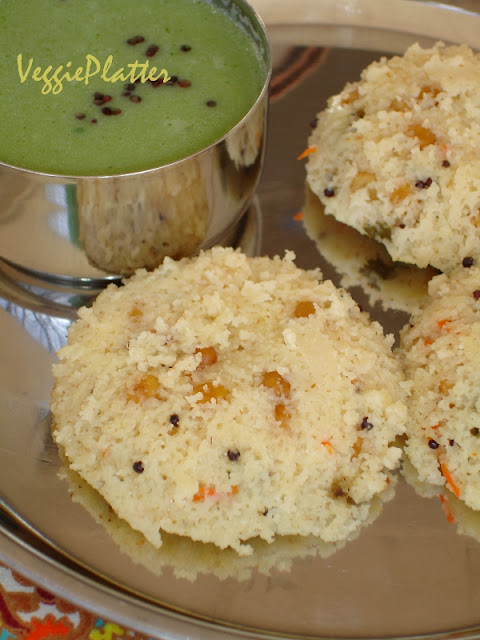
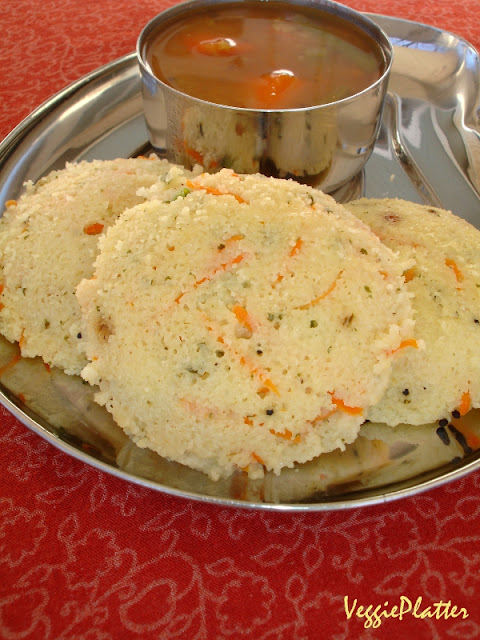
Serve with saagu as they do in Bangalore restaurants or with chutney or sambhar.

Rava idli is my "most favorite" among idlis and so, I thought of posting it on last day of BM#11 under the theme "idlis". Check here to find out what my fellow marathoners are cooking during this marathon.

And my posts during this BM with "Mix and Match" themes.
Lunchbox - Quinoa Khichdi
Bihari Cusine - Thekua
Kids Delight - Color Palette - Cilantro Carrot Rice
Eggless Baking - Eggless Brownie Cookies
Holiday Cooking - Eggless Almond Moon Cookies
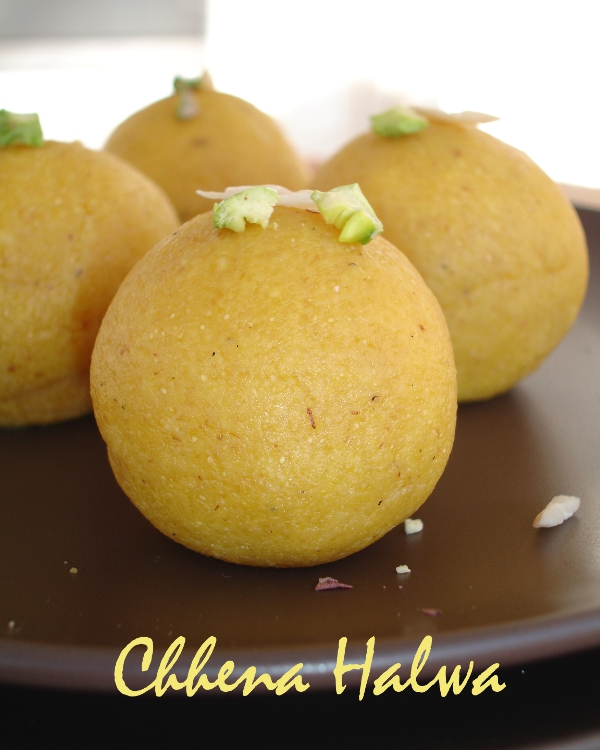
Preps & Preserves - Chhena & Chhena Halwa

Comments

Wednesday, December 28, 2011

Homemade Chhena & Chhena Halwa


We are still in fall season just entered winter season but as usual we already had our share of bone chilling temperatures and snowfalls (though less than usual). Chicago's notorious gusty winds makes it further worse. What do weather has to do with my blogging, you ask? Then read on. I prefer to take pictures in natural light and it gets quite crazy in this season. I should say that it would be hell up until March, if you decide to take pictures outdoors. There would be more cloudy days than sunny ones and in either case, one wants to curl up on the couch than being outdoors. My inexperience in taking pictures indoors, lousy weather and my basic camera are not helping. It was around minus 7 deg C on the day I took the pictures for most of my posts during this marathon. I decided to take the pictures for many dishes that day just because it was very sunny. I went out into my kitchen balcony to take shots without the gloves on. Within 30 seconds, I was turning hot water in the kitchen sink to help my hands that have gone numb. It was that chillingly cold and my husband couldn't understand why I was torturing myself in the name of blogging. :) That is the reason why I couldn't post any good picture for bread crumbs last week or for today's chhena post. And so kindly bear with me.


Today's post comes under "preps and preserves" theme. Sometimes I end up with fullfat milk that is past due date. I have read somewhere that it is safe to use for a couple of days more the past date since the date mentioned on the can is the selling date and not the expiry date of the milk. Only kids drink fullfat milk at my home and so, if any milk is past sell date or starts smelling / tasting different even before that date, I just make paneer or chhena with it and stash it in the freezer.
Paneer is the only cheese native to Indian subcontinent and is vegetarian. Paneer and chhena are the base ingredients for many Bengali desserts and preparing them at home is quite a simple process. They both involve the same steps of preparation except that the paneer is drained and pressed for long while chhena is the crumbly and moist form of paneer.

Ingredients & utensils needed:
1 litre of whole milk
1 Tbsp of vinegar or juice from a lime / lemon
A saucepan to boil the milk
A colander / strainer
Cheesecloth or a thin cotton cloth

Method:
* Bring the milk to boil in a saucepan.


* Lower the heat, add the vinegar or the lime juice to the milk and stir. The solid part, chhena starts separating from the liquid part which is called whey.


* When the chhena completely separates, turn off the stove. Let it sit for a couple of minutes.


* Then line a colander / strainer with the cheesecloth or the cotton cloth and pour the mixture into it. Bring the corners of the cloth together (with the chhena filtrate in it) and hold the bundle under running water to wash away the vinegar / lime juice residue.
* Collect the chhena filtrate and use as needed.


And here is a bonus recipe for today. This is one of my favorite sweets from childhood. Whenever the milk split & curdled at home, my mother used to prepare this yummy halwa.

Ingredients:
Chhena - 1 cup
Semolina / rava - a little less than 1/2 cup
Jaggery - 1/2 cup
Cardamom powder - 1/2 tsp
Food color - A pinch (Optional. I happened to use it only because the color was next to the cardamom bottle. :))

Method:
Just mix all the ingredients in a nonstick pan and cook on low flame until semolina is cooked. It is that easy but make sure that you haven't drained all the liquid from the chhena during the filtering process since the moisture from the chhena is needed to cook the semolina.

This is going to be my day 6 post in BM#11 with "preps and preserves" theme. Check here to find out what my fellow marathoners are cooking during this marathon.

Comments

Tuesday, December 27, 2011

Eggless Almond Moon Cookies

Love at first bite. :)

It is hard to escape from the magic of festivities and the baking spree going on in the blogosphere during this holiday season. And yet this post is here not for that reason. The month of December and Christmas are special to me too, though not for the obvious reasons. I was brought into this world by my wonderful mother on Christmas day and my blog was also born this month. While I turned 30+ something this Sunday, my blog turned 5 a couple of weeks ago. And I thought of celebrating the occasions with these delicious, melt in the mouth kind cookies.

First of all I would like to mention that I am not good in gushing about things I have come to love in this culinary journey or present a dish emphatically / humorously to convey the "awesome"ness (if there is such a word) of a recipe. It is really hard for a person like me who loves to live in her own cocoon but still I would unabashedly love to proclaim that these cookies are really awesome. Just a bite into it, I knew that this is going to be one of those cherished recipes one would love to treasure. One of the local shows on TV featured these cookies as a part of holiday celebrations and I was instantly attracted to the recipe since they were eggless. After trying these cookies, I was so glad that I did not miss the show that day and could get hold of this amazing recipe. They are crunchy and at the same time have a crumbly and melt in mouth kind of texture. Just try them once and I am sure this would find a permanent place in your recipe repertoire.
Don't skip the sugar dusting; without it the cookies are barely sweet. At first bite, you think they are just subtly sweet but after completing the cookie, you realise that that is the right amount of sweetness you need in a cookie.


Ingredients: (Yield 28 cookies. I halved the recipe and got 15 cookies.)
Unsalted butter, warmed to room temperature - 2 sticks (16 tablespoons or 1 cup)
Confectioners' sugar or powdered sugar 1/4 cup + 1 cup for coating the cookies after they're baked (I used about 2 - 3 Tbsp for coating)
All-purpose flour - 2 cups
Vanilla extract - 1 tsp

Almonds, slivered, finely chopped - 1 cup

Prep work:
1. Put the butter out of the refrigerator a couple of hours before the cookies are made. Or nuke the butter in a microwave just to soften it.
2. Grease the baking sheets.
3. Sift the all purpose flour and sugar seperately. Keep aside.
4. Toast and chop the almonds.

Method:
1. Put the greased baking sheet(s) in the freezer. (I did this eventhough it was not mentioned. Somewhere in the prep work, it was mentioned that doughballs need to be placed in the refrigerator but I did not see the step mentioned in the recipe given. I therefore chilled the baking sheet.)
2. Cream the butter until it is light and fluffy. You can use a stand mixer / hand mixer.
3. Slowly add in the 1/4 cup sugar,  the flour, and the vanilla. Mix until well combined.
4. Turn off the mixer and slowly add the chopped almonds. Mix until the almonds are just combined, about 1 minute.

5. Preheat the oven to 325 degrees F.
6. Use the cookie scoop to scoop out balls of dough, and place those balls 2 inches apart on the prepared baking sheets. Try not to touch the dough balls, as doing so will warm the dough. (I did not have a cookie scoop and so I just used a tablespoon. I quickly patted the dough into the measuring spoon using my fingertips and it did not matter.)


7. Bake at 325 degrees F for about 30 minutes, or until the bottoms are lightly brown.


8. Cool the cookies completely on a wire rack. Pour the remaining 1 cup confectioners' sugar into a low bowl and roll the cooled cookies around in it until covered.
9. If they are not gone by the day they are made, take the trouble to store them in a sealed, airtight container at room temperature.


Note:
The cook mentioned that the dough can be frozen upto two months.

This is going to be my day 5 post in BM#11 with "holiday cooking" theme. Check here to find out what my fellow marathoners are cooking during this marathon.

These are being sent to the following events -
Bake Fest # 2, hosted by Sangee, originally started by Vardhini
Bake With Your Heart by Khushi
CC - Holiday Baking by Sravs
Christmas Delicacy by Julie
Let's Cook - Baked Goodies, an event by Radhika.
Sinful Delights hosted by Vardhini
Sweet Baked at Krithis and Dennys.

Comment

Monday, December 26, 2011

Eggless Brownie Cookies


This is one of cocoa recipes that I bookmarked recently to try. If my memory serves me right, it must be from diabetic living website. The recipe attracted me since it was mentioned that these cookies taste like rich brownies and to top that, they were eggless. The recipe is quite an easy one and so I tried them around 11 pm last night when I was not feeling sleepy. :)
The recipe mentioned that the cookies would be set by 8 - 10 minutes. The scoops of dough remained unaltered in shape until the sixth minute and so my daughter and I sat in the kitchen thinking that they would be ready by the next couple of minutes. However, after that period, they started to spread and began to become almost gooey. I thought that this experiment was going to end in a disaster and started to curse myself for trying those at the middle of the night. However, I kept them baking for around 8 - 10 minutes more and removed them thinking that probably they would end up in trash.
Nope, I was wrong. They were absolutely delicious and crispy. I forgot to sprinkle the powdered sugar at that hour but they were absolutely good. They are very dark brown in color, just like brownies but were perfectly done. They were more like chocolate cookies than brownies and received more than a seal of approval from my kids. I need to bake one more batch this week. :)

Ingredients:
(The following ingredients yield 24 cookies. If you want to halve the recipe to get a dozen cookies, use the ingredients mentioned in the parentheses / brackets. )
1 cup all-purpose flour (1/2 cup)
1/4 teaspoon baking soda (1/4 tsp)
1/4 cup butter (2 Tbsp)
2/3 cup sugar (5 Tbsp)
1/3 cup unsweetened cocoa powder (Heaped 2 Tbsp)
1/4 cup packed brown sugar (2 Tbsp)
1/4 cup buttermilk or sour milk* (2 Tbsp)
1 teaspoon vanilla
Nonstick cooking spray
1 tablespoon sifted powdered sugar (I didn't use it. )
Note
* To make 1/4 cup sour milk, pour 3/4 teaspoon lemon juice or vinegar to a glass measuring cup. Add enough milk to make 1/4 cup total liquid; stir. Let mixture stand for 5 minutes before using


Method:
1. Combine flour and baking soda in a bowl and set aside. Melt butter in a saucepan and stir in sugar, cocoa powder and brown sugar. Add buttermilk, vanilla and flour. Stir just until combined. Cover and chill dough for 1 hour. When you remove the dough out, it would be firm. 
2. Preheat the oven at 350 degrees F.
3. Drop chilled dough by rounded teaspoons onto a greased cookie sheet. The cookies will spread while baking and so space them accordingly.
4. Bake for 8 to 10 minutes or until edges are set. (Actually I baked around 16 - 18 minutes since they were not set by 10 minutes and were almost at semi liquid stage.)
5. Transfer to a wire rack after a couple of minutes and let cool.
6. Sprinkle with powdered sugar.


This is my day 4 post in BM#11 with "eggless baking" theme. Check here to find out what my fellow marathoners are cooking during this marathon.

I am sending these to the following events -
Bake Fest # 2, hosted by Sangee, originally started by Vardhini
Bake With Your Heart by Khushi
CC - Holiday Baking by Sravs
Christmas Delicacy by Julie
Let's Cook - Baked Goodies, an event by Radhika.
Sinful Delights hosted by Vardhini
Sweet Baked at Krithis and Dennys.

Comments

Sunday, December 25, 2011

Cilantro - Carrot Rice


For day 3 of blogging marathon#11, here is a delicious idea for lunchbox. Aromatic cilantro, healthy carrot and flavorful spices combine in this yummy rice. No need to alter the ingredients if serving older kids and for younger ones, just reduce the spice levels. This is going to Veena's "Kid's Delight - Color Palette", an event originally started by Srivalli.

Ingredients:
1.5 cups rice (Preferably Sona masuri)
2 Tbsp oil
1 tsp grated ginger
3 one inch pieces of cinnamon
6 cloves
2 green chillies (I used Serrano Peppers. Adjust the quantity if using other variety.)
1/4 cup grated, fresh / frozen coconut (Thaw if using frozen.)
2 cups packed cilantro leaves
2 carrots (about 1.5 cup peeled and grated carrot)
Salt to taste
For Tadka: 1 Tbsp oil, 1 tsp chana dal / Bengal gram, 1 tsp mustard seeds, few cashews / peanuts


Method:
* Cook rice adding 3 cups of water. Let cool and fluff.
* Heat 2 Tbsp of oil and add ginger to the same oil and fry until golden brown. Then add cloves, cinnamon and chillies to it and fry them for a few seconds. Then add cilantro leaves and fry until they are wilted. Turn off the stove and let cool. Add coconut to it and grind into a paste without adding any water.
* Heat a Tbsp of oil in a pan and add chana dal, peanuts/cashews and mustard seeds. Fry until peanuts and chanadal turn golden brown and then add grated carrot. Cook until it is done.
* Next add the cilantro - coconut paste and fry for a couple of minutes. Then add the cooked rice and salt. Stir well to combine.


Check here to find out what my fellow marathoners are cooking during this marathon.

Comments

Bihari Cuisine ~ Thekua / Khajur


I had prepared thekuas for this month's Indian Cooking Challenge in advance but unfortunately could not post it on time. The day I was supposed to post them, I hurt my hand and couldn't draft the post. My hand was jammed in between while accidentally our van door closed. Literally my right hand was half inside and half outside when the door was locked. I had to thank God that my hand was not broken that day.
I thought of posting it today since it fits both "Bihar dishes" & "Holiday cooking" themes. Holidays are "festivals" in India and we Indians have no dearth of them. One or other religious celebration would be waiting for us on turn of each page of calendar, if we really care to accommodate them in our busy schedules. And obviously like other cultures, Indian celebrations too revolve around good food. When taking about good food, sweet dishes steal the show like the other regions of the world. However most of the stuff is deep fried and there are hardly dishes involving baking since ovens are not part of a traditional Indian kitchen setup. Since cookies, cakes and other decadent desserts are reigning the blogosphere this month, today I thought of posting thekua, a regional cookie from India. Thekua, also known as khajoor or khajur is from Bihar and Jharkhand regions and is one of their revered prasads, offering to gods. This sweet and crispy dessert is prepared with whole wheat flour, sugar and coconut. It can be stored for a few days and hence an apt one to carry during travels.


Ingredients to make 20 thekuas:
2 cups wheat flour (atta)
1/2 tsp cardamom powder
2 Tbsp grated, dried coconut / copra (or cut into tiny bits)
3 Tbsp solidified ghee
1/4 cup semolina / sooji / rava
1/2 cup + 2 Tbsp sugar, powdered
Water / milk to make the dough (I used 1 cup minus 2 Tbsp of water.)
2 cups oil / ghee to fry the thekuas
(A special mould is used to shape these cookies.)

Method:
* Combine wheatflour, semolina, cardamom, sugar and coconut in a bowl. Add ghee and mix to form a crumbly mixture. Then add water little by little to form a stiff dough.
* Roll out the dough into 1 '' thickness and cut out into shapes desired.
* Heat oil / ghee in a small wok or kadai. When it is hot, drop them gently into the oil and fry them until golden brown on low flame.
Remove them with a slotted ladle and drain them on paper towels. Let cool and store them in an airtight container. 
  
Verdict:
They have a melt in mouth kind texture and very addictive. We all enjoyed them.


Check here to find out what my fellow marathoners are cooking during this marathon.

Comments

Friday, December 23, 2011

Quinoa Khichdi ~ Spicy Quinoa - Toordal Stew


Second week of blogging marathon #11 starts from today and I have chosen to go with "Mixed themes" for this week. My pick for today is lunchbox theme and so here is quinoa khichdi, a flavorful and healthy one pot dish. It is quick and simple to put together (especially in an Indian kitchen) and so qualifies for lunchboxes or quick fix meals on busy nights. 

Ingredients for 2 servings:
1/4 cup quinoa
1/4 cup toordal
3/4 cup chopped vegetables (I used carrot, beans, potatoes and tomato.)
A pinch of turmeric powder
1.5 tsp sambhar powder
1.5 Tbsp tamarind puree or to taste
1/2 tsp chili powder
Salt to taste
For tadka: 1 Tbsp ghee / oil, 1 tsp mustard seeds, few curry leaves and a pinch of asafoetida powder

Method:
* Wash quinoa and toordal with plenty of water by rubbing them in between your fingers and drain.
Add quinoa, toordal, turmeric, vegetables and about a cup of water to a container and cook in a pressure cooker. Alternatively, the ingredients can be cooked in a saucepan on stove top until toordal turns mushy.
* Melt ghee in another pan / a small kadai and add the mustard seeds. When they start to pop, add curry leaves and asafoetida. Then add the cooked quinoa - dal mixture, sambhar powder, salt, chili powder and tamarind to it. Add about 1/2 cup of water if needed, to reach the desired consistency. Mix well and cook for about five minutes. Turn off  the stove and serve warm with papad / potato chips.

This goes to MLLA - 42, hosted by Kiran, an event by Susan.
Comments

Thursday, December 22, 2011

Homemade Yogurt / Perugu

A simple breakfast - Strained / hung yogurt, kiwis, walnuts drizzled with honey.

Milk, yogurt and ghee - this trio of dairy products have a special place in Indian kitchen and are consumed on a daily basis for their health benefits. A freshly made batch of yogurt appears daily at the dinner table and eaten at the end of a meal either plain or along with rice for its digestive & cooling properties. Also it helps to soothe the palate after a spicy meal. Besides, yogurt can be a star in many dishes like these ones. BTW, yogurt goes by the name curd in India. It is perugu in Telugu, mosaru in Kannada, thayir in Tamil and dahi in Hindi.
Preparing yogurt at home is another basic and essential step in Indian kitchens and making yogurt is child's play, literally. Homemade version tastes better, is economical and free of unwanted chemicals and sugars. Using a good starter / yogurt culture and letting the yogurt set in a warm place are the only two points to be taken care of while making yogurt at home. The type of starter determines the quality of your yogurt and so, choosing a good starter is the key for making delicious yogurt. Starter is nothing but a few spoons of fresh yogurt. In India, good starters can be borrowed from neighbors or even store bought yogurt sometimes taste good and can be used. I have learnt from experience that when you live abroad, it may be difficult sometimes to get Indian style yogurt with that characteristic texture and taste. When you move out of the country, you will realize how you cherish those small things that you take granted back home. :(
For a true desi style yogurt experience, try your desi neighbors / colleagues, restaurants or even temples that has food service. They would be happy to share some yogurt with you. In the recent years, I have noticed that Indian grocers are carrying "desi dahi". I have tasted it but don't consider it as a substitute for an authentic Indian style yogurt but it is better than the sticky ones sold in supermarkets.

Making yogurt is the last thing probably an Indian wife does each night so that she has a fresh batch of yogurt to serve at lunch the next day. Preparation of yogurt is a simple chore done everyday without giving much thought to it. In India, generally full fat cow / buffalo milk is bought fresh each morning and boiled before consuming since it is unpasteurised. Excess milk is bought than needed for tea/coffee preparations and the leftover milk is used to prepare yogurt.
Yogurt preparation is actually a simple and quick process. All you need is milk and a couple of spoons of yogurt. Any milk will do - fatfree, low fat or full fat milk. I usually just heat about 4 cups of milk in the microwave for about 4 - 5 minutes since I use pasteurised, fatfree milk. And below is the way how it is done in India normally.
How much milk you need depends upon how much yogurt you would want to make. Just rinse the pan you are going to use to boil milk and add milk to it. This is a small step I follow to let the milk not scorch. Start heating milk on low flame in a sauce pan / non stick pan suitable for stove top cooking. Usually a steel vessel is used in India for this job. Remember to stay around when you are heating milk. If heated on high flame, you will end up with a scorched milk and also there is the possibility of milk boiling over the stove and that means a messy stove to cleanup. After a few minutes, you will notice that a thin layer of cream starts forming on the top. The milk starts bubbling and boiling over. At this point, either you can turn off the stove or simmer a few minutes to get a thick layer of cream.


Do you see the cream layer on top? Now wait until the milk becomes lukewarm. For about 4 cups of milk, I add about 1 - 2 tsp of yogurt / starter / live culture. Add a small piece of dried red chili, or a piece of green chili or a few peppercorns to the milk to ensure that yogurt is set fast. This is an optional step but I usually follow it.


Set in a warm place to set. The weather determines how quick your yogurt sets. On hot days, it sets quickly and also turns sour quickly if left at room temperature. If it is really cold like here in Chicago where the temperatures go below zero mark during fall & winters, the yogurt takes more than two days to set if left at room temperature and tastes not so good. During cold weather, I usually leave it overnight in my oven with the light on so that I will have my yogurt ready by morning. Refrigerate it until use or else it will go sour.


Tips:
1. If you want to have strained yogurt or a thick yogurt to make shrikhand or other desserts , pour the yogurt in a cheese cloth or thin cotton cloth, tie up into a bundle and put it in a colander to drain. Keep a bowl underneath to catch the drips. Place the colander and bowl in a refrigerator to avoid yogurt going sour.


2. If you want to have a healthy drink on hot days, add a cup of water to a cup of chilled yogurt. Churn it for a few seconds until you get an uniform consistency, add a pinch of salt and drink. This is called butter milk in India though the original buttermilk is the one leftover after churning the cream to produce butter.

Here I drained the fatfree yogurt slightly and served it with kiwi pieces, walnuts and honey.


This is going to be my Day 7 post under "Preps & Preserves" during BM#11. Check here to know what my fellow marathoners are cooking today.

Comments

Wednesday, December 21, 2011

Basics ~ Homemade Ghee / Neyyi / Thuppa


Ghee happens to be an important kitchen staple in India from ancient times. It is such an essential part of life that it is used ranging from preparation of delectable and elaborate Indian sweet preparations to religious ceremonies. A baby's traditional solid food is always fed with delicious, homemade ghee. A teaspoon of ghee served with Indian meal certainly enhances its flavor. 
Majority of Indian households prepare ghee at homes since it is a part of their everyday meal. Also the quality and flavor of homemade ghee is obviously far superior compared to store brought ones. I never thought of posting about ghee preparation since I assumed that every Indian knows about it. However a recent conversation with a friend made me realize that making ghee may be a tricky one if you have never paid attention to ghee making process and may end up burning the stuff. I had promised her to post a detailed pictorial of ghee preparation and here it is. Luckily I had some good sunshine on the day I took these pictures and I could take pictures indoors, which I usually don't do.

Ghee is usually made from unsalted butter. It is melted until all the moisture is removed. However unlike butter, it can be stored at room temperature for many months. We make ghee from homemade butter at my mother's place. Here I use fatfree milk and yogurt and so don't have a chance to collect any thick cream for making butter. I buy the 4 pounds pack unsalted butter from Sam's Club and use it.
Choose a sturdy pot / non stick pan / thick bottomed vessel to prepare ghee. I go with a pound of unsalted butter each time I prepare ghee. Add the butter to the pan and start heating it on medium flame.You can heat on medium flame if you are going to stay around. Or you can use low flame from the beginning. The butter melts, the white stuff disappears and remains pale yellow colored liquid. There will be a lot of bubbling sound through this process.


Next the foam starts to form on the top. Continue to simmer until the butter becomes transparent like water. By the time, the milk solids at the bottom would have turned from white to golden brown.


When the  butter becomes clear liquid like above, turn off the stove. If you don't turn off the stove at this point, the milk solids may get burnt and you may have to trash the liquid.
Let it cool and collect the clear liquid (which is your ghee) into a container.  The solids would be usually collected stuck to the bottom of the container and is discarded.


The final product of this process, ghee in liquid form is here.


At room temperature, ghee solidifies, as shown in the first picture. When ghee needs to be used, it is just reheated until it melts. There is no harm in using solidified ghee except that you end up eating more. :)

This is going to be my Day 6 post under "Preps & Preserves" during BM#11. Check here to know what my fellow marathoners are cooking today.

Comments

Tuesday, December 20, 2011

Virtual Baby Shower for PJ ~ Eggless Custard Powder Cake in 5 Minutes


We came to know during last blogging marathon that PJ, a blog buddy is expecting her second child in a few weeks and we marathoners thought of celebrating this joyous occasion by throwing a virtual baby shower to her. Each one of us are cooking from her blog and bringing her a delectable platter to enjoy, virtually of course. Check the following bloggers' links to know what has been brought to this party.

Aarthi    http://yummytummy-aarthi.blogspot.com
Cool Lassi(e)    http://pangravykadaicurry.blogspot.com
Gayathri Kumar    http://gayathriscookspot.blogspot.com
Kalyani    http://itsnotmadrasi.blogspot.com
Kaveri    http://palakkadcooking.blogspot.com
Mireille Roc    http://gourmetglobal.blogspot.com
Pavani    http://cooks-hideout.blogspot.com
Pradnya    http://pumpkinfarmfood.blogspot.com
Priya Srinivasan    http://enveetukitchen.blogspot.com
Priya Suresh    http://priyaeasyntastyrecipes.blogspot.com
Srivalli     http://spicingyourlife.blogspot.com
Sushma    http://sushmapinjala.blogspot.com
Vardhini     http://vardhiniskitchen.blogspot.com
Veena     http://veenasvegnation.blogspot.com

Aarthi came up with this beautiful logo using the images from posts.


I chose to go with her Microwave eggless custard powder snack cake since it was my kind of dish - a quick and easy one. I have baked earlier three different kinds of microwave cakes and they turned out pretty good. I so guessed that this one would be delicious as well and tried it. One can have this cake ready to be served by the time a convection oven gets preheated.


Ingredients:
3/4 cup - All purpose flour / Maida
5 to 6 Tbsp (a little more than 1/4 cup) - Vanilla flavored custard powder
Scant 3/4 tsp - Baking powder
1/2 cup Sugar
5 Tbsp / 75 grams Butter, at room temperature (I just melted it in microwave.)
1/2 cup /125 ml Milk

Method:
* Sieve the flour and custard powder. Combine the dry ingredients in a bowl.
*  Beat milk, butter, sugar until creamy. Add the dry ingredients to it and whisk till you get a smooth batter.
* Grease a microwave proof dish and pour in the batter.


* Microwave on high for 5 minutes or until a toothpick inserted comes out clean. Remove after 5 minutes, cut into slices and enjoy.

PJ mentioned to check it for doneness from the 4th minute onwards since microwaves vary. Mine was exactly done in 5 minutes. It doesn't raise much as my
other microwave version cake and so use a baking utensil accordingly.


Verdict:
It is eggless and baking time is five minutes. What can get better than that? :) From preparation to plate, it hardly takes 15 minutes including the waiting period and an apt one for snacking as the title of the original recipe says. This is a good one for those who enjoy vanilla custard since this cake is just that; filled with that flavor. The texture is perfect as you notice from the image.
The only drawback was that I could not get the cake by inverting the bowl but I am not complaining. It is sliceable but a thin layer of cake at bottom was sticking to the bowl.  


Check here to know what my fellow marathoners in BM#11 are cooking today.