HOME        |        ABOUT        |        COPYRIGHT        |        CONTACT        |         RECIPE INDEX        |         INDIAN THAALIS        |         MILLET RECIPES        |        EVENTS' ROUNDUP        

Monday, November 30, 2009

Maddur Vade / Maddhur Vade


(The latter part of the word vade, de is pronounced as day)

As the name suggests, this popular snack item of Karnataka can be traced back to Maddhuru. Maddhuru is a small town which lies between Bangalore and Mysore, the two most popular cities of Karnataka. This Vade is frequently sold on the trains which frequent these two cities. I have always attached these vadas to our train journey since that's where I ate them though they are available in restaurants as well.
I am not great fan of deep frying. However, there are certain exceptions and this awesome vade tops that exclusive list.These crispy, delicious vadas are a great treat, enjoyed by adults and kids alike. What makes them extra special is that they can be stored for a few days unlike the other Indian vadas.
Give them a try and you would thank the guy who came up with this recipe.

 Ingredients needed to make around 20 vades:
1 cup fine semolina / rava (chiroti rave)
1/2 cup rice flour
1/4 cup all purpose flour / maida
2 onions (about 1 cup, chopped)
10-15 curry leaves, finely chopped
4 tbsp finely minced cilantro
3 Serrano peppers, finely chopped (Use any other variety chilis and as many as needed)
1.5 tsp salt
About 1/4 cup water (same cup used to measure dry ingredients.)
3 - 4 cups of oil to fry (I use canola)

Making vades:
Heat the oil in a kadai / deep based pan.
Meanwhile, combine all the ingredients except the water and the oil. Add about 4 tsp of hot oil to it. Mix all together by adding water little by little, to form a firm dough.
Pinch and take about a small lime sized dough. Grease a plastic sheet and put the dough ball on the sheet. Pat it with your fingers and shape into a circle/patty as thin as you can.
To know whether the oil is hot enough, drop a pinch of dough into the oil. If it sizzles and comes to the surface, then the oil is ready. If the dough stays at the bottom, heat the oil a couple of minutes more.
Now carefully lift the patted dough circle using your fingers and gently slide it into the hot oil. You can drop a few more patted circles, taking care not to overcrowd the kadai.
Now turn down the heat to the lowest setting and deep-fry them till they turn slightly brown on both sides and are crispy. Remove with a slotted spoon and drain on paper towels.
Repeat the process with the remaining dough. Remember to grease the plastic sheet everytime you shape the dough into thin circle. If the sheet is not greased, the patty will stick to it.
Let them cool and store them in an air tight container. This quantity would last only for a couple of days.:)
Serve with chutney or can be eaten as it is.
Another look at maddhur vades.


Post a Comment

Tuesday, November 24, 2009

MEC - Fresh Produce Roundup, Carrot Laddu & Vegetable Poha

Microwave Easy Cooking - Fresh Produce round up is here and I thank all the bloggers who have sent their delicious entries for the event and also thank Srivalli for giving me the opportunity to host the event. Also a big thanks to my mother and sister who gave me the recipes instantly when they heard about the event in spite of not being well versed with the blogging process. Obviously, they are non bloggers and so, basically gave me the recipe. I tried their recipes, photographed and posted here. A special mention about Priya has to be made as well. She sent four entries and thank you Priya.The entries have been arranged in an alphabetical order. Go through, try and enjoy the recipes. :)

MEC - FRESH PRODUCE ROUND UP

Aloo-Methi Matar by me


Avial by me


Baby Corn, Potatoes Stir Fry in Microwave by Srivalli


Carrot Chikki by Sheetal


Carrot Laddu by Lakshmi, my mother (Recipe below)


Dry Curry Leaves, The Microwave Way by PJ


Microwave Beetroot Halwa by Priya Srinivasan


Microwaved Cabbage and Carrot by Nathan Lau


Microwave Carrot Halwa by Priya


Microwave Carrot N Spinach Fried Rice by Priya


Microwave Jeera Aloo by Priya


Microwaved Spinach and Malai Kofta by Cool Lassi(e)


Microwave Spinach Stir Fry by Priya


Okra Fry by Kamala Bhoopathy


Potato - Carrot Soup by me


Raw Banana Peper Fry by Radhika Subramanian


Saunfwale Aloo Baingan by Lata Raja


Spicy Red Potatoes by me


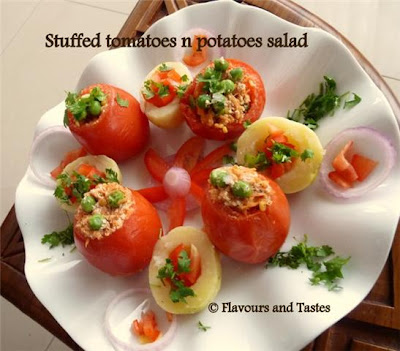
Stuffed Tomatoes and Potatoes Salad by Lata Raja


Sweet Potato Kheer by me


Tomato - Capsicum Chutney by me


Vegetable Poha from Sirisha, my sister (Recipe below)


Now coming to the recipes for carrot laddu and vegetable poha. I must admit I was so much caught up in the act that I forgot to note the time required to make the dishes.

Carrot Laddu:

My mom said that she prepared these laddus based on a TV show. They were an absolute delight and I enjoyed them to the last bite.They are quick to prepare and are suitable candidates to impress guests and also an impossible to screw up kind of dish even for a beginner. Glad to learn this new dish. :)


Ingredients to make around 16 laddus:
Grated carrot - 1.5 cup
Unsweetened khoa/khoya, grated - 1.5 cup
Fresh, shredded coconut - 1.5 cup
Sugar - 1.5 cup (reduce if less sweetness preferred)
Milk - 3/4 cup
Cardamom powder - 1/4 tsp

Cooking:
This can be prepared on a stove top as usual but today I am giving the MW method. Take a microwave safe bowl big enough to hold all the ingredients. Add the carrot and milk and cook/fry for 3-4 minutes. Then add the sugar and coconut and keep cooking. You have to keep an eye and stir in between till the mixture comes together. Then add the khoa and cardamom powder to the carrot mixture and keep cooking till the mixture comes closer again. Do not stop paying attention to the mixture or it may get burnt. Remove and let the mixture cool. Then make laddus. You can also roll them in dessicated coconut, if you wish.
They can be refrigerated.

Vegetable Poha


I make poha regularly but never in the microwave and also never had added vegetables before. This was a change from my routine way of making poha and we enjoyed this.

Ingredients:
Thick variety poha - 2 cups
Onion, potato, tomato, carrot - one each and a handful of green peas
Medium hot green chillies, finely chopped - 4 or 5 (red chillies or a combo of green & red chillies can be used)
Salt to taste (about 2.5 tsp)
For seasoning - 3 or 4 Tbsp oil, a handful of peanuts, 1 Tbsp chanadal, 1 tsp mustard seeds, 1 tsp urad dal, curry leaves, 1/2 tsp turmeric powder
Chopped cilantro (Optional) - 2 Tbsp


Cooking:
* Wash the poha thoroughly twice with water, drain all the water and keep it covered till needed.

* Chop the veggies and green chillies.
* Heat the oil in a microwave safe bowl and add peanuts, chanadal, mustard seeds, green chillies and curry leaves. When peanuts and chanadal start to turn reddish, add the onions and turmeric powder and fry till the onion turns translucent. Then add the chopped tomatoes and fry for about a couple of minutes. Then add the rest of the vegetables and continue to cook till vegetables are done. Keep stirring in between. Then remove the bowl and add the poha, salt and cilantro. Turn around the poha mixture once so that all the ingredients are mixed well. Then cook for about five minutes or till the raw smell of the poha is gone with stirring once or twice in between.

* Stir the content gently one more time before serving.

Happy Thanksgiving!!

Comments

Sunday, November 22, 2009

My Kitchen - Maratha/Marathi Moggu

Moggu is a spice used in some of Karnataka's cherished dishes such as bisibele bhath, saagu, (Karnataka style) kootus to name a few. It is brownish in color and looks somewhat like a bigger version of a clove. I had failed to notice that it smells somewhat like shikakayi powder until today. The smell / fragrance attached to it is not that strong that one would notice it as soon as a container of moggu is opened and I guess that's the reason I missed it. (For those shampoo lovers and who don't know what it is, shikakayi powder is used in India to wash hair). It is not eaten raw but always dry fried and ground with other spices before going into a dish. It is called moggu in Kannada and mogga in Telugu which literally means a bud. Since the Kannadigas attach the tag Maratha, I am assuming it is used in Maharasthrian cuisine as well. I always get my supply of moggu from India since I could not find this in any Indian grocery shops here. I had these questions regarding this spice and if anyone knows the answer, let me know. Which plant's flower bud is this? Do you know the name of this spice in English or any other Indian languages? Is it used to make any other dishes or for any different purpose? Comments

Friday, November 20, 2009

Tadka Moongdal

Before proceeding to today's recipe, a word regarding the plagiarist who blogs at momrecipes , whom I mentioned about in my previous post. She reminds me of the plagiarist blogger (andhra mirchy if I am correct) who mainly copy pasted others' recipes a couple of years ago. The person closed the blog after the attacks by affected bloggers.
That blogger did not interact with other bloggers where as this woman has the nerve to contribute the copied recipes to events and even conducts the events on her own. After going thru her blog, I noticed that she had copy pasted many old recipes of bloggers who are here in the blogging world for some time now. The people who are visiting would not recognise her content theft. Check to see if any of your posts have been plagiarised.


The yellow colored moongdal is the skinned and split mung bean (outer green husk removed). It is one of the quickest cooking bean and needs no pre soaking or a pressure cooker. Moongdal is also said to be one of the easily digestible beans and therefore people who are stepping into the bean world for the first time can start their journey with this one. Indians who eat beans on a daily basis tend to add the spices like turmeric powder & asafoetida while cooking beans to reduce the flatulence and to aid the digestion.
Basically, this dal is a simple one accentuated by the fragrant tadka of cumin, curry leaves & asafoetida and slightly spiced by the red chillies. The quantity of red chillies I have used works even for the little ones to relish this scrumptious, creamy dal.

Cooking time: Under 30 minutes
Ingredients used to yield 2 cups of cooked dal:
1 cup moongdal
1/4 tsp turmeric powder

5 cups water (approximately)
Salt - 1.5 tsp or as needed
Minced cilantro for garnish
For tadka- 2 tsp canola or peanut oil / ghee, 1 tsp each of mustard seeds & cumin seeds, 6 red chillies broken into small pieces**, a pinch of asafoetida powder, few curry leaves
*A deep sauce pan or a thick bottomed pot are also good substitutes for a kadai, the Indian style wok.

** Green chillies can be substituted and the quantity of chillies can be increased for more spiciness.

The cooking part:
Wash the dal in two exchanges of water. Add the dal to a kadai* along with 3 cups of water & turmeric powder and cook on medium flame. Scoop away with a ladle, the froth formed during the cooking process. Cook the moong till done adding the extra water as needed and stirring in between. Add the salt and stir the dal well. The dal would cook in around 20 minutes, when the moong has almost attained a mushy texture. The final dish would be a little watery with a thicker consistency.
Now the tadka part. Heat oil in a small pan. Add the mustard & cumin seeds. When they start to sizzle, add the asafoetida, red chillies & curry leaves. Heat for a few seconds more and turn off the heat.
Add the tadka ingredients to the dal and mix well. Garnish with cilantro.
Serve with rotis / rice.


This one is going to be a part of
1.
Food for 7 stages of life - Kids (4-14 yrs) hosted by Radhika and the event creator is Sudeshna.
2.
MLLA - 17 guest hosted by Sra and the event creator is Susan.
3.
Think Spice - Turmeric hosted by Sudeshna And the event creator is Sunita.

Comments

Tuesday, November 17, 2009

Plagiarism Strikes Again

Whenever someone copies my work, I feel like screaming from rooftops at the plagiarists for their thievery. I had my first taste of plagiarism when I was only a couple of months old in the blogging world. It was not fun. After three years of blogging and many similar episodes, I would love to feel that I do not care any more about these blatant, shame less acts but seems they still make me mad. One of my readers brought to my attention about a blogger named Sireesha who blogs at Momrecipes. Later today, another blogger friend forwarded an email which mentioned about the above said blogger copying the work of several other bloggers. Content (some / whole) of my pandumirapakaya pachchadi, pappula podi and tindora chutney recipes has been copied by her. There may be chances that we both have the same recipes but same words?? HELL NO!! She took pains in rearranging the sentences/writing one or two sentences of her own. Check her post URLs. http://momrecipies.blogspot.com/2008/08/pandu-mirapakaya-pachadi.html http://momrecipies.blogspot.com/2008/11/pappula-podi-spicy-roasted-chickpea.html http://momrecipies.blogspot.com/2009/11/dondakaya-pachadi-tindora-chutney.html Check the site to see if any of your posts/images have been copied. And finally, to anyone who is trying to copy from my blog, I would like to say .... I would appreciate if you respect my time and energy invested in blogging and do not try to copy my work. If you really like my work, leave a comment. If you tried & liked my recipe and want to mention it, give a link to my post and I greatly welcome and appreciate it. If you simply want to lift the content from other bloggers including mine and rearrange the sentences, that is not creative and nobody needs a duplicate blog when there is an original one. If you have any self respect, stop plagiarising.

Comments

Friday, November 13, 2009

Winter Melon Halwa / Gummadikaya Halwa - Microwave Version


Kashi halwa, dumrot, kumbalakayi halwa - few names in Kannada for the wintermelon halwa

A cheery November is here after a dreadfully, drab month. The sunny weather also brought the urge to do some back-breaking, fall clean up. After all the hectic work this week, I had some free time today. M, who doesn't care for sweets is away on an official trip and so I thought of some 'self indulgence'. I went ahead and prepared one of my favorites, wintermelon halwa.
In Bangalore (& other regions of Karnataka), the wintermelon halwa is almost a mandatory part of a decadent breakfast at most of the social gatherings, irrespective of whether the celebration is of a smaller range or enoromous. This delicous dessert has been one of my favorites since my child hood and kashi halwa was (& still is if I am in India) one of the menu items that I always look forwarded to whenever I attended any functon in Bangalore. This sinfully tasty dish has been a part of the celebrations associated with my life - Our engagement, wedding, gruhapravesham to name a few.
Both white or yellow-orange hued wintermelon flesh can be used to prepare the halwa. The wintermelon used to prepare halwa usually is of the white variety (ash gourd) in Andhra. However, the kashi halwa I grew up eating was always yellow in color and I therefore go with the yellow-orange hued one.
This time, I prepared the halwa in a microwave which is quicker than stove top method and needs less supervision & stirring.


List of Ingredients to make about 2 cups of halwa:Grated wintermelon - 5 cups
Sugar - 1/2 cup or as needed
Evaporated milk - 5 oz *
Ghee - 1 tbsp
1 Tbsp of raisins & cashews
Few saffron strands (optional)

1/4 tsp cardamom powder
* Half & half/whole milk can be substituted. Quantity of milk can be reduced.

Cooking:
. Begin with the usual exercise. Peel the wintermelon, remove the seeds and grate it.
. Take a microwave safe bowl which is big enough to cook the quantity of wintermelon being used. Heat the ghee in it and add the cashews and raisins to it. When rasins turn plump and cashews turn golden brown, remove them with a slotted spoon and save them to use later. Add the grated wintermelon to the same bowl with ghee and fry it for about 5 minutes. Stir once or twice in between.

. Then add the evaporated milk to the bowl and continue cooking till the wintermelon is done. The milk would be incorporated into the wintermelon and the mixture would have attained a thicker consistency by now. This would take around 15 minutes (or a couple minutes more) and need some stirrings in between.
. Then add the sugar, cardamom powder, saffron strands to the cooked wintermelon and cook for another 5 minutes (or more). It is done when the sugar has melted, and got incorporated into the cooked melon mixture and the final product, halwa is almost a solid mass.
. Add the toasted raisins and cashews and serve warm or chilled.


Kitchen tip:
Always keep an eye while cooking in a microwave. This is especally important at the final stages, when there are more chances of unsupervised food getting burnt. Also the timings mentioned above holds good for my MW and your's may take little lesser or longer since the MW strengths vary.

Post a Comment

Wednesday, November 4, 2009

Capsicum & Potato with Besan


While potatoes are a must in most of the gravy style Indian curries, they are fun to work with in dry subzis too. They gel well with other veggies as in vankaya-bangaladumpa koora or as in this one where it is paired with capsicum. Potatoes bring in extra flavor and substance to the dish. Addition of besan/ chickpea flour not only compliments the veggies but enhances the essence of this simple dish. This is easy & quick enough to be part of a substantial meal and for those 'Cook for yourself' moments.  

List of Ingredients:  
1 Capsicum - stalk & seeds removed and chopped 
2 Potatoes - peeled and cubed 
2 Tbsp of besan (gram flour) 
1 tsp each - Chili powder & salt 
For tadka: 2 Tbsp oil, turmeric powder, curry leaves, 1 tsp each of mustard seeds, chanadal, uraddal & cumin seeds  

Cooking:  
Heat oil in a non stick saute pan and add all the tadka ingredients except the turmeric powder. Saute for a few seconds. When the dals turn reddish and the mustard seeds start to pop, add the turmeric and the potato cubes. 
Stir well once and let the potatoes cook on low flame, covered. Keep checking and stirring in between. 
When they are half done, add the capsicum and continue cooking till both the veggies are done. 
Then add the besan, chili powder and salt and stir so that the veggies are coated well with besan. 
Heat for 2 -3 minutes more till the raw smell of besan disappears and turn off the stove.  
Serve warm with rice or rotis.

 Comments

Friday, October 30, 2009

Potato - Carrot Soup - Microwave Version

From what I am reading on other blogs, I have to assume that everybody is enjoying the 'Fall' 'season & things associated with it like 'the nips & chills in the air',' fall colors', 'farm Visits', 'pumpkins', 'Halloween'. While everyone (except those near mountains) is gungho over their pleasant autumn stuff, we Chicagoans are stuck with wintry & messy conditions. It seems as if somebody has fast forwarded the weather button from 'Summer' to 'Winter' with vengeance, forgetting that there is autumn in between. We have set a record this month for being one of the worst ten Octobers ever recorded for the area. We have been either freezing or drenching this whole month. Stepping out with out a jacket on is impossible. The temperatures were mostly in 40's (F) and for the past 10 days it is raining almost continuously. Weather is so cold and dreary that when everyone gets out of the house minding their business, I just want to spend my time cuddling up in front of the TV or reading a book and nothing else.With this 'wintry autumn' blues, I don't want even to be in the kitchen spot light for longer. Having a hot bowl of soup, simple yet filling seems more than enough for the moment. Today's recipe is for one of such soup, which has already been on our menu twice in this month. :) I should admit that the inspiration to this potato-carrot soup is actually one of my BIL s. A few years back, he was visiting his son in California and during a chat, told us that he had prepared potato soup in the microwave for lunch. He had used potato, onion & garlic. I have changed the ingredients to suit my taste and any one who wants to try this soup- can play with the ingredients . This cilantro flavored, simple, quick & easy soup is going to taste awesome anyway. The yellow colored soup with specs of green looked fabulous actually and I don't know why, my picture wants to represent the weather I have here right now. I have used a small onion, a carrot and two medium sized potatoes. Peel the skins of the veggies, chop them into big chunks and put them in a microwave safe bowl with a cup of water. Cook for about 8 - 10 minutes or till they are done. Puree the cooked vegetables adding a tbsp of cilantro leaves and a cup of milk (can even add skim mlk or omit it.) Remove and adjust the consistency of the soup by adding some more water. Add the salt and put it back in the microwave for 2-4 minutes. Serve with crushed pepper and croutons.

This is going to be a part of 1. MEC-Fresh produce hosted by me and the event creator is Srivalli. 2. WYF - Light Meal hosted by EC. Comments

Wednesday, October 28, 2009

Aviyal - Microwave Easy Cooking

Before going to the recipe, I just wanted to remind that last date to submit entries for the Easy Microwave Cooking - Fresh Produce is 31st of this month. Keep sending the entries.

You have an idea about the regional cuisines of India if 1. you are an enthusiastic foodie who is interested / would try different regional cuisines. 2. you/your family members have lived through various parts of the country or you have friends who represent different states. 3. you have travelled extensively. 4. you spend whatever free time you have in front of a computer going through food related sites. 5. you keep buying/borrowing Indian cook books. And for zillion other reasons. :) There are as many regional cuisines as the number of states in the country and so, it was and still is hard for Indians to be familiar with all the regional cuisines unless for any of those things mentioned above. My mother, like most of the Indian women of her times, has never thought of a computer while cooking or has owned a cookbook till date. She cooked using the knowledge she gained from her mother, other family members & friends and from the recipes in the magazines that caught her attention and most importantly, the expertise she gained from almost 4 decades of cooking. In the process, however she gave prominence only to the regional cooking (and that is the case with many of our Mothers.) My parents who were from Andhra, settled in Karnataka and were tenants of a Tamil Iyer family when they were newly weds. My mom therefore soon learnt the cooking ways of the three states but never got a chance to know about Kerala cuisine. Growing up, I was therefore not familiar with Kerala's cuisine as much as I was with the rest of the South Indian states. Once, however I had a glass of a kheer at a Malayali classmate's home which I could not forget till now. The yellow puree was so fabulous that even a shy kid like me couldn't stop from asking for a second serving shamelessly. I was just a fourth grader then and didn't bother to ask what it was or for the recipe. So bad. :( :( I have started to pay more attention towards other blogs after I started blogging and I should say it is a kind of new experience knowing about the rich and varied Indian cuisines and culture. I had tried earlier a few from other states and it is time to turn towards the southern , coastal state of Kerala. The first time I tasted aviyal was at M's niece's wedding, a dozen years ago. I liked it but didn't bother about asking the recipe since I was not that much into cooking then. I later learned that Aviyal is usually one of the items present in a Kerala Sadhya - The feast. Aviyal- basically an assortment of vegetables in a mixture of coconut and yogurt is popular both in Kerala and Tamilnadu, because of it's proximity to the region. I followed the recipe which I got from one of M's SIL who has some Tamilnadu - Kerala background. I absolutely loved the aviyal with sweet undertones of coconut and yogurt since those two happen to be my most favorite things. However I have omitted the coconut oil seasoning part since we are not used to cooking with that oil. It is too much over powering when you are not used to coconut oil. I know how some feel about our avakai , gongura pickles. :) Ingredients I used: Beans, carrots, winter melon, plantain, potato, peas - 2 cups (Some of the other vegetables suggested were yams, cluster beans, drum sticks and even bittergourd can be used. Avoid sticky vegetables like okra) yogurt 1/2 cup (reduce the quantity if you wish. I added more since I love yogurt) 4 green chillies 1/2 c fresh coconut salt, curry leaves Cooking: . Cut the vegetables into thick, match stick size strips. Cook with little water in a microwave till done. (The original recipe had turmeric which I didn't use. If using, add turmeric to the veggies while cooking.) . Meanwhile, grind the coconut and green chillies in a blender. Add the coconut mixture, few curry leaves and salt to the cooked vegetables and cook for another 3 -4 minutes in the microwave. . The original recipe requires to add the yogurt to the vegetable mixture and heat lightly. Instead, I cooled the mixture and added the yogurt to prevent curdling. It stayed fresh, refrigerated for two days. I had them with my rotis. This is going to be a part of the Easy Microwave Cooking - Fresh Produce, guest hosted by me this month and Srivalli, being the event creator. Comments

Sunday, October 25, 2009

Tomato - Capsicum Chutney - Microwave Version

Any one who follows my blog regularly can figure out our family's love for chutneys/pickles as I keep posting recipes for them quite often. I should say today's chutney is quite apart from my earlier chutney posts. I had coupled tomato and capsicum to come up with this tangy chutney which I had never done before. Bringing vegetables together to make chutney is not novel nor the ingredients used but what makes it unique is the use of microwave to prepare this. Prior to this, I had always used the skillet & stove method to prepare these Indian spicy chutneys but never a microwave. I am very happy with today's result as it was done in a jiffy and thought of sharing this success. Ingredients used: 2 Tomatoes 1 Small, Green capsicum Salt to taste For tadka/popu: 1 tbsp oil, 1 tsp chanadal, 2 tsp urad dal, 1 tsp mustard seeds, 6-8 red chillies, 1/4 tsp turmeric powder, a pinch asafoetida powder & a tsp of tamarind (optional) Method: . Remove the centre core and seeds from the capsicum and chop it. Also chop the tomatoes. . Add the oil, chana dal, urad dal and mustard seeds to a microwave safe bowl and heat for a couple of minutes. Stir once in between. The dals would have turned red by this time.Then add the turmeric powder, asafoetida powder and red chillies and again heat it for about 30 seconds. . Remove the bowl. Add the chopped capsicum, tomatoes and tamarind if using and stir once. Then cook them till the vegetables are tender. It would take around 6-8 minutes. Stir once or twice in between. Remove and let the contents of the bowl cool. . Put all the ingredients in a blender and grind it into a coarser paste adding enough salt . Collect the chutney in a bowl after done. Serve along with rice or any breakfast items.

This goes to Microwave Easy Cooking - Fresh Produce guest hosted by me and the event creator is Srivalli. This also goes to Spicy Fiery Chutneys hosted by Srivalli. Post a Comment