HOME        |        ABOUT        |        COPYRIGHT        |        CONTACT        |         RECIPE INDEX        |         INDIAN THAALIS        |         MILLET RECIPES        |        EVENTS' ROUNDUP        

Wednesday, December 26, 2012

VeggiePlatter Turns 6


I guess "double birthday and a triple chocolate cake" would have been an apt title for this post. :)

The idea of a recipe journal took the form of VeggiePlatter, this month six years ago. This online culinary journey of mine has been fun so far, earning friends along the way as an added bonus. I would like to take this opportunity to thank my readers/fellow bloggers who invest their time going through this blog & leave comments and to those strangers who email me appreciating my work. Thank you. :))

And BTW, yours truly, you know who celebrated her birthday yesterday. Hope I turned wiser as well along getting older. :) My daughter who is turning into a chocoholic wanted me to bake a chocolate cake on the occasion. Though I have a chocolate cake recipe, I used the chocolate muffins recipe for the cake as we had really liked it earlier and also I had to get rid of some overripe bananas. I used store bought Pillsbury chocolate fudge frosting and some decors upon my daughter's insistence. My daughter enjoyed it meaning the recipe was a hit. It is a flavorful cake and the texture is somewhere between fluffy and dense.


I just doubled the recipe I used for the muffins but again mentioning the ingredients anyway.
 
Ingredients:
1/4 cup milk + 1 tsp apple cider vinegar
1&1/2 cups all purpose flour
1/4 cup cocoa powder
1 tsp baking soda
1/4 tsp baking powder
1/2 tsp salt
1 cup sugar
1/2 cup semisweet chocolate morsels
1 tsp vanilla extract
1 & 1/3 cup mashed bananas
5 Tbsp melted butter / oil
1/2 pound chocolate frosting
1 Tbsp cake sprinkles (optional)
 
 
Method:
1. Add vinegar to the milk which is at room temperature. Leave aside for five minutes.
2. Preheat the oven at 350 deg F. Grease a cake pan.
3. Sift flour, baking soda, baking powder, salt and cocoa powder.
4. Add milk-vinegar mixture, vanilla and butter to a bowl and mix well. Add mashed bananas, sugar and combine well.
5. Now add the sifted dry ingredients from step 2 to the wet ingredients in step 3. Mix well and stir in the chocolate chips.
6. Pour the batter into the prepared pan and bake for 40 - 45 minutes or until a toothpick inserted at the center comes out clean.
7. Cool the cake and remove from the cake pan.
8. Apply the frosting and decorate if desired.


Monday, December 24, 2012

Eggless Nutella Brownies with Four Ingredients


When I decided to go with "Kids' Desserts" theme for the final week of blogging marathon, I went to the experts, my kids to see what would they prefer if given a choice. Actually I should admit that there were no prizes for guessing considering my daughter's love for chocolate. Her list went something like this - chocolate pudding, fudge, brownie, chocolate cake, chocolate chip cookies. :)

For the first day, I decided to go with this easy, quick nutella brownie recipe adapted from here. They are delicious and have a soft cake like texture. I have converted the recipe into an eggless one. If you don't mind using the egg, replace the flax meal in the following recipe with it.


Ingredients: (Make 6 brownies or 12 bite sized ones)
1/2 cup nutella (cocoa-hazelnut spread)
5 Tbsp all purpose flour
1/4 cup chopped hazelnuts / walnuts
1 Tbsp flax meal

Method:
* Add 3 Tbsp warm water and flax meal in a bowl. Whisk well and leave aside for 5 minutes.
* Heat the oven to 350 deg F. Line a muffin pan with paper cups.
* Add nutella to the flax meal bowl and whisk well. Next slowly add the flour and again whisk to incorporate the flour into the mixture.
* Spoon the batter equally, up to 3/4th level of each of the muffin cup. Sprinkle the nuts on top of each of the muffin cups equally.
* Bake for about 10 - 12 minutes or until they set.
* Cool on a wire rack and enjoy. They can be refrigerated or can be stored at room temperature for 3 days.


Check what other marathoners of BM#23 are cooking, here.

Comments

Wednesday, December 19, 2012

Eggless Vanilla Cupcakes with Chocolate filling


I was planning to make a pictorial post of marble chocolate cupcakes today as I was expecting sunshine based on weather report. However Sun god had other plans and was not even peeking in our neck of the woods. It has been the same for the past few days. My mood was no different than the grey, gloomy weather outside my window and so decided to go the easy way, throw in a chocolate surprise inside the vanilla cupcakes instead of those marbled ones.

Ingredients: (Yield 6 cupcakes)
1/2 cup yogurt / curd
5-6 Tbsp sugar
1/2 tsp baking soda
3/4 tsp baking powder
1/4 cup melted butter / oil
1 tsp vanilla essence
3/4 cup all purpose flour / maida
6 one oz  semi sweet baking chocolate squares


Method:
1. Combine yogurt, sugar, baking soda and baking powder in a bowl and let it sit for about 4 - 5 minutes. It will turn frothy by the time.
2. Meanwhile, preheat the oven to 200 deg C / 390 deg F. Sift the flour. Grease the muffin pan or use paper liners.
3. Add vanilla, butter / oil and flour to the yogurt mixture in step 1 and mix well.
4. Fill 1/4th of each of the muffin cup with the batter, place the chocolate square at the center and again spoon batter over it so that each muffin cup is filled only up to 3/4th thereby leaving space for the cupcakes to raise.
5. Bake for 10 minutes and then lower the temperature to 180 deg C / 350 deg F. Bake for another 15 - 20 minutes or until a toothpick inserted at the center comes out clean. (If it comes out with gooey chocolate, it is fine.)

Note:
1. Even fatfree yogurt will do but should be at room temperature.
2. I used 1/2 oz chocolate squares and realized that I could have gone with 1 oz and that's what has been listed in the ingredients.
3. The chocolate inside was gooey when eaten warm. If the chocolate inside hardens for any reason, just warm the cupcakes in the microwave before serving.
4. I have used Nita Mehta's Vanilla cake recipe for the cupcakes.


Check what other marathoners of BM#23 are cooking, here.

Comments

Tuesday, December 18, 2012

Eggless Carrot - Chocolate Chip Muffins

 
I had blogged many recipes earlier with carrot and even hosted an event with the same theme. When I chose to go with carrot theme again during this marathon, I prepared a list of carrot recipes that either I haven't posted or tried yet. My son had suggested a few that included carrot -chocolate cupcakes. I had never tried that combo before and said yes. However I did not do it because I posted two other baked recipes during the carrot week. I went ahead and prepared them this week as I am doing chocolate based muffins. They turned out delicious with a soft texture. 
 
Ingredients: (Yield 7 muffins)
3/4 cup + 2 Tbsp all purpose flour
3/4 tsp baking soda
1/4 tsp salt
 6 Tbsp sugar
5 Tbsp melted butter
1/4 cup milk
1 banana, mashed
1 tsp vanilla extract
1 cup grated carrot
6 Tbsp semisweet chocolate morsels 


Method:
1. Preheat the oven to 375 deg F.
2. Sift together flour, baking soda and salt in a bowl.
3. Mix butter, sugar, vanilla, milk and mashed banana in another bowl.
4. Now add the dry ingredients to the wet ingredients and mix just until combined.
5. Toss carrots, chocolate morsels to the mixture and gently combine.
6. Grease the muffin pan or use paper liners. Spoon the muffin batter into each cup, filling only 2/3rd of the cup.
7. Bake for 35 - 40 minutes or until a tooth pick inserted at the centre comes out clean.

Check what other marathoners of BM#23 are cooking, here.

Comments

Monday, December 17, 2012

Eggless Double Chocolate Banana Muffins


Owing to my daughter's affinity towards brownies, I went ahead and signed up for chocolate based muffins / cupcakes theme during this blogging marathon. I hadn't got any opportunity to bake chocolate muffins / cupcakes until now though I have made choco cakes. I had earlier bookmarked a recipe from Eggless Cooking and this was a perfect opportunity to try them out. This recipe is fool proof and yields very moist, yummy and flavor filled muffins.
 
I had baked two other kinds of muffins on the same day and so I halved the original recipe. It took ten minutes more baking than the original recipe mentioned. I usually eat a tiny portion of a muffin / cupcake to just test the texture and taste because of the calories while my daughter rarely eats them. This time however we both were after these fluffy muffins and so this recipe is a keeper for me. :)
 
Ingredients: (Yield 6 muffins)
2 Tbsp milk + 1/2 tsp apple cider vinegar
3/4 cup all purpose flour
2 Tbsp cocoa powder
3/4 tsp baking soda
1/4 tsp baking powder
1/4 tsp salt
1/2 cup semisweet chocolate  morsels
1 tsp vanilla extract
2/3 cup mashed bananas
6 Tbsp sugar
2 - 3 Tbsp melted butter 


Preparation:
1. Mix together milk and vinegar and set aside until it curdles.
2. Line a muffin pan with paper liners or grease them.
3. Preheat the oven to 350 deg F or 180 deg C.

Method:
1. Sift together the flour, cocoa, baking powder, baking soda and salt.
2. Combine the mashed banana, milk - vinegar mixture, vanilla extract, butter and sugar in another bowl.
3. Add the wet mixture to the dry ingredients in the step 1. Mix well until just combined. Stir in the chocolate chips.
4. Divide the batter among the muffin cups, filling only about 3/4th of each cup.
5. Bake for 20 - 25 minutes (I had to bake for about 10 minutes more.) or until a toothpick inserted at the center comes out clean.

Check what other marathoners of BM#23 are cooking, here.

Comments

Saturday, December 15, 2012

Kodubale and Banana - Chocolate Chip Muffins

 
Srivalli chose Karnataka's famous savory kodbale/kodubale for November's Indian Cooking Challenge. Kodbale, nippattu and chakli are the savory trio that I enjoyed as a kid in my mother's kitchen and am still very fond of them. I couldn't therefore miss the opportunity to make  kodubales for this month's ICC. There are several variations to the basic version and Valli chose two - one from my blog and the second one from Lata Narasimhan's blog, that I followed obviously. :) 
 
Ingredients: (Makes 2 dozen)
1 cup rice flour
1/4 cup all purpose flour / maida
1/4 cup wheat flour / atta (or substitute with all purpose flour.)
1/4 cup roasted chickpeas / hurigadale / chutney dal
1/4 cup grated dry coconut (copra)
1 Tbsp ghee
Salt & chili powder to taste
1/4 tsp asafoetida / hing
Oil to fry
 
Method:
* Grind together roasted chickpeas and coconut, finely.
* Roast all purpose flour and wheat flour on low flame until it starts to change the color.
* Now combine all ingredients except oil in a bowl. Add water as needed to form a firm dough. (I used the same cup used to measure dry ingredients and added about 1 cup minus 2 Tbsp water.)
* Heat oil in a kadai.
* Mean while, pinch a small lime sized portion of the dough and roll into a ball. Knead into a log of about 1/4 inch thickness and about 6 inches long. Shape it into a coiled form. Repeat the procedure with the remaining dough.


* Drop a small piece of dough into the oil. If it sizzles and comes to the surface, then the oil is ready for frying. Gently drop the shaped dough coils into the oil and fry flipping in between, until golden brown. Drain them on absorbent towels and once cool, store them in an airtight container.
 
Note:
1. Frying on low medium flame is the key for crunchy kodbales. Hasty frying on high flame will brown the kodbales sooner but will not turn out crunchier. Also at a time, fry only as many kodbales as the frying pan fits. Meanwhile, cover the remaining coils that need to be fried.
2. No offense. They were slightly softer inside even after proper frying. I am just mentioning in case if anyone wants to try this. I think it may be because of the addition of the wheat flour. Usually all purpose flour yields crunchy results in most of the Indian traditional dishes. I wondered about it when I saw the ingredients' list but went ahead as I wanted to follow the recipe exactly. I would substitute it with all purpose flour next time if I give it a try.
 
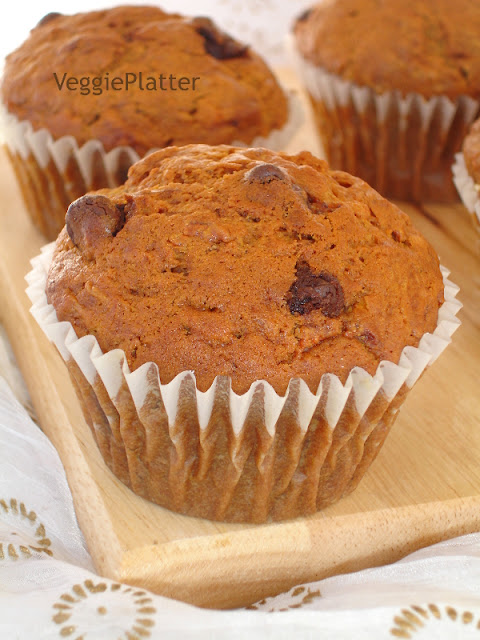
EGGLESS BANANA - CHOCOLATE CHIP MUFFINS:


I have baked these muffins probably zillions of times in my kitchen and I was surprised to notice last week that I haven't posted about them yet. And so here you go with my version of these muffins which seem to be the most mundane ones in the blogosphere. This fits the theme of Magic Mingle #12, "Fruit & Chocolate".
 
Ingredients: (Yields 6)
3/4 cup all purpose flour
1/2 tsp baking powder
1/2 tsp baking soda
1/4 tsp salt
4 - 6 Tbsp semi sweet chocolate morsels
2 bananas
1/4 cup sugar
1/4 cup melted butter

Method:
* Preheat oven to 375 deg F / 190 deg C.
* Combine the flour, baking powder, baking soda and salt in a bowl.
* Mash bananas in another bowl. Add sugar and mix well. Stir in melted butter. Gently stir in the flour mixture and chocolate morsels.
* Grease or line the muffin pan with paper cups. Spoon the batter into cups so that it fills up to 3/4th of each cup.
* Bake until a toothpick inserted at center comes out clean or for about 30 - 35 minutes.


Comments

Wednesday, December 12, 2012

Chivda


I am a sucker for sweets and naturally I was tempted when I saw  the theme "traditional dishes" and the list of sweet choices Valli had provided. However as I mentioned earlier, I didn't want to pack all the calories alone and stuck to savory choices. When I saw that chivda was the only savory option left, I thought of going with a sweet dish for the final post of this week's marathon since I have already posted a basic version of chivda. I changed my plans at the last minute for my daughter.
My 11 year old is opposite to me and likes savory stuff. She doesn't mind the spice levels when she comes across all those chatpati stuff commercially sold though I cannot make her eat even a mild sambhar at home. She goes eating hot stuff huffing and puffing, gulping cold water. When I saw that she liked ghatia very much, I prepared a milder chivda  for her, adding a lot of other yummy stuff and she happily went on munching. 

Ingredients:
2 cups poha / flattened rice flakes (See note below.)
1.5 to 2 cups - thin and thick sev, spicy boondi and roasted chickpeas
1/4 cup peanuts
2 - 3 Tbsp raisins
1 Tbsp fennel seeds / saunf
Salt & chili powder to taste
1/4 tsp turmeric powder
Few curry leaves
Oil


Method:
* Heat oil in a kadai / pan and add peanuts to it. Fry till they turn golden brown, remove them with a slotted spoon and keep them aside.
* Then add poha in small batches (about 1/4 cup) to the same hot oil. In a couple of seconds , the poha comes to the surface, sizzling and also changing it's color from the pale to a brighter white shade. Immediately, remove with a slotted spoon and drain the poha on absorbent towels.
* Heat 1 or 2 tsp of oil in a small saute pan and add raisins, anise seeds, curry leaves and turmeric powder in that order. When raisins start to plump up, turn off the stove. Add the fried poha, peanuts, dalia, tadka, sev, boondi, chili powder & salt to a bowl and mix well. Serve with hot coffee or tea.

Note:
* I used thick poha and so fried it in the same oil that was used to prepare sev. Usually thin poha is used to make chivda. When using thin poha, there is no need to fry it. You can dry roast it in a pan on stovetop or in a microwave/conventional oven or even sundry until crisp. Or you can add a Tbsp of oil more in tadka and fry the poha along with the other stuff. 
* A lot of other yummy stuff can be added to the above chivda like dry coconut pieces, potato sticks, puffed rice etc

Check what other marathoners are cooking, here.

Comments

Tuesday, December 11, 2012

Ghatiya


When I saw ghatiya among the list of traditional recipes that Srivalli provided us to pick from, I was wondering how it was different than the regular sev. Both are prepared using besan flour and I was wondering whether it was a Gujarati name for the basic sev or the besan chakli. I made sure to hop on some blogs with authentic Gujarati recipes to find out. I realised in the process that ghatiya includes savory spices & lime juice, making it taste entirely different than the sev or the besan chakli.
I tried a small quantity yesterday and it was a hit. Even my daughter who doesn't peek in the kitchen when something is being cooked, came smelling and tried them. She liked it so much that she was praising the ghatiya even today before she left for school :)

Ingredients: (Makes about 4 cups)
2 cups chickpea flour / besan
1/2 tsp baking soda
1 Tbsp lemon juice
Salt to taste
1 tsp (or adjust as needed) ground black pepper
1/2 to 1 tsp ground carom seeds / ajwain (I did not use it as no one at my home prefers it.)
2 Tbsp hot oil
Oil for deep frying


Method:
* In a mixing bowl, combine everything except the oil used for deep frying. Add water little by little and form a soft dough. The dough should be softer than roti dough but not runny.
* Heat oil in a deep frying pan or a kadai.
* Fill a chakli press with the dough and press over hot oil in concentric circles. Fry on low flame, flipping in between with a slotted spoon until golden brown on both sides. If rushed, the chaklis don't fry properly and won't be crisp.
* Once done, remove them with a slotted spoon and drain on absorbent towels. Repeat the steps with the remaining dough.
* Once cool, break the fried chakli into small pieces and store them in an airtight container.

Check what other marathoners are cooking, here.

Comments
 

Monday, December 10, 2012

Chakli / Murukku

The second week of BM#23 is here and I am going to post under the theme "Traditional recipes". Srivalli gave an array of Indian traditional recipes to pick from and I am going with chakli on the first day. The posts for the next two weeks here are going to be on the sweeter side and so thought of dividing the calories among family members by preparing some savories this week. No one in my family needs an invitation when there are savories around. :)

"Chakli" needs no introduction in India. Depending upon the flour / flour combination used, the flavor or color of a chakli may vary, nonetheless this crunchy snack tastes delicious. It may go by different names because of the regional differences but the standard accepted term through out the country happens to be "chakli".

I have posted several versions of chakli already here and if interested, click on the links for recipes.
Chaklis
Potato Chakli
Ragi Chakli
Sabudana Chakli
Thentharlu / Thenkhuzal
Vamupodi Kaaralu

Recently when I was going through older Indian cooking challenges, I came across murukku recipe that I wanted to try and thought this was the perfect occasion. BTW, murukku is a Tamil word and janthikalu / chakkilalu is a Telugu word for the same chakli. It is made using rice and urad dal flours. If you are inclined to make your own flours, you are welcome but the store bought, ready made flours work fine too.

Ingredients:
2 cups rice flour
1/2 cup urad dal flour (Skinned black gram flour)
Salt to taste
Chili powder to taste (optional)
1 tsp cumin seeds
1 tsp sesame seeds
2 to 3 Tbsp oil
1/8 tsp asafoetida
3 - 4 cups oil for frying chaklis


Method:
* Heat 2 - 3 Tbsp oil and add the asafoetida. Switch off the stove after 20 - 30 seconds.
* Combine the flours, salt, chili powder, cumin seeds, sesame seeds in a mixing bowl. Pour the hot oil into the flour mixture. Wait for a couple of minutes and rub the oil into the mixture. Add water slowly as needed and form a softer than roti dough.
* In the mean while, heat oil used for frying in a kadai / deep frying pan and bring it to low flame, once it is hot. (The oil doesn't need to smoke. If you drop a teeny tiny dough ball into the hot oil, it should come to surface.) During chakli making process, if the heat is low, increase it a bit.
* Fill a chakli press with the dough. You can press it directly into the kadai or make shapes on the back of a ladle and slowly drop it into the hot oil.
* Fry until golden brown on both sides, on low flame. Remove with a slotted spoon and drain on the absorbent towels. Repeat the steps with the remaining dough.
Cool and store in an airtight container.

Check what other marathoners are cooking, here.

Comments 

Wednesday, December 5, 2012

Eggless Carrot Nut Bread


I had another recipe in mind for today's "Carrot" based post but couldn't resist when I came across this bread, here. I converted this into an eggless one and it turned out really delicious. I was very happy with the result and so this carrot - nut bread makes it appearance here during BM#23.

Ingredients:
1.5 cups flour
2 tsp baking powder
1/2 tsp salt
1/4 tsp ground cinnamon
1/4 cup coarsely chopped nuts (I used walnuts.)
1.5 cups shredded carrot
3/4 cup sugar
1/3 cup melted butter / oil
1/2 cup yogurt
1 Tbsp flax meal

Method:
* Mix flax meal and 3 Tbsp warm water in a bowl and keep aside for about 5 minutes.
* Heat oven to 350 deg F. Grease a loaf pan 9X5X3 inches and keep aside.
* Mix carrots, sugar, butter, yogurt and flax meal solution in a  bowl. Stir in the remaining ingredients. Pour the batter into the loaf pan.
* Bake for 50 -60 minutes or until a toothpick inserted in center comes out clean. Cool, remove the loaf from pan and slice.


Check what other marathoners are cooking, here.

Comments

Tuesday, December 4, 2012

Carrot Raita


My second day "Carrot" themed post for the blogging marathon is going to be this simple, healthy raita that can be done in less than 10 minutes. Raitas generally accompany spicy dishes for their cooling effect but I eat it as a snack as well. I have provided a simple version. For variation, add 1/2 tsp cumin powder or a tadka of mustard seeds and cumin seeds. To make it a mini meal, add cooked quinoa / rice / cracked wheat to the raita.

Ingredients:
1 cup yogurt (I used fatfree, homemade yogurt.)
1/2 cup grated carrot
Salt to taste
1 Tbsp minced cilantro
1 finely minced green chillie

Method:
* Steam carrot until it softens and let cool.
* Beat the yogurt with a fork to get uniform consistency. Add salt, carrot, cilantro and chillie. Mix well and serve.

Check what other marathoners are cooking, here.

Comments 

Monday, December 3, 2012

Savory Carrot Scones


I am back with BM#23, after yet another unintentional blogging break I was on. During the last few weeks, either I was cooking the mundane stuff or the ones that have been already posted and so did not find a reason to update the blog. Even Diwali didn't tempt me as my husband had brought a large box of mithai from the grocery store. I, being the sole consumer of those sweets didn't have any intention of adding extra calories in the name of blogging. I told the same to my sister who mentioned that she kept checking my blog hoping to see me post some sweets and savories during Diwali.  Nothing interesting was happening in my kitchen and hence the break. :)
These days I seem to blog for the sole purpose of participating in Valli's blogging marathon. :) Not complaining though since I could come with at least a dozen posts a month in the process. For the first week of BM#23, I am going to post under the theme carrots and these simple, savory scones inspired from Tamalapaku are going to be my Day 1 post. I made slight changes to the original recipe and they came out decent. A nice accompaniment to your evening cup of tea / coffee.


Ingredients:
1 cup all purpose flour
1/2 cup wheat flour
2 tsp baking powder
Salt to taste
1/2 tsp chilli powder
1 tsp cumin seeds
3/4 cup milk + 2 tsp apple cider vinegar
1 cup grated carrot
2 Tbsp minced cilantro
2 Tbsp melted butter / oil

Method:
* Combine milk and vinegar in a bowl and keep aside.
* Preheat the oven to 400 deg F.
* Sieve together flours and baking powder in a mixing bowl. Add cumin, salt, chili powder, carrot and cilantro.
* Add the milk - vinegar mixture and also butter to the bowl. Don't knead the mixture. Just gently combine the ingredients to form a sticky dough. 
* Line a baking sheet with parchment paper / aluminium foil. Transfer the dough ball to the baking sheet and pat into a disc of about 1/2 - 3/4 inch thick using oiled fingers. Slice the disc into eight wedges.
* Bake for about 20 - 30 minutes or until done. (The original recipe mentioned about 15 minutes baking. I baked for 20 minutes and it was underdone. I baked for about 10 minutes more at 375 deg F.)
* Remove them after they are done. Brush with melted butter and serve warm.


Check what other marathoners are cooking here.

Comments 

Friday, October 26, 2012

Guilt free Snacks ~ Oven Roasted Chickpeas / Garbanzo Beans


Baked garbanzo beans is going to be my last post of the BM#21 under "Copy Cat" theme. This perfectly crunchy, guilt free snack comes from Vardhini of Cook's Joy. I had noted it down in one of the previous marathons and this recipe did yield very good results. I thoroughly enjoyed this non greasy, healthy snack.

Ingredients:
1.5 cups chickpeas /garbanzo beans / chana
Salt and chili powder to taste
Cumin powder and/or any spice powder preferred as per taste
Oil to spray or a Tbsp of oil

Method:
* Soak garbanzo beans overnight and pressure cook them for about 3 whistles, without turning them mushy. Drain and cool the beans.
Skip this step if you are using canned beans. Rinse the canned beans before using.


* Preheat the oven to 400 deg F. Line a baking sheet with aluminium foil and keep aside.
* Add salt, chili powder, cumin powder / any other spice powder preferred to the beans and mix well. If you are not spraying the oil, you can add a Tbsp of oil to the beans mixture and mix well.


* Spread the beans on the prepared baking sheet. Spray it with oil.
* Place the sheet in the preheated oven and bake for 40 - 50 minutes or until they turn crunchy. Actually I baked for an hour and left the sheet in the turned off oven for 10 minutes more.

 
The original recipe mentioned that the beans would turn rock hard if baked longer than needed and so, pay attention to the beans at the final stages of baking.
 
Check what other marathoners are cooking, here.


Thursday, October 25, 2012

Vegetable - Dal Khichdi


Recipe Source: Vaishali Sabnani

Usually whenever I came across a recipe that piques my interest, I keep filing them in the memory folders of my brain or computer. However I hardly try them as I keep mostly going to the same, traditional recipes that have been in our families for generations. Because of the familiarity and the experience, those seem pretty easy and quick to put together, how elaborate the procedure may be. I think this must be a pretty familiar scenario to many of us here.

My recipe repertoire again increased as expected due to BM#21. This time however I tried a couple of recipes without procrastinating. One was this yummy khichdi, from the Saurasthra region of Gujarat, posted by Vaishali. It is a nourishing and comforting one pot meal full of goodness with nutritive dals and veggies. Besides it is very delicious and healthy, easy to put together and needs no side dishes if prepared according to one's preferred spice levels. I used just oil for tadka and didn't use any ghee while serving and so this was not greasy at all.

Ingredients:
1 cup rice (I used Extra long grain as I love mushy khichdis.)
1/2 cup yellow moong dal
1 Tbsp each - chana dal (Bengal gram) & toor dal (pigeon peas)
1 cup chopped vegetables (I used carrot, potato, beans and peas.)
1 tomato chopped
1 cup chopped spinach
Salt to taste
1 tsp chili powder or according to taste
1/4 tsp turmeric powder
For tadka:
1 Tbsp oil, 1 tsp cumin seeds, 4 cloves, 2 red chillies, 2 one inch piece cinnamon, 1 bay leaf and a pinch of asafoetida

Method:
* Soak rice and dals in water for about 30 minutes. Drain and keep aside.
* In the mean while, prep the veggies that you are going to use.
* Heat the oil in a pan or directly in a pressure cooker and add the tadka ingredients. When cumin starts to brown, add the veggies and saute for a couple of minutes. Add the rice - dal mixture and saute for a couple of minutes more.
* Next add the chili powder and about 4 cups of water to the mixture and pressure cook for 2 whistles.
* When the valve pressure is gone, add salt and mix well.
* Serve warm with a pickle and ghee if desired.

Note:
1. I actually don't add salt when dal is being cooked. It hinders the cooking process of dals usually and so I always add it at the end. I added 3 cups of water while pressure cooking the rice - dal. At the end, I added salt and 2 more cups of water to reach the desired consistency.
2. Also because of where we come from, this was not spicy for us. :) I had increased the spice levels according to our taste though above measurements is good for those who prefer moderate heat, speaking in terms of Indian cuisine.
3. The original recipe recommends the addition of raw spinach and tomato at the end of cooking. I had however added them along the other vegetables to cook. 

Check what other marathoners of BM#21 are cooking here.

Comments


Wednesday, October 24, 2012

Baked Gulab Jamun


Recipe Source: Priya Suresh

The final week of this month's blogging marathon starts from today and I chose the "Copy Cat " theme. I am supposed to cook from other marathoners' posts and it was quite challenging considering the fact that there are many mind boggling recipes in the marathon collection. I had one particular recipe in mind from dear Priya's blog when I visited her space yesterday. I totally forgot about that when I came across a baked version of gulab jamuns. I had missed this recipe due to my vacation and when I saw "zero oil" in the title, I must say that I was intrigued and interested at the same time.

I was even skeptical about the results of this experiment but I did try them today. For a baked version, these are pretty good and are almost close to the frying version. I did not get the regular brown color though. I think we can bake them at 300 deg F or a little lower temperature and have to keep constantly moving the jamuns all around for uniform baking. I noticed that they kept browning within 2 - 3 minutes on each side. If they are not moved, it would end up looking like the jamuns are burnt and so keep turning them.

Soaking jamuns in the sugar syrup for a few hours is very crucial in this recipe. When the jamuns come out baked, they are a little on the crispy side. You end up disappointed if you serve them immediately with sugar syrup. I had prepared them around 11 am and after a couple of hours of soaking, the texture of these baked jamuns was more like rosgullas. By evening, they tasted exactly like the fried jamuns except the color which didn't bother me at all.
We really enjoyed them and thanks Priya for this wonderful recipe and the delectable jamuns.

Ingredients: (Makes 12 jamuns)
1 ready made jamun mix (100 grams)
1 cup sugar
1/2 tsp powdered cardamom
Slivered almonds / pistachio for garnishing

Preparing sugar syrup:
Add a cup of water to the sugar and bring it to a simmer. When sugar completely dissolves, add cardamom powder. If preferred, a pinch of orange food color may also be added at this point. Simmer 3 - 4 minutes more and turn off the stove.

Preparing the Jamun dough:
Add a few Tbsp of water and prepare a firm dough according to the package directions. Let it rest for 10 minutes. Then divide the dough into 12 portions and roll each of them into a ball with your hands.

Baking the Jamuns:
Preheat the oven to 300 deg F. Place the jamun dough balls on a greased or foil covered baking sheet and bake for 15 - 20 minutes, constantly turning them around for uniform baking.
Add them to the sugar syrup and let it soak for at least a couple of hours before serving. The longer soaking results in softer jamuns.

Check what other marathoners are cooking during BM#21.

Comments


Friday, October 19, 2012

Moong Tikkis


My final post during third week of BM#21 under "Cooking with Moong" theme is these nutritious, and yummy sprout tikkis. These are one of the sprouts tikkis made regularly at my home. They can be served as an evening snack or they can go even in ragda patties. Depending upon the mood, one can go with garam masala, cumin / coriander powders, ginger / garlic / green chili paste or whatever spice powders or flavors preferred, while making the patties. This time I kept simple, added chili powder and made them real hot and served them with sweet chutney.


Ingredients: (Yield 10 patties)
1 cup moong beans (Green colored) or moong sprouts (I used sprouts.)
1 cup cooked and mashed potatoes
1/2 cup bread crumbs or as needed for binding
1/8 tsp turmeric powder
Salt and chili powder to taste
Oil to shallow fry the tikkis

How I made them:


* Pressure cook moong beans/sprouts and potato chunks together for 2 whistles.
* Drain and let the moong cool a bit. Mash the potatoes.
* Mix well the moong, potatoes, bread crumbs, salt and chili powder.
* Divide the mixture into 10 portions and shape them into patties.
* Place them on a shallow pan or a tawa and shallow fry them until golden brown on both sides.
* Remove them and serve hot with spicy or sweet chutney.

Check what other marathoners are cooking during BM#21.

Comments 

Thursday, October 18, 2012

Moongdal - Methi Rottis


Rottis ~ - the quintessential breakfast item from Karnataka.

I was planning to prepare something else for today's post and had cooked about a cup of moongdal. I added rice flour to it as per the requirement of the recipe and proceeded with a small portion of it only to realize that the recipe I had tried zillions of time earlier with no problems was turning into a mess this time. That too when I very badly needed it for the BM#21. :(
I did not feel like trashing the dough and after giving it a considerable thought, ended up preparing these delicious rottis. I added methi leaves besides the regular stuff that goes into a rotti preparation. These can be served as breakfast / a light meal or as a snack. They are usually spicy enough that an accompaniment is not needed but some serve it with chutney powder / jaggery powder.

Ingredients: (Yield 8 medium sized rottis)
1.5 cup cooked moongal
1.5 cup rice flour
1 cup finely chopped methi leaves (fenugreek greens)
2 onions, finely chopped
1/2 cup shredded, fresh coconut
Finely chopped green chillies as needed
Salt to taste
Oil to make the rottis

Dough preparation:
* Mash well the cooked moongdal in a mixing bowl, with the back of a ladle or just puree it in a food processor.
* Add all the other ingredients to the mashed dal except the oil and make a firm dough, adding water as needed.


Making rottis:
Pinch about a big orange sized portion from the prepared dough and shape into a ball. Pour about a tsp of oil at the center of a griddle and place the dough ball on it. Pat it into a thin, flat circle and pour a tsp of oil around the edges and cover with a lid.

Now turn on the stove and let it cook on a low - medium flame. When it appears cooked on the bottom side and brown spots appear, flip it. Again add a tsp of oil around the edges if needed. Cover it again and cook till the other side is done too. Repeat the procedure with the remaining dough.

Note:
1. The dough can be prepared a day in advance and refrigerated.
2. Be sure to turn off the stove and cool the griddle slightly so that it is safe to pat the next dough ball on it. You can use 2 griddles to quicken the process but still have to let the tawa / griddle to cool after making a rotti. Actually I give the cast iron pan a quick wash with cold water after preparing a rotti so that I can go ahead immediately just after wiping it dry with a paper napkin.
3. I think moongdal flour can be substituted for the cooked moongdal in this recipe.
4. Finely chopped amaranth leaves / spinach can replace the methi leaves. Shredded carrot can also be added.

Check what other marathoners are cooking here.

Comments