HOME        |        ABOUT        |        COPYRIGHT        |        CONTACT        |         RECIPE INDEX        |         INDIAN THAALIS        |         MILLET RECIPES        |        EVENTS' ROUNDUP        

Showing posts with label Bengal Gram. Show all posts

Sunday, July 11, 2021

A - Z Idli Series ~ N for Navadhanya Idli


I had planned another traditional idli recipe from Karnataka for today but could not source an ingredient needed for it and had to discard the idea. I then went ahead and as an experiment, prepared these idlis using navadhanya. To be honest, the idea would never have occurred to me if not for this series and these protein rich idlis turned out soft and fluffy. Navadhanya refers to the nine grains used in Hindu religious rituals - Bengal gram, black gram, black sesame seeds, chickpeas, green gram, horse gram, rice, wheat, and white colored beans (I used black eyed peas for it). 

These idlis are simple to make though advanced planning is needed as the ingredients need to be soaked, ground and fermented before steaming the batter in the idli moulds. Though the process sounds tedious, the steps are quite simple and doesn't need much of one's energy. The idlis can be made in advance and can be refrigerated or even frozen to have a healthy breakfast ready in the morning rush hours with a simple step of reheating them in a microwave.

Navadhanya idli turned out fluffy with a subtle flavor to them, because of the wheat used in the recipe. These navdhanya idlis served with chutney and / or sambhar  make a filling breakfast or dinner option as they are super healthy, nutritious and vegan. Ours were served with peanut chutney and erra karam, Andhra style onion chutney.
I used navadhanya as I mentioned above but some ingredients may be substituted or omitted from the recipe as per preference. Brown rice can also be replaced with idli rice. Wheat can be completely omitted from the recipe as well if it's flavor in the idli is not to your taste. Whole black gram can be replaced with skinned variety as it needs only a couple of hours of soaking and also doesn't need thorough rinsing to get rid off the skins. Omitting one or two beans that are not on hand works too.

Some of the beans used here like chickpeas, black gram and horse gram need to be soaked overnight or for at least 8 hours. It is hard to sort out and soak the ingredients individually according to their soaking periods and therefore I soaked rice, wheat, Bengal gram, green gram, black eyed peas, chickpeas and horse gram in water in one container and black gram in another bowl. The black gram needs some thorough rinsing to get rid off the skins as much as possible and so they were soaked separately.

I soaked the ingredients overnight and ground the batter in the morning. The batter fermented quickly, in about 7 hours which never happens with my regular idli batter. It maybe partly because of the quantity of the beans used in the recipe and partly because of the weather the day I made these idlis, at 80 deg F / 27 deg C. I would recommend to grind the batter in the morning to keep an eye on the fermentation process. I am not sure but guessing that too much fermentation may cause the batter to start smelling foul because of the beans used here.

Ingredients: (Yield - 28 idlis)
1 cup idli rice 
1/2 cup brown rice
1/4 cup wheat kernels
1/2 cup + a handful of black gram *
6 tbsp. each - Bengal gram, green gram, black eyed peas, chickpeas, and horse gram **
Toasted black sesame seeds as needed
Salt to taste (I used about 2.5 tsp. salt.)
Water to grind the ingredients
Notes:
* I used whole black gram but it can be substituted with skinned black gram which takes only about 2 hours of soaking. 
** Some of the ingredients used here like black gram, chickpeas, horse gram need overnight or about 8 hours of soaking.

Directions:
1. Add idli rice, brown rice, wheat, Bengal gram, green gram, black eyed peas, chickpeas and horse gram to a container. Rinse them with water twice and drain. Add enough water and soak them overnight or for at least 8 - 10 hours.  
* Add black gram to another bowl and rinse. Drain and add water to the bowl and soak it also overnight or for at least 8 hours. (Or skinned black gram can be substituted which needs soaking for only a couple of hours.)
After the soaking, drain the water from the rice - lentil container and rinse again twice with water and keep aside. However the black gram needs some thorough rinsing to get rid off the skins as much as possible. I used whole black gram since it is used in navdhanya but skinned black gram can be substituted to skip the rinsing part.
2. Add all the soaked and drained ingredients to a grinder. Grind them adding salt and enough water into a smooth and thick batter. If using a mixer then grind them in 2 batches. (The salt can be added just before making idlis if living in a warm climate. I add it while grinding since I live in a cold climate and the batter takes longer to ferment.)
* Transfer the batter to a container large enough to allow the batter to raise during fermentation. Cover the container and allow it to ferment for about 7 - 8 hours. (It took me about 7 hours to ferment the batter when the temperature was about 80 deg F / 27 deg C and it may take longer in  cold climate. Leaving the batter out after fermentation may turn smelly.)
3. The fermented batter looks like above in the picture 3. Refrigerate the batter if not using immediately and use within a couple of days. Leave the refrigerated batter on the counter for a couple of hours before using.
* Heat about 2 cups of water in a idli cooker base or a idli cooker or a steamer on medium heat. 
4. Grease the idli moulds with ghee / oil and sprinkle black sesame seeds over them.
5. Gently stir the batter a couple of times with a ladle. Pour the batter into the idli moulds carefully without spilling.
6. Place the idli stand in the prepared cooker / steamer and close the lid. Don't use the valve for the lid if using a pressure cooker.
Steam the idlis on low heat setting for about 20 - 25 minutes or until done. (The idlis should not stick when touched with moist fingers.) Check the water level in the steamer base and add extra if needed.
7. Wait for about 10 minutes and then remove the idlis from idli stand. Remove the idlis by running a spoon around the edges.

Serving the idlis: 
* Drizzle melted ghee over the idlis and serve them with a chutney, and sambhar if preferred. Mine were served with peanut chutney and erra karam / Andhra style onion chutney.

What to do with leftover idlis:
1. Refrigerate the left over idlis and use in a day or two. 
2. Or they can be cooled down immediately after preparation and frozen to use later. Nuke them in a microwave, covered and enjoy hot, piping idlis when needed.

Wednesday, March 18, 2020

Bihari Kaddu Aur Chane Dal / Split Chickpeas - Bottle Gourd Dal


I had prepared this dal a while ago as part of a Bihari meal. This is a very common preparation in the state of Bihar and other surrounding areas. It is cooked using split chickpeas / chana dal and bottle gourd. Yes, you read it right. It is prepared with bottle gourd and not pumpkin. Surprisingly, Biharis call their bottle gourds kaddu while the other Hindi speaking areas call pumpkin as kaddu and bottle gourd as lauki. It is one of those hearty, every day kind dals prepared in Indian kitchens. It is a quick and easy dal with simple flavors.

Ingredients:
3/4 cup Bengal gram / Chana dal / Split Chickpeas
1 cup peeled and cubed bottle gourd
1/8 tsp. turmeric powder
2 bay leaves
1 tbsp. oil
1 tsp. cumin seeds
2 - 3 red chillies
Salt to taste
1 tsp. garam masala

Method:
* Soak split chickpeas / chana dal for a couple of hours and drain. Pressure cook split chickpeas / chana dal adding turmeric, a bay leaf and 1.5 cups of water until soft. Don't make it thinner since the dal needs to be on the thicker side. When the valve presssure is gone, remove the lid and mash the dal well or pulse in a food processor. (If the dal was not soaked in advance, pressure cook it longer.)
* Cook the bottle gourd cubes separately with enough water in a microwave.
* Heat oil in a pan and add cumin seeds, bay leaf and red chillies.  Add the cooked dal and bottle gourd cubes, salt and garam masala. Simmer for a few minutes and turn off the stove.
* Serve warm with rotis / rice.

Friday, September 27, 2019

Kalmi Vada


Vadas can be loosely translated as eggless fritters from the Indian subcontinent. They are quite popular in the region as appetizers,  breakfast food, street foods or a tasty snack to sneak in along with a cuppa on a cold or rainy day. Some are even a part of a festive platter. The deep fried vadas come in numerous varieties depending upon the grain / legume / flour base used to prepare them. Some varieties may include greens or vegetables and a few even come stuffed with a tasty and spicy vegetable filling. Whatever shape or size they come in, vadas are usually on the spicier side and may be served as it is or with some chutney / sauce on the side.

Given that vadas are an integral part of Indian cuisine, it is no surprise that a vada recipe appears in this final week of blogging marathon that is featuring regional snacks across India. We are travelling to Rajasthan, a state in the western part of India for today's recipe called kalmi vada. The recipe has a close resemblance to south Indian style masala vadas as both are based on chana dal aka Bengal gram or split chickpeas. Masala vadas have green chillies, cilantro and onions in the vada batter whereas these kalmi vadas also have some extra flavorful spices added to it. 

Unlike the other vada recipes, these vadas are fried twice. They are fried partially for the first time, removed and cut into pieces and fried again. This keeps them crispier for longer time compared to masala vadas, a fact I, who happens to be a fan of masala vadas loved. They are also used in the Delhi's famous kalmi vada chaat. This is one of the two recipes of this week's marathon I got to try for the first time and genuinely loved them. The other one is Ooty varkey which is coming later. We ate a few vadas which were utterly crispy and delicious and I made a kalmi vada chaat with the rest. This way, I could trick my son (who normally doesn't favor fried snacks) to taste the vadas and also could tick off one recipe in the third week of this BM without needing to plan / fry one more recipe. These kalmi vadas taste so good that they disappear fast. It is hard to have any leftovers but if you do in case, then use them in a chaat recipe to enjoy them in a new form. 

I came across two online versions. The first one is close to the south Indian masala vadas with the use of green chillies and cilantro. I got the second recipe from a Youtube video of a street hawker in Delhi selling the kalmi vada chaat.

Ingredients:
1 cup Bengal gram / chana dal
1 tsp. cumin seeds
1 tsp. coriander seeds
Salt to taste
1 inch piece ginger
2 green chillies
A handful of minced cilantro 
Oil to fry

Or

1 cup Bengal gram / chana dal
or
1/2 cup chana dal + 1/2 cup yellow moong dal 
1 tsp. cumin seeds
1 tsp. coriander seeds
1/4 tsp. peppercorns
Few cloves
Salt to taste
Chili powder to taste
Oil to fry

Directions:
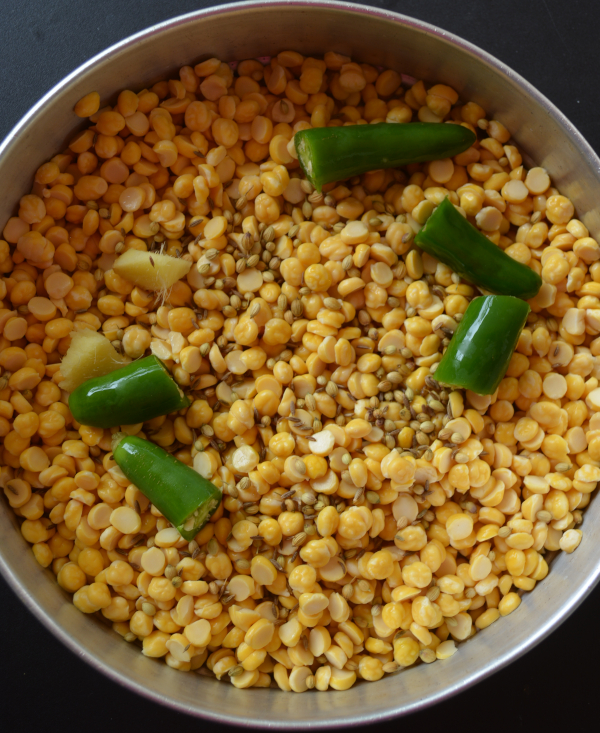
* Soak Bengal gram / chana dal for about 2 - 3 hours in water and drain. Keep aide a handful of soaked chana dal. Add all ingredients except cilantro and the oil to a food processor or blender. (If using the second set of ingredients grind everything together except oil and proceed with the recipe.)
* Grind the ingredients to a coarse thick batter, adding no water. Add a tbsp. of water if needed.
* Transfer the ground batter, the reserved chana dal and minced cilantro to a bowl and gently mix.
* Heat oil in a medium sized wok / frying pan on medium heat. Drop a pinch of batter into the hot oil. If it immediately swims to the surface then the oil is hot enough to fry. If it sinks to the bottom then oil needs some more heating. Don't bring the oil to a smoking point.
* Pinch a big lemon sized portion from the ground mixture and place it on your left hand. Pat it into a thick oblong or round disc using right hand fingers. (It is usually easily to shape them. If one finds it hard to shape them for any reason, add a tbsp. or two of chickpea flour to the batter and proceed.)
* Gently transfer the disc from your left hand to your right hand fingers and carefully drop it into the hot oil from the sides of the frying pan. Prepare discs this way one by one and drop as many discs as the pan can accommodate.  

* Fry them until they turn lightly golden brown on both sides on low medium heat. There is no need to let them completely cook since they are going to be fried again later. Remove them with a slotted spoon / ladle, draining as much oil as possible. Drain them on a plate covered with absorbent paper towel.
* Repeat the process with the remaining dough to make vadas and turn off the stove.

* Let them sit for a while to cool down. Cut each disc into two or three pieces. 

* Heat the oil again on medium flame to deep fry the vadas. Keep the cut pieces of partially fried vadas ready.

* Deep fry vadas in batches on low medium heat, flipping intermittently, until they turn golden brown both sides. They should turn crisp not hard.
* Remove them with a slotted spoon and drain them on absorbent paper towel.

* Serve them hot with green chutney or a sauce. Use them in a kalmi vada chaat recipe if you have any left overs.

Jowar Kothimbir Vadi


Check out the Blogging Marathon page for the other Blogging Marathoners doing BM#104.
You are invited to the Inlinkz link party!
Click here to enter


Comments