HOME        |        ABOUT        |        COPYRIGHT        |        CONTACT        |         RECIPE INDEX        |         INDIAN THAALIS        |         MILLET RECIPES        |        EVENTS' ROUNDUP        

Showing posts with label Rajasthan Recipes. Show all posts

Wednesday, September 30, 2020

Dal Baati Churma Platter


After more than a year of mulling over and planning the recipes, and cooking, this month seemed to have come and gone in a flash. My final platter of this mega marathon comes from the desert state of India, Rajasthan known for it's culinary vibrancy in spite of it 's dismal geographical conditions. The arid conditions limit the availability of fresh produce all year round which most of us Indians take for granted. The locals had to improvise and come up with recipes using either no vegetables or dried vegetables and the available pantry staples. One would be wrong to assume that their recipe repertoire is as bleak as the surroundings or their meager supplies. 


The Rajasthani thaalis I have eaten in India have been enjoyable experiences. I can still reminisce over the abundant variety of  delicacies served and the hospitality that makes you feel at home instead of eating at a restaurant. I could not cook a Rajasthani meal as planned but instead I made this mini platter around dal baati churma which has also been on my to-do list. 
Dal baati churma needs no introduction if one is even slightly familiar with Rajasthani cuisine. It is the most iconic dish of the region and is an integral part of any celebratory meal. The dish was created again keeping in mind of the harsh geographical conditions but the combo is a delectable one where sweet and savory dishes are enjoyed together. The cuisine has dishes that can be stored for longer and batis and churma fall under that category. The dal served along with batis is panchratan dal or panchmel dal which uses a combination of five pulses. One can still try the spicy dal and enjoy even if not using all the five varieties of pulses. 

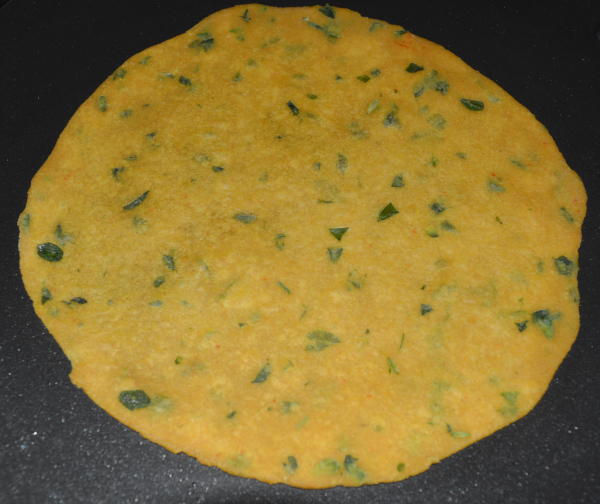
Baatis are wheat flour based hard, unleavened rolls which were originally war time food. I read that the Mewar soldiers would bury  chunks of dough under thin layers of sand to bake under the sun. They would return from the battlefield and dig out the perfectly baked baatis and eat it slathering with ghee and yogurt made from goat or camel milk. Baatis are traditionally baked over coal or in clay ovens but they can be baked in the oven which is lot easier. The baked baatis are immersed in ghee and served. Baatis can be made plain or stuffed with variations and is made with different flours as well. Baatis are made in other regions of India too with slight variations.

Churma is believed to be an accidental invention when a Mewar cook accidentally poured sugarcane juice over baatis making them sweeter and softer, which further evolved into the present day version churma. The Churma is the sweet counter part for the savory dal baati and was traditionally made by grinding the baatis / left over rotis with ghee and sugar / jaggery and optionally adding dry fruits and nuts. They can be rolled into laddus, binding them with ghee. 

This combo, a traditional delicacy filled with high calories is valued for it's high nutritional value and the longer shelf life. The combo is loaded with ghee but I did not find the flavor overwhelming and indeed enjoyed the combo. My platter contains the following dishes.

Panchmel Dal - A gravy amde with five varieties of pulses / legumes. (Recipe here.)
Baati - Oven baked wheat and semolina rolls 
Churma - A sweet dish made with wheat, semolins, sugar, ghee and nuts 
Salad - I had onions, cucumbers, tomatoes. Also lemon slices 
Papad
Ghee - To serve over baati and dal
Lehsun ki Chutney - Spicy Garlic chutney
Mirchi ke Tipore - Rajasthani Green chili pickle
Papad ki Kadhi - A chickpea flour based gravy with papad
Boondi Raita - A yogurt sauce with boondi. (Recipe here)

I have posted the following recipes so far in the series.


Week 3 - Regional Thaalis

Week 4 - Indian Flatbreads

Week 5 - Platters

Friday, June 26, 2020

Bajre Ki Khichdi ~ Indian, Spicy Pearl Millet Porridge

Bajre ki khichdi - A spicy pearl millet porridge is a winter comfort food from the Indian states of Rajasthan and Haryana. It is an easy, filling and nutritious khichdi. It is prepared with pearl millet, moong dal and with or without adding rice and is quite delicious on it's own. In fact the ones who are not used to eating bajra wouldn't even guess the presence of bajra in it. It reminds the spicy pongal to a south Indian mind and I immensely enjoy this version of bajre ki khichdi. The creamy khichdi is tasty by itself that it doesn't eat any side dishes to go with it but one can always serve it along with some yogurt / kadhi. I served it along with ginger - tamarind chutney which proved to be an apt combo.

This khichdi is prepared with whole pearl millet grains that are soaked overnight, drained and ground coarsely. Or if possible, one can even coarsely grind the grains without soaking and use it in the recipe. I had store bought coarsely ground pearl millet and so used it avoiding the hassle. I cooked the khichdi in a pressure cooker for a quick meal but it can be cooked in a pot over stove top with frequent stirring, adding water as needed in between. Pearl millet and moong dal are cooked together with the addition of a flavorful and spicy tadka / seasoning of ghee toasted cumin seeds, ginger and green chillies. One can even replace the yellow moong with the green gram or throw in some vegetables to make it more wholesome. 
Ingredients: (Yield - 3 servings)
1/2 cup cracked pearl millet / bajra rava / sajja rava
1/4 cup yellow moong dal
1/8 tsp. ground turmeric
2 tbsp. ghee
1 tsp. cumin seeds
1 tsp. grated ginger
1 spicy variety green chilli, chopped
A pinch of asafoetida powder

Directions:
* Rinse and soak cracked pearl millet bajra for an hour and drain.(This step is optional but I do it anyway). Rinse the millet again one or two times and drain.

* Rinse moong dal as well and drain.

* Cook drained millet and moong dal adding 2 cups of water directly in a small sized pressure cooker, for 3 or 4 whistles.

* When the valve pressure is gone, remove the cooker lid. Add salt to the cooked mixture and mix well. Next add about 1.5 cups of water, stir and bring the mixture to a boil and turn off the stove.
* Heat ghee in a small pan and add cumin seeds. When it starts brown, add ginger and green chili. Saute until ginger starts to turn golden brown and add asafoetida. 

* Remove and add it to the khichdi and mix well.
 
* Serve warm with yogurt if preferred.

Comments

Friday, September 13, 2019

Methi Khakhra

These 'not so perfectly shaped' khakhras hands down win 'the most time taking recipe' among the lot that I has ever tried cooking in my kitchen. Maybe because it was a regional preparation that I did not have any first hand reference to, I don't know. In the time I cooked these, I could have walked, to my local "Patel brothers' store, bought varieties of khakhra and came back home, twice. Even though the recipe tested my patience and time, the silver lining had been that the khakhras were thin and crisp. I think it is hard for beginners to replicate the machine made, commercially sold khakhras that come with a uniform hue through out.

Khakhras are thin, crisp crackers that are made with wheat flour, that are eaten along with tea in the mornings or as a snack both in Gujarat and Rajasthan. Khakhras are sold / made both in plain and flavorful versions like methi/fenugreek green, garlic, mint, and other innovative versions. The modern versions are made with other flours too. They were traditionally made with left over rotis. Or if starting from scratch, the dough prepared is the same as roti dough base, plain or flavors added and they are rolled super thin. They are lightly toasted once, allowed to cool down and again toasted until they turn crisp. It was mentioned in the recipe that I followed that all the lightly toasted rotis would be neatly stacked over one another on the tawa, pressing down applying pressure on the top one while the bottom ones gets crisp. The bottom one will get removed once it turns crisp and the process continues until all are turned into crisp khakhras. I don't think people nowadays have the patience to make these when they are easily available commercially. 

The concept of 'rotis to khakhras' has always been intriguing to me as a non-local and I have always wondered whether the commercially sold version can be replicated at home. If it can be then I marvel at the skilled expertise of those who can do so. We always keep stock of varieties of khakhras bought from store and so until now I never thought of going through the hassle of making them at home since they are easily accessible. While I was planning non fried and guilt-free Gujarati snacks for this week, I thought of giving them a try. The methi khakhras I tried were crispy and kinda tasted plain though they were fenugreek flavored. I know this was my first and last attempt at making khakhras but retrospectively the experience was not bad but it was time consuming and one needs to be in front of the stove constantly. Some of the tips I gathered along the way.

1. Roll the rotis very very thin. I could have easily rolled mine some more thinner but didn't realize at that time but my khakhras were thin anyway.
2. Cut the rolled out dough discs into perfect circles using a sharp rimmed plate. Everyone cannot roll uniformly sized, perfect circles. Mine looked fairly fine shaped when they were rotis but once they were toasted to khakhras, I could see the imperfect edges.
3. The locals use a khakhra press, a wooden disc with a handle to press the khakhras. In lieu of it, a potato masher / rolled kitchen towel works fine. I tried my athirasam / arisela press and after a while, it started to hurt holding the press in the same position. I used a rolled paper towel instead since I didn't want to stain my kitchen towel.
4. Khakhras are toasted on low flame. My first one took about 40 minutes to cook that way and there was not a single brown spot. And then I figured it out that khakhras can be made interchanging the heat setting from low to medium and vice versa, as required. I browned my last khakra at the center on purpose.
5. Use a tawa / low rimmed pan that is slightly concave which gives the khakhras their distinct shape. There is no need to worry if one doesn't own that kind of pan. Also place a pot or something on the khakhras when done to retain the depression at the center. (I did not do it. This is a tip from blogger friend, Vaishali which I noticed after I had made these.)
Recipe source: Here
Ingredients: (Yield - 6 khakra)
1/4 cup washed and roughly chopped fenugreek greens / methi
1 cup wheat flour / chapati atta + extra for dusting
1/4 tsp. turmeric powder
Salt to taste
1 tsp. chili powder or green chili paste (adjust to taste)
2 tbsp. oil 
1 tsp. melted ghee / oil for greasing

Directions:
* Add fenugreek greens, flour, salt, turmeric powder, chili powder / green chili paste and 2 tbsp. oil to a mixing bowl.
* Mix the ingredients well with hand and add water in slow increments and make a soft, pliable dough like chapati / roti dough.
* Allow the batter to rest for about 30 minutes. Add about 1/2 tsp. oil and knead the dough for a minute until smooth. Divide the dough into 6 to 8 equal sized balls.
* Flatten a ball while keeping the other balls covered.
* Roll each ball into a circle, as thin as possible. (I easily could have rolled them even thinner as the recipe needed but somehow I did not.) Use flour if needed for dusting. 
* Roll out all the balls into circles and keep them aside. Mine were not sticking to each other and so I piled them. One can always spread them individually on a wide plate to avoid sticking. 
* Heat lightly a tawa or a lightly concave pan. Don't make it too hot. Place a rolled out disc on it.
* Our purpose is here not to make a roti and so, when it starts to dry and just bubbles start to from, flip it.
* Cook the other side as well until bubbles starts to form. There is no need to cook until you see the spots. 
This is how we need it, lightly toasted without any spots. Finish toasting all the discs this way. This step doesn't take much time.
* Grease on both sides of the prepared rotis, with oil / ghee very lightly. Just very lightly. Let them cool.
* Now comes the part which demands some patience and time. Turning the rotis into crisp khakras. Start from a low flame and keep interchanging the heat between low and a little more higher setting as you keep cooking. Our goal here is not let the bubbles form and turn the soft roti real crisp. Place a partially cooked roti on the warm tawa and when ever you notice bubbles keep pressing them with a khakra press, kitchen towel or a potato masher, whatever works for you.
* Start pressing along the edges first and then keep going to center of the roti. Keep pressing down any bubble that starts to form.
* Flip and keep doing the same step as above.
* (In the middle of it, I realized a paper towel works best.) Pay attention to the heat and keep pressing until it turns crisp. (I took more than 30 minutes for the first one since I did it on the lowest flame possible on my gas stove, through out the process. When I got a hang of it, I realized I could increase the heat and can keep adjusting as needed. I made my first five khakhras patiently without a brown spot.)
* Repeat the process with the remaining rotis. Store them in an airtight container once they cool down.
* Serve them with tea and pickle / methia masala.


Check out the Blogging Marathon page for the other Blogging Marathoners doing BM#104.
You are invited to the Inlinkz link party!
Click here to enter

Comments

Monday, April 15, 2019

A - Z Indian Biryani / Pulao / Khichdi Series ~ M for Motiwale Pulao / Moti Pulao

The most common basic versions of Indian pulaos have to be a plain nuts' based pulao or a ghee rice or even a jeera rice, that pair well with a spicy gravy. My pulao - biryani exploration for this marathon showed me that there are many regional variations of the same with few extra touches that make them unique. Like the Basanthi Pulao from the Bengal region and the Mewa Pulao from Rajasthan with a dose of sweetness. The Kashimiri version with fresh fruits thrown in that sets it apart from being a plain, bland pulao. Today's version of moti or motiyonwale pulao that comes from the state of Rajasthan is one such dish with a special touch. It is bland on it's own and so be sure to serve it with a spicy side dish and a raita. Mine was served with a spicy gravy which is not pictured here.

The addition of fried balls made with a combination of grated paneer and ground cashews and adorned with edible silver foil aka 'chandi ka warq' lend a richness to this pulao and seems to fit a royal kitchen. Moti, pronounced as mow-thi (as in thin) means 'pearl' and the name of the dish must be alluding to those gilttery silver warq balls that look like shiny pearls. Make sure to make the balls tiny if using silver foil to replicate the pearls. 

Silver warq or varak is edible and adding silver and even sometimes gold foils to sweets, dry fruits, supari and other stuff is common in the Indian subcontinent. The fragile foil is flavorless and just added for the richness it imparts to the appearance of the sweets. The thinner version foil tends to stick to skin when handled directly. I let go the silver warq from the recipe but if using, make sure that you are using a vegetarian version, that is if you are practicing vegetarianism.

Warq is made by placing and pounding the pure metal dust between parchment sheets until it is molded into a foil, which takes about two hours. The sheets are typically packed with paper for support, which is peeled away before use. The traditional method involves manually pounding the particles between layers of ox, goat or cattle hide because it is easier to separate the silver leaf from animal tissue than to separate it from paper. Hyderabad was once famous for this dying art. The recent common process uses ox guts where the hammering leads to the intestines become part of the silver foil. The concerns raised by vegetarians have led to production using modern technologies where beating over sheets of black special treated paper or polyester sheets coated with food grade calcium powder takes  instead of hide / guts. Also there are safety issues since sometimes to make quick money, aluminium is used instead of silver which is toxic. The government had banned the usage of guts and hides in 2016 only to halt the directive as a result of job losses. (Source:Wiki)
Recipe source: Here
Ingredients: (yield 2 - 3 servings)
1/2 cup heaped Basmati rice
2 tsp. ghee / oil
2 tbsp. each raisins and cashews
2 cloves
2 green cardamoms
1 bay leaf
1 inch cinnamon piece
Few saffron strands
1.5 tsp. salt
Ingredients for paneer balls:
1/2 cup paneer, grated 
1 tbsp. cashew powder
1/2 tbsp. corn starch
Salt to taste
Oil for frying
Silver warq sheet if using

Directions:
* Rinse and soak rice in water for about 30 minutes. Drain and keep aside. 
* Add grated paneer, cashew powder, corn starch and salt to a mixing bowl. Knead into a smooth dough and roll into small balls. Make sure to make them tiny if using silver foil to cover them.
* Heat sufficient oil in a kadai or a small frying pan. Deep fry the paneer balls on medium heat, until light golden brown. Remove them with a slotted spoon and drain them on absorbent paper towel lined plate. Let the fried balls cool and cover them with silver warq, if using.
* Heat ghee in a pan until it is melted and add raisins and cashews. Toast them until cashews turn light golden brown and raisins plump up. Remove them with a slotted spoon and keep them aside. To the same ghee, add cloves, bay leaf, cardamom and cinnamon. Saute the spices until fragrant.
* Next add rice and stir gently for about a minute. Add about a cup of water, saffron and salt. Bring the mixture to a boil and reduce the heat. Cover and cook until rice is done, about 15 - 20 minutes.
Or 
Pressure cook for 2 whistles adding only 3/4 cup of  water.
* Garnish the pulao with fried paneer balls, raisins and cashews.
* Serve with a spicy gravy curry.

So far in my Biryani / Pulao / Khichdi series,
A for Ambur Biryani
B for Basanti Pulao / Misthi Pulao
C for Corn - Fenugreek Greens Pulao
D for Donne Biryani
E for Ek Toap na Dal Bhaat
F for Fada ni Khichdi
G for Gutti Vankaya Biryani
H for Hyderabadi Vegetable Dum Biryani
I for Iyengar Puliyogare
J for Jaipuri Mewa Pulao
K for Kashmiri Pulao

BMLogo
Check out the Blogging Marathon page for the other Blogging Marathoners doing BM#99.


Comments

Thursday, April 11, 2019

A - Z Indian Biryani / Pulao / Khichdi Series ~ J for Jaipuri Mewa Pulao

When I first read about this easy breezy mewa pulao, my mind at first didn't register the word 'mewa' though I know what it means. I thought the cooked milk solids, called mawa is used to prepare this pulao and was intrigued. I checked the recipe twice only to see the mawa missing from it. Mewa means nuts/dry fruits and this pulao comes from the state of royals, Rajasthan as the name of the recipe indicates. I read somewhere that the dish is one of the specialty pulaos from the kitchens of Maharanas who preferred nutritious food, them being the warrior class. Hence the richness of the dessert. 

This mewa pulao / nuts pulao is not a standard pulao recipe or not even a basic version pulao like the sweetish Bengali mishti pulao that can be served with a spicy gravy curry. An article in "Times of India' mentioned to serve it with raita, pickle or curry but it sounds utterly ridiculous. It is a simple dessert loaded with nuts, that tasted super delicious to my palate, one that is biased towards any dessert. I made a small portion and ate it all by myself in one sitting. It was that good.

Rice, milk and ghee are leisurely cooked together in a pot until the rice is done. Sugar, nuts and the rest of the ingredients are added next and cooked for another 10 to 15 minutes. I didn't follow the traditional method of cooking it in a pot but pressure cooked it which was way simple and quick to cook this dessert. If saffron is missing, add a drop or two of yellow food color for visual appeal. It is going to be yummy even if you skip it. Blanch and peel the almonds if you are patient enough but I wasn't.😉 Try this simple and very inviting sweet version pulao if you have a sweet tooth. Trust me, you will not be disappointed.

Ingredients:
1/2 cup Basmati rice
1 cup milk
1/2 cup sugar (I substituted with stevia as needed.)
2 to 4 tbsp. ghee
1/8 tsp. ground nutmeg / ground cardamom (one cardamom pod)
2 tsp. chironji / charoli seeds (sara pappu)
1 tbsp. each - Almonds, cashews, raisins and pistachios
2 pinches of saffron strands

Directions:
* Rinse and soak rice in water for about 15 minutes and drain.
* Soak saffron strands in a tbsp. of warm milk or water.
* Pressure cook rice, and milk together for 2 whistles. (I made a small quantity and so added contents to a small container and put it in the cooker.)
* Heat ghee in a pan (or directly to the pressure cooker if the rice was cooked in it) and add the cooked rice, sugar, nuts, raisins, saffron and cardamom. Mix them well once, cover and let the mixture cook on low flame for about 10 minutes. By the time, the sugar melts and incorporates into the rice mixture.
* Turn off the stove and serve it warm.

So far in my Biryani / Pulao / Khichdi series,
A for Ambur Biryani
B for Basanti Pulao / Misthi Pulao
C for Corn - Fenugreek Greens Pulao
D for Donne Biryani
E for Ek Toap na Dal Bhaat
F for Fada ni Khichdi
G for Gutti Vankaya Biryani
H for Hyderabadi Vegetable Dum Biryani
I for Iyengar Puliyogare

BMLogo
Check out the Blogging Marathon page for the other Blogging Marathoners doing BM#99.

Thursday, January 17, 2019

Dahi Papad ki Subzi

The arid climate and scarcity of fresh vegetables  have greatly dictated traditional Rajasthani cooking. Various kinds of sun-dried spicy lentil wafers and sun dried vegetables replaced fresh produce  whenever necessary owing to the harsh climate of the region. Food that can last for several days and food that does not need heating were preferred. In spite of all that, the state's cuisine is one of the  finest ones in the Indian culinary world and the signature dishes of the state are enjoyed through out the nation. 

Today's dahi papad ki subzi aka a side dish prepared with lentil wafers (papad) and yogurt (dahi) is a fine example of the region's culinary creativity. This is a simple dish prepared without any vegetables, yet a delicious one with a fine balance of flavors coming from simple spices used. It sounds similar to a kadhi from the other regions of India but the addition of papad and boondi elevate the dish. There are variations to this recipe and some include onion and tomato as well. Adding boondi is optional. I saw a Sanjeev Kapoor's version where boondi was included and so, I added them to the subzi. The version I am posting today is a very easy and quick one to prepare and do not have onion or tomato. It can be prepared in under 10 minutes. 
Ingredients:
1 cup yogurt
1 tbsp. chickpea flour (besan)
About 1 cup water
1 tbsp. oil
1/2 tsp. cumin seeds
1 tsp. finely chopped / grated ginger
A pinch of asafoetida
2 red chillies, broken into small bits
1/8 tsp. turmeric powder
1/2 tsp. red chili powder
1/2 tsp. coriander powder
Salt to taste
1/2 tsp. garam masala
2 - 3 medium sized papads / Indian lentil wafers
1/4 cup plain boondi (fried, chickpea flour drops) - optional
Minced cilantro to garnish

Directions:
* Whisk yogurt and chickpea flour together to an even consistency. 
* Toast papad in a microwave or on a tawa and break them into about 2 inch sized pieces.
* Heat oil in a non stick pan and add cumin seeds. When they start to brown, add ginger and saute for a minute. Next add red chillies and asafoetida and saute for about 20 seconds. 
* Add the yogurt mixture, water, turmeric powder, red chili powder, coriander powder and salt. Stir well to combine. Taste and adjust the seasonings if needed. Bring the mixture to a boil, stirring continuously. Lower the heat and let it simmer for a couple of minutes. If the mixture appears too thick, add extra water. Add broken papad pieces and boondi to the yogurt mixture and cook for another two minutes. Add garam masala, stir well and turn off the stove.
* Garnish with cilantro and serve warm.

This goes to Blogging Marathon under 'Easy Dinner Recipes' Theme.
bmlogo

Comments

Wednesday, September 21, 2016

A - Z Rice Dishes ~ R for Ram Pulao / Rajasthani Gatta Pulao / Gatte ka Pulao


Here is one more flavorful pulao option for vegetarians from Rajasthan, the land of kings. The focal point of this tasty pulao are the delicious gatte, the spicy, fried dumplings made with chickpea flour. Gatte here replace the vegetables that are commonly used in a vegetarian pulao and add a very inviting, crunchy texture to the dish. This dish is a brilliant example which shows the resourcefulness of the local people, where fresh vegetables are not available through out the year because of the arid climate. I didn't follow a particular recipe for it and the inspiration came from many online sources. I chose to leave out onion and garlic from the recipe, as some sources did making this a great option for those who avoid garlic and onion from their diet. In spite of lack of those this makes a great addition to anyone's rice repertoire since it is loaded with flavors and is real yummy for spicy food lovers.
Ingredients for gattes:
1/2 cup chickpea flour / besan
1/2 tsp. toasted and coarsely crushed coriander seeds
Salt to taste
1/4 tsp. red chili powder
2 pinches asafoetida powder
2 pinches turmeric powder
1 tsp. oil / ghee
2 to 2.5 tbsp. yogurt
Oil to fry

Ingredients for pulao:
1/2 cup Basmati rice
1 tbsp. ghee
1 tsp. cumin seeds
1 inch piece cinnamon
2 cloves
1 tbsp. each - cashews and raisins
2 tbsp. fresh or frozen peas (optional)
Salt to taste
1/ 16 tsp. Turmeric powder
1/2 tsp. garam masala or chili powder
2 tbsp. minced cilantro
 
Method:
* Wash rice in two exchanges of water and drain. Pressure cook the rice adding 1&1/2 cups water.
* Add all the dry ingredients under the list 'for gatte' in a bowl and mix. Next add oil and mix again. Add yogurt as needed in small increments and make a rollable dough. Wash and grease your palms. Divide the dough into 4 portions and shape them into logs of uniform size.
 
* Bring a wide pot of water to boil. Drop the dough logs into the water. The water quantity must be enough for the logs to be fully submerged. Cook for 10 15 minutes and drain the water. 
 
* Let the dough logs cool and then cut them into an inch pieces.
* Fry them until golden brown and keep them aside.
* Heat ghee in a pan and add cumin seeds, cinnamon, clove, raisins and cashews. When cashews turn golden brown, add peas, fried gatte, salt, garam masala and turmeric powder. Stir for few seconds and add rice.  Gently combine the rice to mix well. Garnish with chopped cilantro and serve immediately. If left to sit longer, the gatte will loose their crunchiness.
Recipes so far in A - Z Rice Dishes,  
A for Achaari Chole Pulao
B for Bhuna Khichuri
C for Chintapandu Pulihora
D for Dindigul Thalapakatti Veg Biryani
E for Ellorai / Ellotharai  
F for Fodnicha Bhaat 
G for Gongura Pulihora 
H for Hare Moong ki Chaaswaali Khichdi 
I for Iyengar Style Kadambam 
J for Jodhpuri Vegetable Pulao 
K for Kaju - Karivepaku Annam 
L for Lilva Khichdi
M for Mamidikaaya - Kobbari Pulihora 
N for Narali Bhaat
O for Oliya 
P for Peas Pulao 
Q for Qabooli Biryani 

Check out the Blogging Marathon page for the other Blogging Marathoners doing BM# 68.
An InLinkz Link-up