HOME        |        ABOUT        |        COPYRIGHT        |        CONTACT        |         RECIPE INDEX        |         INDIAN THAALIS        |         MILLET RECIPES        |        EVENTS' ROUNDUP        

Showing posts with label Andhra Recipes. Show all posts

Monday, April 8, 2019

G for Gutti Vankaya Biryani (Stuffed Eggplant Biryani)

The biryanis which originated in the royal kitchens of India under Muslim regime were predominantly meat based. The vegetarian versions of the recent era are substitutes to these traditional versions to suit the palates of vegetarians. There have been recently regional twists to these meatless meals to come up with an umpteen number of vegetarian and vegan options in the pulao / biryani section. Gutti vankaya biryani is one such dish I came across during my last summer visit to India. There was a birthday in the family and a nephew of ours, who happens to be a great fan of biryanis ordered a couple of them online. They were gutti vankaya biryani and pandumirapakaya pachadi biryani, which were obviously and heavily inspired by Andhra cuisine, though we were in Bangalore.

Pandu miarapakaya pachadi is a classic Andhra pickle made with red, ripe chillies while 'gutti vankaya koora' is a stuffed brinjal preparation from the region that is quite popular. I cannot stand the smell of garlic and so didn't taste either of them. Even adults who love garlic and are used to the heat of Andhra cuisine started to sniffle and started to complain about the overly spicy and garlicky rice. However I thought they were two great adaptations with local flare. If you take out Hyderabad from the region, I don't think there are any traditional biryanis left that is distinctly Andhra flavored. A gutti vankaya biryani is one of those new era biryanis which can be easily associated with the state just by it's name.

It also makes sense to come up with an eggplant or gutti vankaya biryani. Eggplant has an elevated status among the vegetables in Andhra cuisine and most of the locals love it. My husband too happens to be a fan and I had decided to recreate that biryani for him when I came back home. This marathon proved to be a perfect opportunity to try it. Honestly speaking I was not well versed with pulao - biryani preparations before this marathon. I have cooked around 20 dishes in the past two months to the point of vexation and in turn kinda gained expertise now in the preparation. This was one of the dishes that I cooked early on and so opted for a simple pressure cooker preparation like a pulao. If it had been now, I would have prepared in an authentic biryani style by preparing a marinated base and cooking in a dum style. That is for another time, I guess.

The word 'Gutti' literally means a bouquet or a bunch in Telugu, the language spoken in Andhra and Telangana states. 'Gu' here is not pronounced as in the word 'gut' but as in 'guru'. And 'tti' as the 'th' sound in the word 'thin'.  Eggplant / brinjal is called vankaaya. The 'vanka' in the word 'vankaaya' is pronounced as 'lanka' as in Srilanka. The eggplants are stuffed with a spice - legume mixture here instead of being chopped and sauteed, which is a common feature in vegetable biryani preparation. I added the spice mixture in the gravy as well along with biryani masala to bring out the flavor more. Don't be intimidated by the long list of ingredients. Most of them go into tempering. The final feedback I got from my husband was good. If one is an eggplant lover and looking for a quick and easy biryani version to prepare, give it a try. The dish is spicy enough that it can be served with plain yogurt / a simple raita.

Ingredients:
1 cup Basmati rice
1 - 2 tbsp. ghee and/or oil
1 tsp. shahjeera / jeera (caraway / cumin seeds)
3 cardamom pods
3 cloves
2 small bay leaves
2 star anise
2 one inch pieces of cinnamon / casia
1 or 2 green chilies, finely chopped (depending upon the spiciness)
1 cup thinly sliced onions
1 inch piece of finely chopped ginger
1 tsp. garlic paste (I didn't use any.)
A handful of cilantro leaves
Roughly a handful of mint leaves
1 big tomato, finely chopped
1 tsp. biryani masala / garam masala
1/4 cup yogurt
1 and 1/4 tsp. salt or as needed
A little more than 1 and 1/2 cups water

Stuffing ingredients for 6 eggplants:
6 small eggplants
2 tbsp. peanuts
2 tbsp. chana dal / roasted, split chickpeas
1 tbsp. coriander seeds
1 tsp. sesame seeds
4 cloves
4 one inch pieces of cinnamon
4 - 6 red chillies depending upon their spiciness
Salt to taste
(The stuffing is for six eggplants. I had used the stuffing for 4 eggplants and used the rest in the onion and tomato gravy.  In case, if six eggplants are used and need more to use in the gravy, prepare more stuffing powder.)

Directions for the spice powder preparation and stuffing:
* Toast chana dal in a small skillet or wok on medium flame until it starts to lightly brown. Add coriander seeds, sesame seeds, cloves, cinnamon and red chillies and saute for a minute or two on low flame until everything is toasted. Take care not to burn them. Transfer the toasted contents to a plate and let them cool.
* Peanuts take longer to toast than the above ingredients and so toast them individually. Toast on low flame until black spots start to appear on the peanut skins and they don't appear raw when tasted. Cool and skin the peanuts by rubbing them between your palms. Let them cool. (Ready made toasted and skinned peanuts can be used instead.) 
* Add all the toasted ingredients and salt to a mixer / spice grinder and grind them fine. Add a tbsp. or two of water to the powder, make a thick paste and keep it aside.
* Wash and wipe the eggplants dry. Make crosswise slit on the eggplants, to the opposite side of the stem. (Make a plus mark cut, taking care not to quarter the eggplants.)
* Stuff the eggplants with the above spice mixture uniformly. If there is any leftover spice powder, use it in the gravy prepared.

Directions for biryani preparation:
1. Heat ghee in a small pressure cooker / pan and add carom or cumin seeds. When they start to brown, add cardamom, clove, cinnamon, bay leaf and star anise. Saute for few seconds, until the aroma of spices is noted. 
2. Add green chillies and onions and saute until golden brown. Next add ginger - garlic paste and saute until the raw smell leaves. Next add mint and cilantro and saute for a couple of minutes. Add tomatoes and cook until mush.

3. Add biryani masala, salt, any left over spice mixture from the above stuffing step, and yogurt and cook until almost the yogurt evaporates.
4. Wash the rice in two changes of water and drain. Add the drained rice and water. Mix gently to combine. Arrange the eggplants over the top, close the lid and pressure cook for three whistles. Let the valve pressure release on it's own. Wait for few minutes and then open the lid. Gently fluff and serve with yogurt.

Notes:
1. If the rice was soaked for about 20 - 30 minutes prior to cooking, pressure cook for two whistles.
2. If cooking in a pan, don't add the stuffed eggplants and cook until the rice is half cooked. Then add the eggplants, cover the pan tightly and continue to cook on low flame until rice is completely cooked. (It may take about 20 minutes to cook this way.)

So far in my Biryani / Pulao / Khichdi series,
A for Ambur Biryani
B for Basanti Pulao / Misthi Pulao
C for Corn - Fenugreek Greens Pulao
D for Donne Biryani
E for Ek Toap na Dal Bhaat
F for Fada ni Khichdi

BMLogo
Check out the Blogging Marathon page for the other Blogging Marathoners doing BM#99.

Thursday, September 8, 2016

A - Z Rice Dishes ~ G for Gongura Pulihora / Spicy & Tangy Sorrel Rice


There are traditional recipes that are carried through generations in families and there are spin-offs with little twists given to the older ones by creative minds. Today's dish gongura pulihora falls in the latter category. Chintapandu pulihora (tamarind rice), nimmakaaya pulihora (lemon rice), mamidi kaaya pulihora (green mango rice) and dabbakaaya pulihora (I guess the English name for the citrus fruit used in the preparation is pomelo) used to be the most commonly prepared pulihoras in Andhra. I have been noticing a wide variety of pulihoras these days on TV cook shows, that were unheard of until a few years back. That's how I ended up hearing about gongura pulihora a while ago though I didn't give a second thought about it until later when it started doing the rounds on several blogs. 

I happened to see this particular gongura pulihora recipe on Pavani's blog a few years ago and have tried it several times over the period though I did not get to post it until now. The pulihora is really delicious and makes a quick alternative to the tamarind rice. My recipe is on the spicier side and Pavani's would be perfect for those who do not prefer very spicy rice.
Ingredients to grind:
2 cups chopped gongura / sorrel leaves
2 tbsp. tamarind puree (I added 3 tbsp.)
3 red chillies

Ingredients for pulihora:
3.5 cups cooked rice (preferably sona masuri style medium grained rice)
2 to 3 tbsp. oil
2 tbsp. peanuts
1 tsp. split chick peas / chana dal
1 tsp. black gram / urad dal
1 tsp. mustard seeds
2 red chilies
1 green chili
Few curry leaves
A few pinches of asafoetida powder
1/8 tsp. turmeric powder
Salt to taste

Method: 
* Cook rice such that each granule stands apart. Don't cook the rice mushy. Spread it on a wide plate.
* Grind the ingredients under 'to grind' smoothly, adding few tsp. of water if needed.
 
* Heat oil in a wide pan or a kadai. Add peanuts, dals and mustard seeds. Fry until dals turn light brownish and add the chillies, asafoetida, turmeric and curry leaves. 
 
 * Now add the ground paste and salt to the pan and stir.
 
* Cook the mixture on low flame until the raw smell of gongura leaves, about 4 -5 minutes. 
 
* Turn off the stove and transfer this mixture to the rice plate or transfer the rice to the pan. Mix gently to combine. 

Recipes so far in A - Z Rice Dishes,
A for Achaari Chole Pulao
B for Bhuna Khichuri
C for Chintapandu Pulihora
D for Dindigul Thalapakatti Veg Biryani
E for Ellorai / Ellotharai  
F for Fodnicha Bhaat


Check out the Blogging Marathon page for the other Blogging Marathoners doing BM# 68.


Monday, April 25, 2016

A - Z Andhra Recipes ~ U for Usirikaaya Pulihora

 
Time sure flies by. We are already into the final week of this month long blogging marathon. I am on alphabet 'U' in my A to Z series of Andhra vegetarian recipes, going in an alphabetical order. 

The first ingredient that came to my mind when planning for 'U' dish has been usirikaaya which is 'gooseberry' in English, 'bettada nellikaayi' in Kannada and 'nellikayi' in Tamil. I wanted to post about usiri aavakaaya, a spicy Andhra gooseberry pickle in mustard and chili powder base. Meanwhile, my husband suggested another regional recipe. I had both the stuff at home and so my pictures were taken and ready. And I thought this was going to be one of the easy alphabets which involved no cooking from my side until I called my mother for the recipes and she burst my bubble of excitement. I had called her to see whether she would give me the correct quantities of ingredients that go into the dishes and she used the word 'andaajuga' to my annoyance which is like saying a novice cook to use the ingredients as much as needed. She never measures her ingredients while cooking and so it was hard for her to give me the correct quantities for my blog sake. And so I had to strike them off from my list.

Coincidentally, I happened to see usirikaaya pulihora on a Telugu T.V. show, a couple of months back. I had seen the dish earlier too on shows and over online but gave real attention to the recipe this time and noted it down. I finalized it for my today's post as I hadn't picked any of the regular rice fare for this marathon. Usually a rice dish like pulihora, a spicy and tangy dish prepared sans onion and garlic would be the main course of a festive meal in Andhra brahmin households. It may be chintapandu pulihora (tamarind rice), lemon rice (nimmakaya pulihora), mamidikaya pulihora (green mango rice) and so on.

This usirikaaya pulihora aka gooseberry rice may be not a traditional dish but definitely a tasty one. And healthy one too considering that gooseberry is rich in vitamin C and is good for one's eyes and hair. This rice is a flavorful, quick meal idea for any time or even to pack for lunch boxes. I used frozen gooseberries since I don't have access to fresh variety locally. I delegated the cleaning job of gooseberries to my husband who loves rice dishes and so, this dish got done in no time. I pulsed the prepared berries in a food processor since grating frozen gooseberries is next to impossible. If using, fresh ones, the gooseberries can be grated and refrigerated in advance to make it quicker in the morning rush hours. We loved the dish immensely and I recommend it to anyone who loves Indian variety rice dishes.
 
'U' ingredients from Pantry:
Uddipappu / Minapappu - Urad dal / Black gram
Ulavalu - Horse gram
Uppu - Salt
Uppu Mirapakaya - Sundried chillies

Produce:
Ullikaadalu - Green onion 
Ullipaaya - Onion
Urla gadda / Ulla gadda - Potato
Usiri kaaya - Amla / Gooseberry

Some 'U' dishes:
Uddi vadalu - Vada, Black gram fritterso
Ugadi Pachadi 
Uggani - Puffed rice upma
Ulava Charu - Horse gram rasam
Ulli garelu - Onion & black-gram fritters
Ulli pakodi - Onion pakoda
Ullikaram / Erra karam - Onion paste
Undrallu - Steamed semolina balls
Uppudu Pindi / Uppindi / Upma - Spicy semolina breakfast
Usiri Aavakaaya - Gooseberry Pickle in mustard base
Urumindi - A chutney is referred so in a traditional Rayalaseema kitchen

Ingredients: (Yield 6 servings)
5 cups cooked rice (I used sona masuri rice.)
1 cup grated / usirikaaya / amla / gooseberries
2 to 3 tbsp. oil
3 tbsp. peanuts
1 tbsp. split chickpeas / chana dal
1 tbsp. black gram / urad dal
1 tsp. mustard seeds
2 dried red chillies, broken into bits
2 green chillies or as needed (I used 2 long, spicy ones.)
12 to 15 curry leaves
1/4 tsp. turmeric powder
1/8 tsp. asafoetida powder or to taste
Salt to taste
Juice from a small lime / lemon (optional)

Method:
* If using fresh gooseberries, grate them and discard the seeds. If using frozen variety, wash them and leave aside for one hour in a colander. Get rid of the skin and seeds and chop them into bits. Dry them with a paper towel if needed and pulse them in a food processor until they are crumbly / resemble grated stuff.
* Heat oil in a wide pan and add peanuts, split chick peas, black gram, mustard seeds and red chillies in that order. When the dals turn reddish, add green chillies and stir. When they start to look blistered, add curry leaves, turmeric, asafoetida and salt. Finally add the gooseberry/ usirikaaya grating and saute on low flame until the raw smell is gone. Turn off the stove.
 
 * Next add the rice to the pan and mix well with a spatula to combine. Each grain of the rice should look separate and if there any lumps, break it with the back of the spatula and  mix. Taste and add lime / lemon juice if needed and mix well.
* Let the rice sit for 10 minutes before serving so that the flavors get incorporated into rice.

So far on my 'A - Z' Andhra Cuisine,
A for Alasanda Vada
B for Bellam Garelu
C for Chiyali
D for Dondakaaya Kaarapu Kaaya
E for Endu Kobbari Podi
F for Fine Biscuits 
G for Gongura - Mamidikaya Pappu
H for Halwa Holigalu
I for Idli Karam Podi
J for Janthikalu
K for Kobbari Koora

Check out the Blogging Marathon page for the other Blogging Marathoners doing BM# 63.
 
Comments

Thursday, April 21, 2016

A - Z Andhra Recipes ~ R for Ragi Sangati / Ragi Muddha

From palatial kitchens, we move towards the humble abodes of the working class for today's 'R' recipe. My choice of ingredient is ragi and the dish is 'Ragi Sangati' / 'Ragi Muddha' which is truly rustic and unpretentious. The word 'sangati' is also colloquially called 'sankati' though the correct written form would be 'sangati'.

Anhra pradesh is one of the Indian states (along with it's neighbors) where ragi is widely grown and consumed. Ragi is eaten in Rayalaseema area more compared to the coastal regions where it is not that popular. May be because of the abundance of  rice yield in the coastal areas which gives the state it's status of being the 'Rice bowl of India'. The other misconceived notion being that ragi is a poor man's crop though slowly it's regaining the popular status it deserves. If someones gives a bag of ragi to any one of my aunts who all are from the coastal areas, they wouldn't probably know what to do with it. My guess is mainly because brahmin households prefer rice over any grain and especially this sangati doesn't fall under their radar. 
  
I grew up in Bangalore area where ragi is cherished. There, a 'ragi muddhe', the ball of cooked mixture of finger millet flour is as mandatory as rice in the other southern states or rotis in northern parts of India. It is always served at the lunch and dinner tables, irrespective of economic class and especially in non-brahmin homes. I personally know many adult males who feel like they are deprived of a meal when a muddhe is not served. A muddhe served with bassaru / soppina saaru and they are set. Boards outside small eateries / restaurants announcing that 'a ragi muddhe lunch' served is norm in the state. I know I hopped over to the neighboring state while talking about Andhra but couldn't stop myself from pointing out Kannadigas love for ragi.
  
While Karnataka's ragi muddhe is prepared with the finger millet flour alone, Rayalaseema's version of sangati is a cooked mixture of rice and finger millet flour. Sangati is not something you fall in love with when you eat it for the first time. It is an acquired taste and honestly there is nothing special to write about. One dips a morsel of it in a spicy side dish which is usually a gravy kind and swallows it. If you try to chew and slowly savor it like any other foods, it gets stuck to the palate as it is gummy. On the sunny side, ragi is valuable as it is nutritious, healthy being rich in iron and calcium and keeps you fuller for long time. It is diabetic friendly and cheaper compared to the other grains like rice and wheat. Whereas it is another story in U.S. where ragi flour is expensive as it has to come from India. And if you haven't tried ragi before, there are more appealing dishes to try from here.

I am fond of ragi and eat in many forms but to be honest, not in the form of sangati. Why? It is because my mother never cooked it and I didn't grow up eating it. Her simple logic was no one in our families ever made ragi sangati and she finds it unappetizing, one of the common complaints among the non eaters. My sister however as a toddler picked up the habit of eating it, from the sneaky neighbors who fed her without my mother's knowledge. My paternal aunt who lived in the Rayalaseema area had learnt how to prepare it and during her visits, she would prepare some for my sister and father. My mother and I wouldn't touch the stuff then but now I can eat it in small quantities as I happen to prepare it now at least once or twice a month for my husband who loves it. I have been making it for years now that I have mastered the recipe at least while preparing in small quantities.
  
As I mentioned above, ragi sangati is prepared in Rayalaseema areas and it seems that my mother in law would prepare it occasionally on a weekend for the whole family, which by the way was a huge one. My husband has fond memories attached to rainy days when his mother would serve hot sangati along with some onion-eggplant sambhar. My grandmothers who had been her contemporaries would of course have been clueless if presented with ragi flour, I bet. I know I am digressing again but couldn't help thinking about them. And onto the topic again, a gravy kind side dish would be best suited to serve along with sangati, in my opinion. It makes eating sangati more easier. I follow my MIL here and usually make eggplant sambhar to go with sangati.

This is the traditional way of cooking sangati but if in a hurry, cooked rice can be used to save time but the water quantity has to be reduced accordingly. I have posted another version here which is rice free and a lot quicker one. The following proportions yield three small sized balls pictured above. It makes one full meal for an adult or two mini meals.

Ingredients: (2 big or 3 small sized balls)
3 & 1/4 cups water
1/4 cup rice (I use sona masuri.)
1/2 cup ragi flour / finger millet flour
Salt to taste
1 tsp. ghee or oil (optional)

Method:
* Rinse and soak rice in water for about 15 minutes and drain.
* Heat water in a pan and then add rice, salt and ghee / oil. Cover the pan with a lid and cook on low flame until rice is done (or appears soft). 
I prefer a non stick pan for mess-free preparation.
 
 * At this stage, dump the ragi flour onto the cooked rice and again cover the pan. Do not stir or mix the flour at this point.
* Cook for about 5 to 6 minutes. Then remove the lid and stir the ragi flour well with a wooden spoon, so that there are no lumps and the flour gets incorporated well into the rice mixture.
 
 (I prepare a small quantity of ragi sangati and usually a wooden spoon works fine for me. When prepared in large quantities, usually a wooden stick specially meant for the purpose is used.)
* Cover again and cook for about 20 minutes.
* Wet your hand with cold water and make balls. Drizzle with ghee and serve the ragi balls immediately with sambar or any of the side dishes preferred.

And 'R' ingredients in the Andhra kitchen.
Raati puvvu - Stone flower / dagad phool
Ragi - Finger Millet
Ragi pindi - Finger Millet flour
Rava - Semolina
Regi pandu - Jujube / Chana ber 

So far on my 'A - Z' Andhra Cuisine,
A for Alasanda Vada
B for Bellam Garelu
C for Chiyali
D for Dondakaaya Kaarapu Kaaya
E for Endu Kobbari Podi
F for Fine Biscuits 
G for Gongura - Mamidikaya Pappu
H for Halwa Holigalu
I for Idli Karam Podi
J for Janthikalu
K for Kobbari Koora

Check out the Blogging Marathon page for the other Blogging Marathoners doing BM# 63.
 
An InLinkz Link-up

Comments

Friday, April 15, 2016

A - Z Andhra Recipes ~ M for Matikkaaya Karam Koora

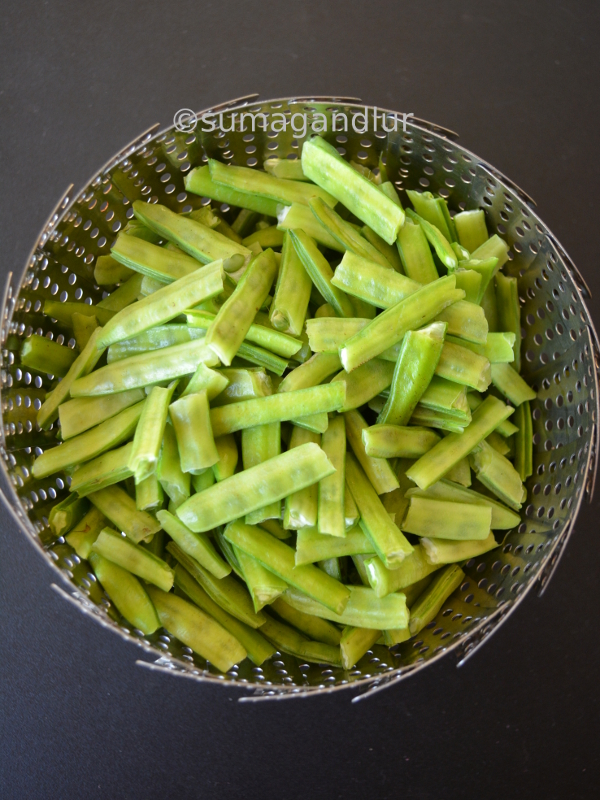
I am doing 'A - Z' recipes from Andhra cuisine this month, presenting dishes with regional names in an alphabetical order and it's time for the letter' M' today. The alphabet 'M' also stands for 'Matikkaaya' in Telugu and that is what the star of today's recipe is. There were some alphabets during this journey that needed no planning and this is one of those. I had decided early on that I would do this recipe without giving a second thought because this is a regular preparation in my husband's side of the family and not a well known version outside Rayalaseema. Cluster beans are called 'Matikkaaya' in the Rayalaseema area while they go by the name 'Goru Chikkudukaaya' in Andhra region. (While Andhra Pradesh is the name of the state, the coastal areas are also referred as Andhra region sometimes.) While pronouncing the word 'matikkaaya', the stress is on the 'k' sound and not on the 't' since 'matti' means dirt in Telugu. The word 'Karam' stands for the spiciness offered by the green chillies and 'Koora' means curry. And so 'Matikkaaya Karam Koora' literally means 'Spicy Cluster Beans Curry'.

The only Andhra version of cluster beans curries we knew about while growing up were the ones using coconut or the lentils. This karam koora using cluster beans is a Rayalaseema preparation and the recipe comes from my mother in law's kitchen. It was the only dish she used to prepare using cluster beans and is quite an unusual one. The beans are not chopped here but ground along with chillies, coconut and cilantro and then sauteed until done. The resulting koora is a spicy and delicious one.
'M' Ingredients from the Pantry:
Minugulu / Minumulu - Whole black gram
Minapappu - Skinned and Split black gram
Miriyalu - Peppercorn
Mogga - A spice / Maratha Moggu

Produce:
Maaredu - Bael fruit
Mamidi Kaaya - Green mango
Mamidi Pandu - Mango
Matikkayalu / Goru Chikkudu - Cluster Beans
Medi Pandu - Fig
Menthaku / Menthikoora - Fenugreek greens
Mokkajonna - Corn
Mokka Jonna Kankulu - Corn on the Cob
Molakalu - Sprouts
Mullangi - Radish
Munagaku - Drumstick plant leaves
Munagakaaya / Munakkaaya / Mulakkadalu - Drumsticks

Some 'M' dishes:
Maagaaya & Mukka Pachadi - Green Mango Pickles
Majjiga - Yogurt churned with small quantity of water / Buttermilk
Majjiga Pulusu - Spicy gravy prepared with sour buttermilk / Andhra style Kadhi
Manugupoolu & Murukulu - Spicy Snack / Chakli
Menthi majjiga - Spicy buttermilk
Menthula Pappu - Lentil preparation with fenugreek seeds (not the leaves)
Minapa Rotte / Minapattu - Breakfast dishes
Minapa Sunni - Sunnundalu, Urad dal laddus
Mirapakaya Bajji - Spicy snack
Miriyala Charu - Pepper rasam
Miriyala Kashayam - Home remedy / Herbal concoction to cure ailments
MLA Pesarattu - Pesarattu & Upma combo Breakfast
Mudda pappu - Plain cooked lentils with salt
(And also all curries, stews and dals prepared with the above vegetables.)
Ingredients for the Koora: (Yield 3 servings)
3 cups cluster beans' pieces
1/4 cup cilantro leaves
1/4 cup shredded fresh coconut
2 green chillies
1 tbsp. oil
1 tbsp. split chickpeas / chana dal
1 tsp. black gram / urad dal
1 tsp. mustard seeds
1/8 tsp. turmeric powder
2 pinches of asafoetida powder
Salt to taste

Method:
* Rinse and wash away any dirt present on the cluster beans.
Wipe them dry / transfer them to a colander so that beans can dry as much as possible.
* String the beans if needed and tear each bean into 2 or 3 pieces. (The step is optional but recommended to avoid the curry ending up with strings and getting struck between teeth while eating.)
* Add the cut beans, cilantro, coconut, and chillies into a food processor / blender and process just to a coarse mixture without adding any water. Avoid grinding the mixture to a paste.
* Heat oil, preferably in a non stick pan and add dals, mustard seeds in that order. When dals start turn reddish, add asafoetida, salt and turmeric and stir once with a spatula. Immediately add the ground bean mixture to the pan and mix well. Cover and cook on medium flame, turning intermittently, until the raw smell of the beans and chillies is gone.
* Turn off the stove and serve hot with rice or rotis.

So far on my 'A - Z' Andhra Cuisine,
A for Alasanda Vada
B for Bellam Garelu
C for Chiyali
D for Dondakaaya Kaarapu Kaaya
E for Endu Kobbari Podi
F for Fine Biscuits 
G for Gongura - Mamidikaya Pappu
H for Halwa Holigalu
I for Idli Karam Podi
J for Janthikalu
K for Kobbari Koora
L for Lauzu


Check out the Blogging Marathon page for the other Blogging Marathoners doing BM# 63.

Tuesday, November 24, 2015

Thapala Chekkalu / Sarva Pindi

Andhra's thapala chekklau are equivalent to Karnataka's version rice flour rottis and also go by the name sarva pindi in Telangana region. Thapala refers to 'thappela', the round bottomed vessels, mostly the brass ones once associated to traditional Indian kitchens. A thappela and not a griddle was the original choice to make these rice flour based flat breads and hence the name. We grew up eating rottis for breakfast on a regular basis and so I am quite familiar with the dish but what caught my attention when I saw this recipe on a cook show was the interesting add-ons to the basic version besides adding a healthy dose of chickpea flour. This version did not use onions or coconut but still was very delicious with peanuts adding a nice texture and flavor.

Ingredients:
1 cup rice flour
1/2 cup chickpea flour / besan
1 tsp ginger paste
1 tsp. green chilli paste / 2 chopped green chillies or chili powder as needed
Salt to taste
2 tbsp. finely minced curry leaves
1 tsp. cumin seeds
1 tbsp. sesame seeds
1/4 cup toasted and skinned peanuts, slightly crushed
1/4 cup soaked chana dal / split chickpeas *
2 tbsp. hot oil
Luke warm water as needed. (I added about 1/2 cup + 2 tbsp. water.)
Oil to make thapala chekkalu (I used canola oil.)
* Soak chana dal in enough water for 1 -2 hours or until they soften.

Method:
* Combine all the ingredients in a mixing bowl except water and the oil mentioned at the end, using your fingers. Add luke warm water as needed to form a firm dough.
* Divide the dough into four portions and roll each one into a ball. Work with one dough portion at a time and keep the rest covered.
* Pour a tsp. of oil in the center of a griddle / skillet and place the dough ball at the center of the griddle. Pat it using fingers till a thin, flat circle is formed. (It doesn't need to be super thin like tortillas.)  Thapala chekkalu can me made as big as the griddle size or smaller ones. Poke some holes randomly using index finger if you wish or just leave it out.
 
* Pour a tsp oil around the edges of the dough circle and over it. Cover with a lid and turn on the stove. Let it cook on a low - medium flame and flip it using a wide spatula when golden brown spots develop on the bottom side and the upper side doesn't look raw. It may take around 5 to 6 minutes. 
* Add half a tsp of oil around the edges again if needed. Cover it again and cook for about 3 to 4 minutes or until the other side turns light brown too. Turn off the stove and remove the cooked chekka
* Repeat the above steps with the remaining dough portions, making sure that the griddle is cool each time before it is used. Wash the griddle with cold water after each use to quicken the cooling process or use 2 griddles to cook simultaneously.

This goes to Blogging marathon #58 under the theme 'Bookmarked Dishes'. Check the link to see what other marathoners are cooking.

Comments

Sunday, August 3, 2014

Theepi Kudumulu

Kudumulu are a traditional neivedyam prepared in Andhra homes on Vinayaka Chavithi / Ganesha Chaturthi day. They are prepared in other Indian states as well and go by different regional names like kozhukattai / kadubu / modak. Now kudumulu are usually half moon shaped dumplings with an outer shell made of rice flour or wheat flour encasing a sweet or savory stuffing. The rice flour ones are usually steamed while the wheat flour based ones are deep fried. At least this is what I thought kudumulu were until one fine day when I got to see an old lady preparing different kind of kudumulu  on a TV show. 
It was past noon that day and I don't know what got into me. I prepared these for no reason. I was craving for a traditional dish, I guess. These kudumulu do not fall into those "ooh -aah" kind, scrumptious desserts' category which you reserve for your guests. These are those homely kind, simple and traditional stuff meant for festive occasions. They are easy and simple compared to the kudumulu I am traditionally used to. There is no need to prepare a separate stuffing and covering. All ingredients are just combined, shaped into patties and are steamed. They are subtly sweet, redolent with cardamom flavor and are not that overbearing on your taste-buds even if you consume a few at once.

Ingredients: (Yields around 8)
1/2 cup rice flour (I used store bought flour.)
1/2 cup powdered jaggery
2 - 3 tbsp. chana dal / split yellow chickpeas (Soaked in water for about 40 - 60 minutes and drained.)
1/4 tsp ground cardamom

 
Method:
* Combine all the ingredients in a bowl. Add water as needed to make a firm dough. Divide the mixture into 8 portions and shape into patties.
* Grease a flat bowl or a deep plate and place the patties.
* Steam them using a steamer / idli cooker / pressure cooker without the whistle on, for about 20 minutes or until done. When they are properly done, they won't be sticky to touch anymore. 
I know it is hard to notice the difference between the before and after pictures posted here but trust me you will know the difference when they are done. They won't appear raw and are not sticky anymore. 

These go to BM #43 under "Festival Special Theme". Check here to learn what other dishes are being cooked during this marathon.

Wednesday, June 25, 2014

Spinach Dal / Paalakoora Pappu

My kids love spinach and so I knew spinach is going to feature in one of my "Iron rich recipes" for this week's blogging marathon. However I didn't decide on the "how" part until the end and kept contemplating over salads, pastas and baked dishes. I figured it out finally that it is best to stick to a tried, tested and loved recipe at my home. And so I am here with this spinach dal which is healthy, delicious and wholesome. It uses spinach and lentils which are two good sources of iron for vegetarians. This Andhra style, spicy lentil dish happens to be a favorite of my family, especially my kids and gets cooked at least 3 to 4 times a month. Indian kids are used to these kind of comforting, home cooked dals on a daily basis and so, I thought it would be a suitable entry for the event. However adjust the spice levels according to the kids' preferences. 

Ingredients: (For 4 servings)
1/2 cup toor dal
1 bunch of spinach leaves (About 2 to 2.5 cups packed, chopped leaves)
1/4 tsp turmeric powder
1 to 2 tsp oil
1 tsp cumin seeds
1 tsp mustard seeds
Few curry leaves
A pinch of asafoetida powder
1 tsp salt
1/2 to 3/4 tsp chili powder
1&1/2 to 2 tbsp tamarind extract

Preparation:
* Discard any damaged spinach leaves and wash the rest that are going to be used. Finely chop them including the tender stalks. 
Feel free to use frozen, chopped spinach instead of fresh variety and you are not going to notice any difference. If using frozen spinach, go with about 5 oz for this recipe.
* By default, Indians usually own pressure cookers in their kitchens which make cooking beans a cinch. It takes about 10-15 minutes to cook lentils in a pressure cooker. If you don't own a pressure cooker, soak the lentilS in water for about a couple of hours to fasten the cooking. And then proceed with cooking lentils and spinach in a sauce pan on stove-top until the lentils turns mushy, adding water as needed in between.
Method:
* Wash lentils in two exchanges of water. Pressure cook together the lentils, spinach and turmeric adding about 1 cup water.
* When the valve pressure is gone, remove the lid of the cooker. Mash the cooked lentils well with the back of a ladle.
* Heat oil in a kadai or a pan. Add mustard and cumin seeds. When they start to crackle and pop, add asafoetida and curry leaves. Next add the cooked lentil-spinach mixture, tamarind, salt and chili powder. Mix well, taste and adjust the seasonings if needed.
* Bring the mixture to a boil and continue cooking for about 1-2 minutes and turn off the stove.
* Serve warm with rice or rotis. I had served it along with beetroot curry that happens to be another good source of iron.

Note:
* 1 or 2 green chillies can also be added along with the lentils. If green chillies are added, adjust the chili powder in the recipe accordingly. Or chilli powder can be completely excluded and substituted with green chillies.
* Finely chopped onion can also be added with the lentils.
* The tadka part can be done separately in another pan and can be added finally.

These go to the following events.
1. Blogging Marathon #41
2. Srivalli's "Kids' Delight", hosted this month by Kalyani with the theme "Iron rich recipes". 

Comments

Tuesday, June 24, 2014

Chimmiri Undalu / Sesame Seeds Laddu


Rustic and earthy - I think that best describes these laddus. They used to be traditionally prepared using a mortar and pestle though now one can use a food processor or a mixer to grind the mixture. The black sesame seeds used in the recipe adds an intense flavor to these laddus and that's what we use in making chimmiri in our households. However white sesame seeds can replace black ones. Whatever you use just make sure the sesame seeds have not gone rancid. Sesame seeds, dried coconut and jaggery used here are all rich in iron content and so a mandatorily fed item to girls in many Andhra households during their initial menstrual cycles. Generally it is advised to go on easy with the consumption part since they supposedly generate heat and bring on an early period in women.

There are no set rules when comes to the proportions of ingredients used. One can use coconut and jaggery according to one's taste preferences. Increase / decrease the quantities from the below recipe accordingly. The recipe is quite a simple one. Lightly toasted sesame seeds, jaggery and the coconut are coarsely ground and shaped into laddus.

Ingredients: (For about a dozen laddus)
1 cup black sesame seeds
3/4 to 1 cup powdered jaggery
1/2 cup grated dried coconut / copra

Method:
* Toast the seame seeds on low heat for 60 - 90 seconds, turn off the stove and let them cool. This step is optional as some prepare laddus without toasting sesame seeds as well.
* Run the ingredients through a food processor until they are coarsely blended and can be fisted together to shape them into laddus.
* Transfer the mixture to a wide plate and shape them into lemon sized balls.
* Store the laddus in an airtight container. They can be left over the counter if one is planning to consume them in the next few days. If not, they can be refrigerated.

Note: 
Peanuts are another good source of iron and can be added to the above mixture to make another variety of laddus. Check out the recipe here.

These go to the following events.
1. Blogging Marathon #41
2. Srivalli's "Kids' Delight", hosted this month by Kalyani with the theme "Iron rich recipes". 

Comments