HOME        |        ABOUT        |        COPYRIGHT        |        CONTACT        |         RECIPE INDEX        |         INDIAN THAALIS        |         MILLET RECIPES        |        EVENTS' ROUNDUP        

Showing posts with label Rotis. Show all posts

Sunday, October 11, 2020

Besani Koki

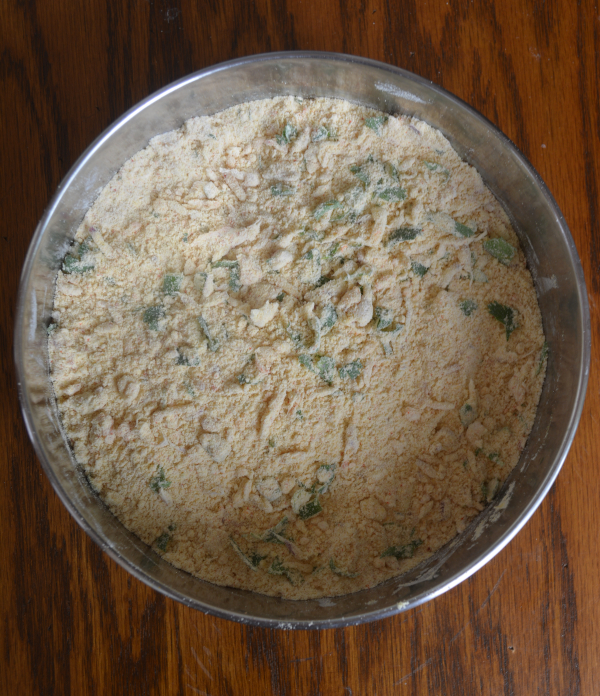
Kokis are traditional flatbreads from Sindhi cuisine and are made with wheat flour. Here are a couple of versions I have already posted, spicy koki and koki. This besani koki is another version, obviously prepared using besan / chickpea flour. These kokis are spicier and are made with a combination of chickpea flour and wheat flour. The addition of chickpea flour makes these kokis nutritious and protein loaded. 

I have tried a few times another version from Vaishali's blog where kokis are made with chickpea flour alone which are tastier as well and is a gluten free version. I usually pat them into thicker rotis, directly on the pan as I can not roll them. I find even rolling the kokis that I am a posting today a bit difficult. The dough tends to stick to the rolling board while rolling because of the chickpea flour addition. Rolling them between two greased sheets of parchment takes care of the problem. Besani kokis are made thicker than regular rotis and can be served with a preferred curry, dal pickle, yogurt or even plain if kokis are on a spicier side.
Ingredients: (Yield 6 kokis)

For the dough:
1 cup chickpea flour / besan
1 cup wheat flour
1/8 tsp. turmeric powder
Salt to taste 
1 tsp. carom seeds / ajwain
1 onion,  finely minced
2 green chilies, finely chopped
A handful of cilantro, minced
2 tbsp. melted ghee / oil
For toasting koki:
Ghee / Oil as needed

Directions:
* Add all the ingredients mentioned under 'dough' list to a bowl and mix well to combine. 
* Add water as needed to prepare a stiff dough. (I added about 6 tbsp. water.).

* Divide the dough into 6 portions and roll them into smooth balls. 
* Lightly grease a parchment paper and place it on the rolling board or any work surface that is being used. Place the dough ball at center and cover it with another parchment sheet. Roll the ball gently between the parchment sheets into a thick circle of about 4 - 5 inches diameter. 

* Remove the top parchment sheet and gently score it with a knife, not going all the way through or prick it with a fork all over.
* Heat a griddle or a pan on medium heat. Transfer the rolled circle onto the pan, lifting away the parchment sheet.
* Toast it brushing with little ghee / oil, until brown spots appear on both sides, flipping intermittently once or twice.
* Repeat the steps with the remaining dough balls and serve them warm with your choice of side dish.


Tuesday, September 22, 2020

Mandua ki Roti / Ragi Roti / Finger Millet Flatbreads

I grew up in Karnataka, a south Indian state where finger millet aka ragi is one of the staple crops. Many eat ragi muddhe / finger millet balls instead of rice on a daily basis in the area where I grew up. I therefore have affinity towards finger millet and I try to include the flour in our diet as much as possible. Don't be put off by it's color. It is a whole grain with high nutritional value and is a good source of carbohydrates. It is gluten free as well and good for diabetics. The millet is cultivated in various parts of India and go by the names ragi, nachni, kodo and mandua. It is a hardy crop which can grow even in high altitudes and withstand harsh weather conditions and has been traditionally grown even in the hilly / pahadi areas of Himalayas.
Various dishes are made with finger millet flour in Uttarakhand including rotis. The rotis here are made in two ways, either the dough is patted with fingers or just rolled as rotis. The first time I heard about these rotis was through an online video I saw a few years ago. I make the Karnataka version thicker rottis regularly in my home but the idea of rotis sounded interesting. The patted version obviously yields thicker rotis and are made with a dough of finger millet flour alone adding a bit of salt and water. The ones that are rolled to make it thinner like the regular wheat version rotis are made with a mixture of finger millet and wheat flours. Finger millet has no gluten and it hard to roll though I saw a Pahadi chef doing it in a video which did not seem easy even to him and they were smaller in size. If looking for a gluten free version of finger millet flatbread, check this recipe of ragi rotti. You can find more finger millet recipes on my blog, clicking here.
These finger millet aka mandua ki roti are regularly made in my home over the past few years. I have tried these rotis adding various proportions of wheat flour in the beginning and now I have settled with using both wheat and finger millet flours in equal proportions. That proportion works fine for me and the dough is very easy to roll. The other thing I follow is to allow the dough to rest for a couple of hours after it is made, for the gluten to develop. The resting time helps as I don't knead much while preparing the dough. I have noticed that I have a hard time rolling when using a dough that was not rested. Also generously flour the working surface / chapathi  board while rolling these rotis as it helps in rolling the rotis without sticking. Just pat away any excess flour before toasting the rotis.


These healthy and tasty rotis are on a rotation in our home and in fact, even the picky daughter doesn't complain. I have made them at least twice in the past month and I happened to take pictures both times. And that's why you get to see two sets of pictures, one with north Indian style side dishes where pickle / achaar, aloo jhol, a potato preparation from Uttarakhand, kadhi, raita and dal were served. The other one is where I had made them to include in our south Indian lunch where capsicum curry, sambhar and rice were made.

Ingredients: (Yield 10 rotis)
1 cup finger millet flour / mandua ka atta / ragi flour
1 cup wheat flour / gehu ka atta
Salt to taste
Oil to toast rotis

Directions:
* Combine both the flours and salt in a mixing bowl. Add water as needed and knead into a smooth, soft dough. Cover and rest the dough for a couple of hours.
I add almost close to a cup of water for this proportion. There is nothing to worry in case if extra flour or water was added. If the dough appears dry, add a little extra water and knead. If the dough appears too wet, fix it by adding a little flour.
* Divide the mixture into 10 portions and roll them into balls. Work with one ball at a time keeping the rest covered. If new to roti making, then some rotis can be rolled first and then they can be toasted. Otherwise rolling and toasting the rotis can be done simultaneously. 
* Heat a griddle or a shallow pan on medium flame.
Flatten a ball and dust it with flour.
Roll it into a thin circle of about 5 inches diameter

* Place the rolled out dough circle on the griddle. 
* Cook it until the surface darkens and then flip it.
* Let the other side cook as well until bubbles start to appear.
* Add a little oil around the edges and rub the back side of the spoon over the surface. Cook it for few seconds.
* Flip it and cook until the brown spots appear on both sides and remove the roti from the pan.
* Repeat the steps with the remaining dough. Serve hot with a side dish.

Monday, September 21, 2020

Indian Bread Series ~ Tikar Roti / Tikkar Roti

I had jotted down several recipes from Tarla Dalal's cookbooks at my Sister-in-law's home, more than a dozen years ago. These tikkar rotis were one of them and they have been on my 'to do' list for that long. I included them in my North Indian thaali that I cooked on a whim this month when I saw that they were easy like regular rotis. 
Tikar / Tikkar are from the desert state of Rajasthan and are unleavened breads. These quick rotis are made with a combination of maize flour (makai ka atta) and wheat flours along with onion and other spices which make them interesting. There is another version where tomatoes and green onions are included as well. If want to go with that pyaz tamatar tikkars, add 1/4 cup each of tomato and green onions to the flour mixture while preparing the dough. Garlic paste can also be included in the recipe if one prefers that flavor.
Apart from being healthy and filling rotis, these are quicker to make. One more plus point is that they don't need any side dish to go with. If the tikar rotis are kept on a spicy side then one needs only yogurt and some pickle if preferred. I however had aloo mutter, Lucknawi dal, Kashmiri dahi baingan and raita since I also happened to include phulkas and jeera rice.

Ingredients: (Yield -  about 10)
1 cup maize flour (makai ka atta)
1 cup wheat flour + extra for dusting
1 tsp. chili powder 
Salt to taste
2 tbsp. melted ghee
1/2 cup grated onion
1/2 tsp. grated ginger
1 green chili, finely chopped 
2 tbsp. cilantro / coriander leaves, finely minced
Ghee / oil to toast rotis

Directions:
* Combine flours, salt and chili powder in a mixing bowl. Add ghee, onion, ginger, chili and cilantro the bowl.
* Knead into a stiff dough adding enough water, cover the bowl and leave it aside for about 15 minutes.
* Divide the mixture into about 10 portions and roll them into balls. Work with one ball at a time and keep the rest covered. Roll  a portion into a 6 inch thin circle, dusting with flour if necessary.
* Heat a tawa / griddle and place one rolled circle over it. Cook using a little ghee until brown spots appear on both sides, flipping once or twice in between.
* Repeat the rolling and toasting steps with the remaining dough. If comfortable, rolling and toasting can be done simultaneously. If not, roll out few rotis first and then start toasting.
* Serve them warm with a spicy Indian style pickle and yogurt.


Sunday, February 24, 2019

Mixed Flour and Vegetable Thepla


Thepla, a staple bread from Gujarati kitchens is nutritious and can be served for any meal of the day. The bonus point is that one doesn't need to go through the hassle of preparing a side dish to go with them. A spicy pickle and yogurt on the side will do, the two staple ingredients of any Indian kitchen. Theplas remain softer for longer periods unlike the regular rotis and therefore are ideal to get packed in a lunch box, a picnic basket or as a travel food.

I gave a small twist to the traditional recipe adding a blend of flours and vegetables to make it more healthier and filling. You can customize the recipe by adding flours you have on hand and raw vegetables you think would work in theplas. Adjust the spice quantities if serving little ones and they can eat them directly with some ghee smeared over them, if preferred. You can find the classic methi thepla recipe here and oats thepla here.

Ingredients: (Make about 12 theplas)
1 and 1/4 cup wheat flour (gehu ka atta) + extra for dusting
2 tbsp. chickpea flour (besan)
2 tbsp. amaranth flour (rajgire ka atta)
2 tbsp. millet flour (bajre ka atta)
2 tbsp. sorghum flour (jowar ka atta)
1/8 tsp. ground turmeric
Salt to taste
1 inch piece ginger + 2 -3 green chillies (adjust the quantity as needed)
or
1 tsp. ginger - green chillie paste (or adjust as needed)
1/4 cup fresh / frozen green peas
1/2 cup roughly chopped fenugreek greens / methi
1 carrot, peeled and grated
1 tsp. white sesame seeds
1/3 cup yogurt (I used homemade fat-free yogurt.)
1 tsp. oil + extra to toast theplas (I used canola oil.)
Water as needed

Method:
1. Pulse the flours, salt, turmeric, ginger - green chillies (if not using paste) and peas in a food processor until ginger, chillies and peas are chopped into fine bits. Or just coarsely grind the peas alone.
2. Transfer the ingredients to a mixing bowl and add all the remaining ingredients except water. Form a firm dough adding water if needed, in small increments. (You may need a tbsp. or two of water.) Finally add a tsp. of oil and knead for few seconds.

3. The final dough should be soft and pliable, easy to roll into a ball. If it is sticky, add flour as needed and knead it to make it firm. In case it is too dry, add a little water and knead. Cover and set aside for about 30 minutes. Divide the dough into 10 - 12 balls or make lemon sized balls.

4. Work with one flour ball at a time, keeping the rest covered. Coat a ball with flour and press slightly to flatten it. Roll it into a thin circle of about 5 inches diameter, dusting the work surface with flour if needed. (Theplas can be rolled and toasted simultaneously. In case of novice cooks, a few theplas can be rolled before turning on the stove so that the process would not become overwhelming.)  

5. Heat a cast iron or non stick griddle over medium heat. Place the rolled thepla on the pan and cook until the surface appears bubbly. Flip it and add 1/2 tsp oil around the edges and run the backside of the oily spoon over the surface of the thepla just to coat it with oil. Press the edges down with a spatula to cook evenly. As soon as the brown spots appear on the bottom side, flip it once more, cook for 10 seconds or so and transfer it onto a plate.

6. Repeat the steps 4 and 5 until all the theplas are made. 
7. Serve them with some Indian style spicy pickle / achaar and yogurt. Lightly smear with ghee if serving kids.

This post is an entry for Blogging Marathon #97 and BM - 'Kids' Delight' event hosted by Renu this month with 'Travel Food' theme.
bmlogo

Comments

Tuesday, May 3, 2016

Spicy Koki


Another new day and new month of blogging marathon starts and I am here with wheat based dishes this week. I had earlier tried Vaishali's basic version of Koki, a flat bread from Sindhi community. Today's one is a spicy version I happened to watch on Sanjeev Kapoor's show a while ago. These koki make an interesting and flavorful variation to regular rotis. They can be served with a side dish of your choice and the combo together makes a great meal. These koki may look a little rustic because of the not so smooth edges, courtesy of the minced onions and spices in the dough. However the kokis were on a softer side and I enjoyed them.

Ingredients:(Yield 6)
1 cup wheat flour
1 tsp semolina
2 tsp. toasted chickpea flour /besan
1/2 tsp carom seeds / ajwain
2 tsp. kasuri methi / dried fenugreek green leaves
Salt to taste
1 tbsp. coriander seeds
1 tsp. cumin seeds
2 tbsp. finely minced onion
1 tbsp cilantro chopped
3 tbsp. melted ghee / oil
Ghee / Oil to make kokis

Method
* Toast cumin seeds and coriander seeds separately on low flame, until they start to turn a few shades darker. Remove the flame and slightly crush them using a mortar and pestle. There is no need powder them. 
* Lightly crush kasuri methi between your palms and keep it aside. 
* Add all the ingredients to a bowl and mix well to combine. Add water in slow increments and make a soft, pliable dough. (I added about 6 to 7 tbsp. water.).
* Rest the dough for about 10 minutes. (I rested it for about an hour or more.)
 
* Divide the dough into 6 portions and roll them into smooth balls. Work one portion at a time and roll out the ball into a circle of about 4 - 5 inches diameter. Dust the work surface with wheat flour if needed or grease the dough ball, to facilitate easy rolling.
* Toast the rolled out circle on a heated griddle / flat pan, on medium flame. Drizzle 1/2 tsp. oil around the edges and cook until brown spots appear on both sides, flipping intermittently once or twice.
* Repeat the steps with the remaining dough balls.
* Serve them with your choice of side dish.


This is going to be a part of Blogging marathon #64 under the theme 'Wheat based Dishes' and check here to find out what other marathoners are cooking today.

Comments

Sunday, May 31, 2015

Recipe Index ~ Indian Breakfast Dishes

Here is a list of Indian breakfast dishes that I have posted so far. This page is going to get updated whenever a new recipe is posted.

DOSAS / INDIAN PANCAKES: 
IDLI / DHOKLA / STEAMED DISHES: 
POHA DISHES / BEATEN RICEFLAKES: 
POORIS / PUFFED/ DEEP FRIED BREADS:
 
ROTIS / PARATHAS / THEPLAS / WRAPS:
ROTTI / THALIPEETH:
SANDWICHES / TOAST:
 NO COOK BREAKFASTS:
BREAKFAST / SUMMER DRINKS:
COFFEE / TEA:
 
Comments